You can go to our 'Price
Page' for our current cost for our aluminum and copper gutters
You can click on the pictures for a closer view |
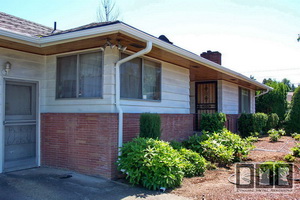
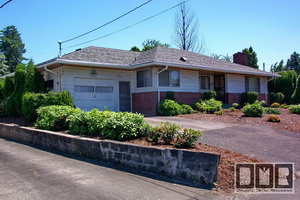
Here is one of our aluminum gutter conversion jobs
(3-05)
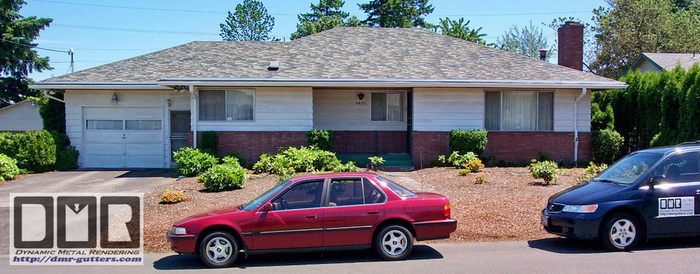
This house is at 4832 NE
100th in Portland Oregon owned by a nice man named Johnny Gamenara. To
help him minimize the cost, ten
years earlier we had covered over the back part of the old steel built-in
gutter that wraps around the whole house, that was leaking of course, to
mounted new external gutters on the outside of the fascia board. The gutters
and downspouts were done in white pre-painted aluminum to match the house
paint. The roof was red at that time, so we covered over the old built-in
gutter with a clay red pre-painted aluminum sheet metal 12" wide and about 64'
long seamless. There was no way for it to leak into the old steel
gutter when we left.
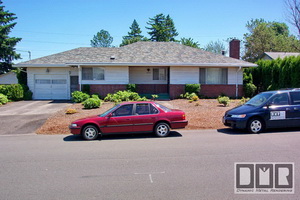
He later had the
roofing redone about 5 years later. The roofing contractor's workers tried to
nail the new shingles over the hollow aluminum sheet metal I had used to covered the old
gutter with, but of course that would not hold the nails much at all.
Instead of realizing this problem quickly, they had continued to finished
nailing the shingle over the whole back side. They
then removed those shingles and restarted above that sheet metal, just like
with the old roofing, leaving
the 100+ nail holes they punched through the metal cover I had installed.
They didn't bother to seal those holes up. It then continued to leak the rain water
into the old gutter that had caused the problems in the first place, causing
more dry rot in the fascia boards and cedar tongue and grove soffit. |
|
It took him another 5 years to be
able to afford to have us fix this and mount new gutters all around.
It cost just short of $4,k and took 2 full weeks for us to do this work for
him:
-
remove the aluminum gutters and
downspouts we had installed on the back side,
-
remove the red aluminum cover and old steel built-in gutter,
-
cut the
outer edge down 2" to 3", so we can have the rain sheet off at
the same angle as the roof,
-
remove
the old rotten plywood that was under the old steel gutters,
-
secure
the fascia boards with 3.5" deck screws,
-
mount
new 8" wide 3/4" plywood with deck screws covering the trimmed
fascia board,
-
cover
the new plywood with 30lb roofing felt,
-
cover
that with a custom 12" wide dark gray painted aluminum sheet metal bent
down on the lower edge for a drip edge and secured with stainless steel screws with a
sealing washer,
-
fabricate all new gutters with a custom wedge mounted on the back to
level off the gutter that will be mounted on the diagonal fascia boards,
-
hinged
screens for over the gutters,
-
No-clog
downspouts w/Leaf-catchers
-
and a
new custom copper chimney cap made and installed on his stainless steel
stove pipe behind the brick chimney.
|
|
Below are
photos of the project in the process:
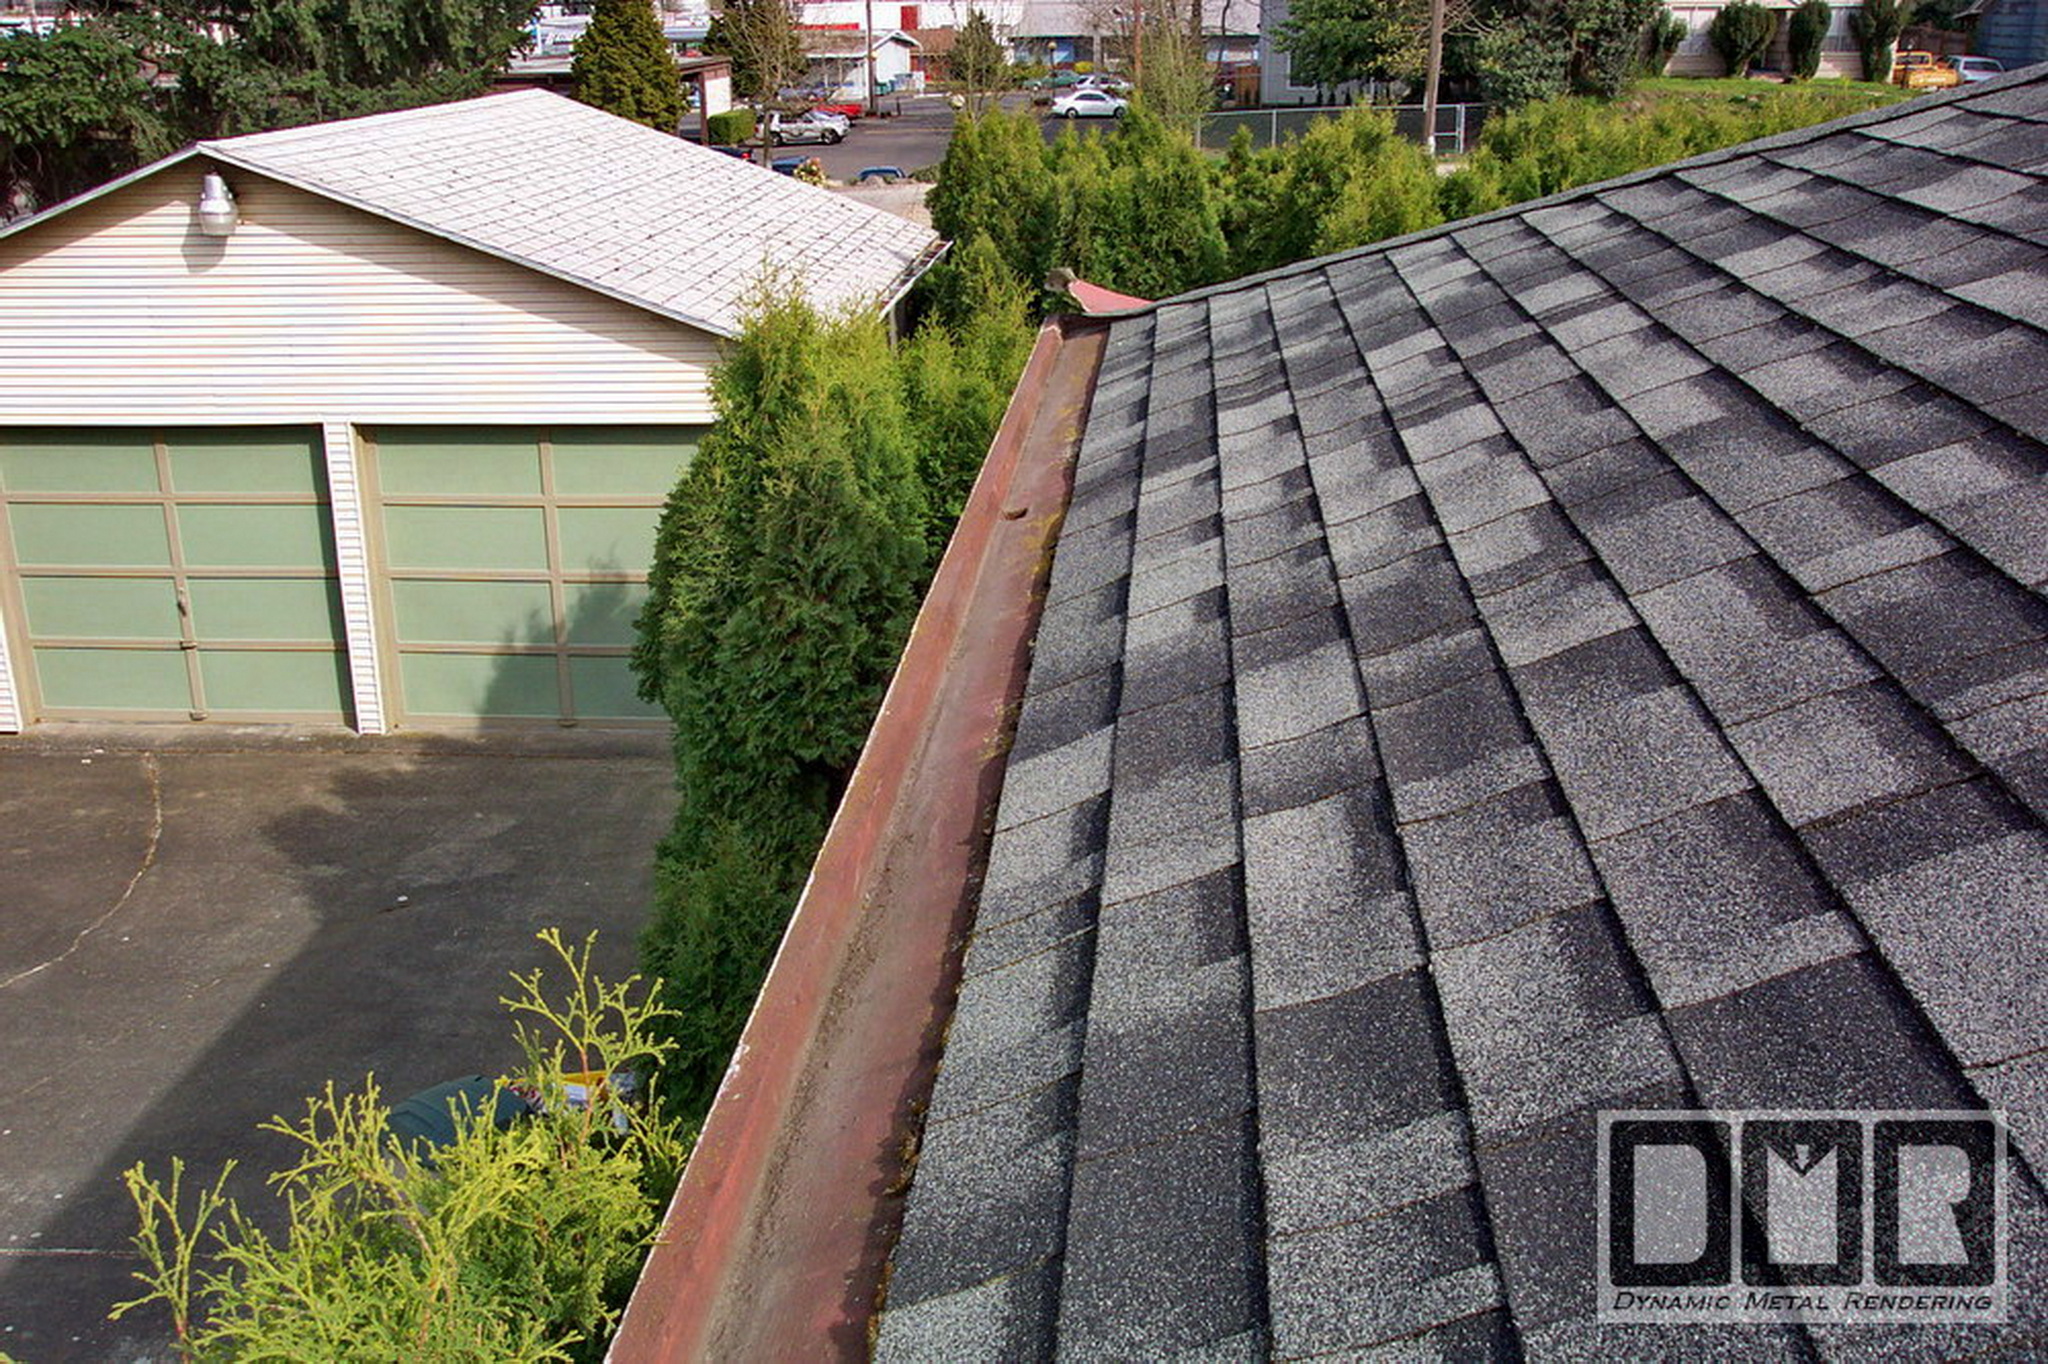
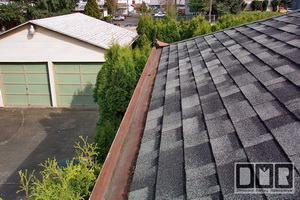
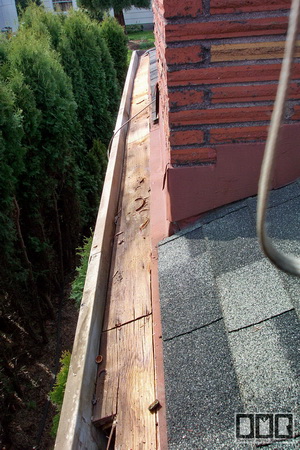
This shows the old steel built-in gutter in
red that was ruining his nice cedar tongue and groove soffit below the
gutter. Even
though the owner was good about keeping the gutters clean, and varnished the inside of the
gutters to keep them from rusting, there were seams every 10' that had separated
from the solder that held them together from expansion and contraction that
was different than the wood structure, causing leaks into the eaves. About
a fourth of the seams had split open already
 |
|
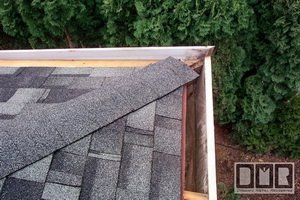
These pictures show the front corner over the
garage. I used this cordless sheer to remove the old steel gutter without
disturbing the roofing shingles. That would have damaged the shingles
to try to remove all the steel sheet-metal.
  |
|
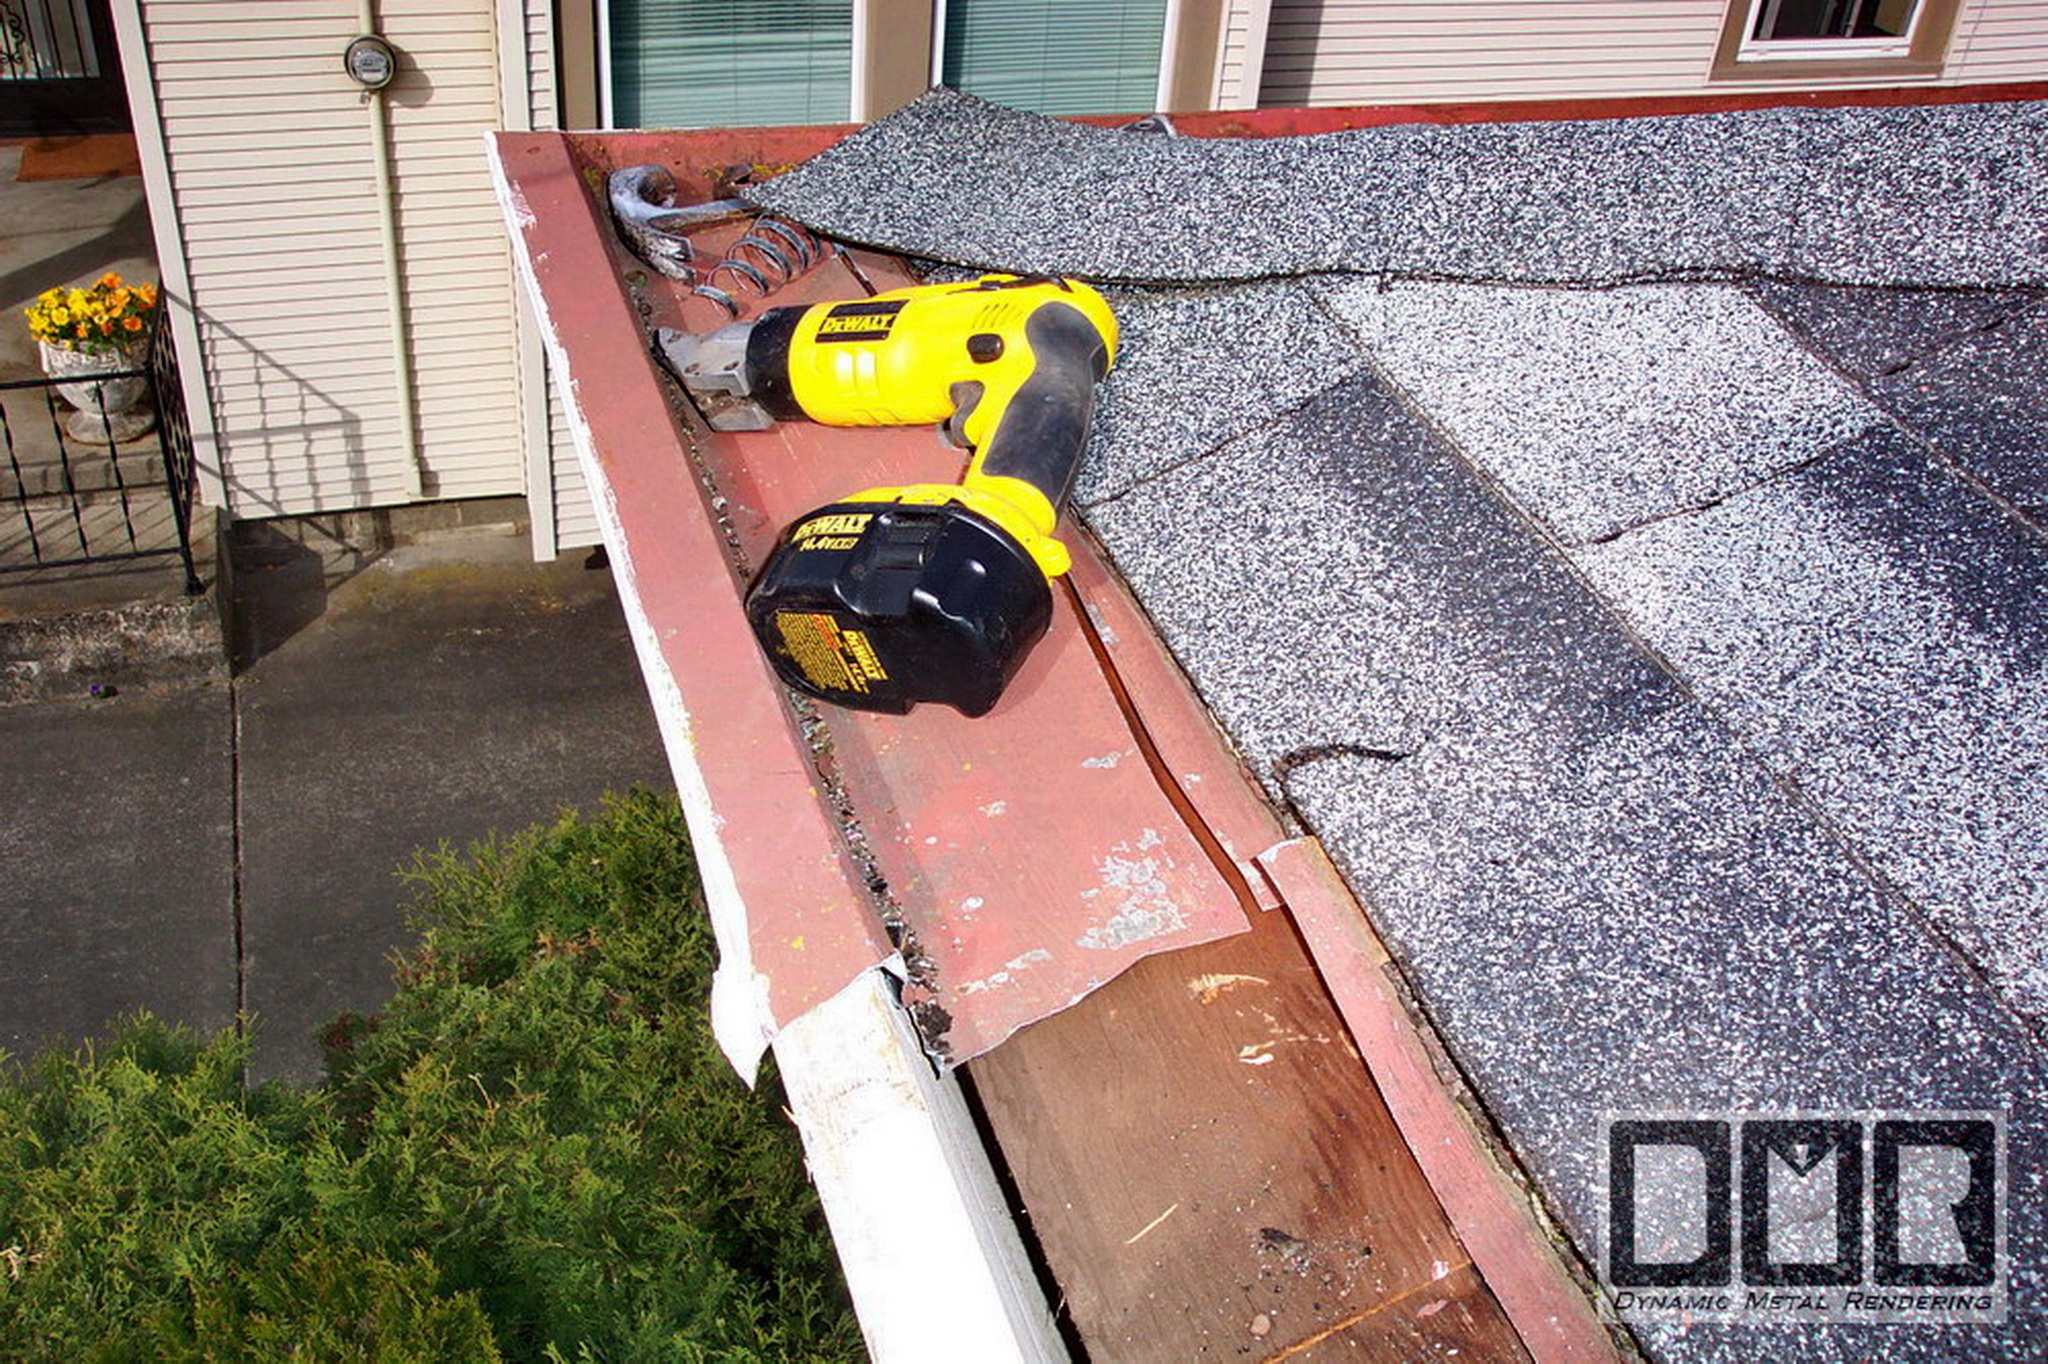
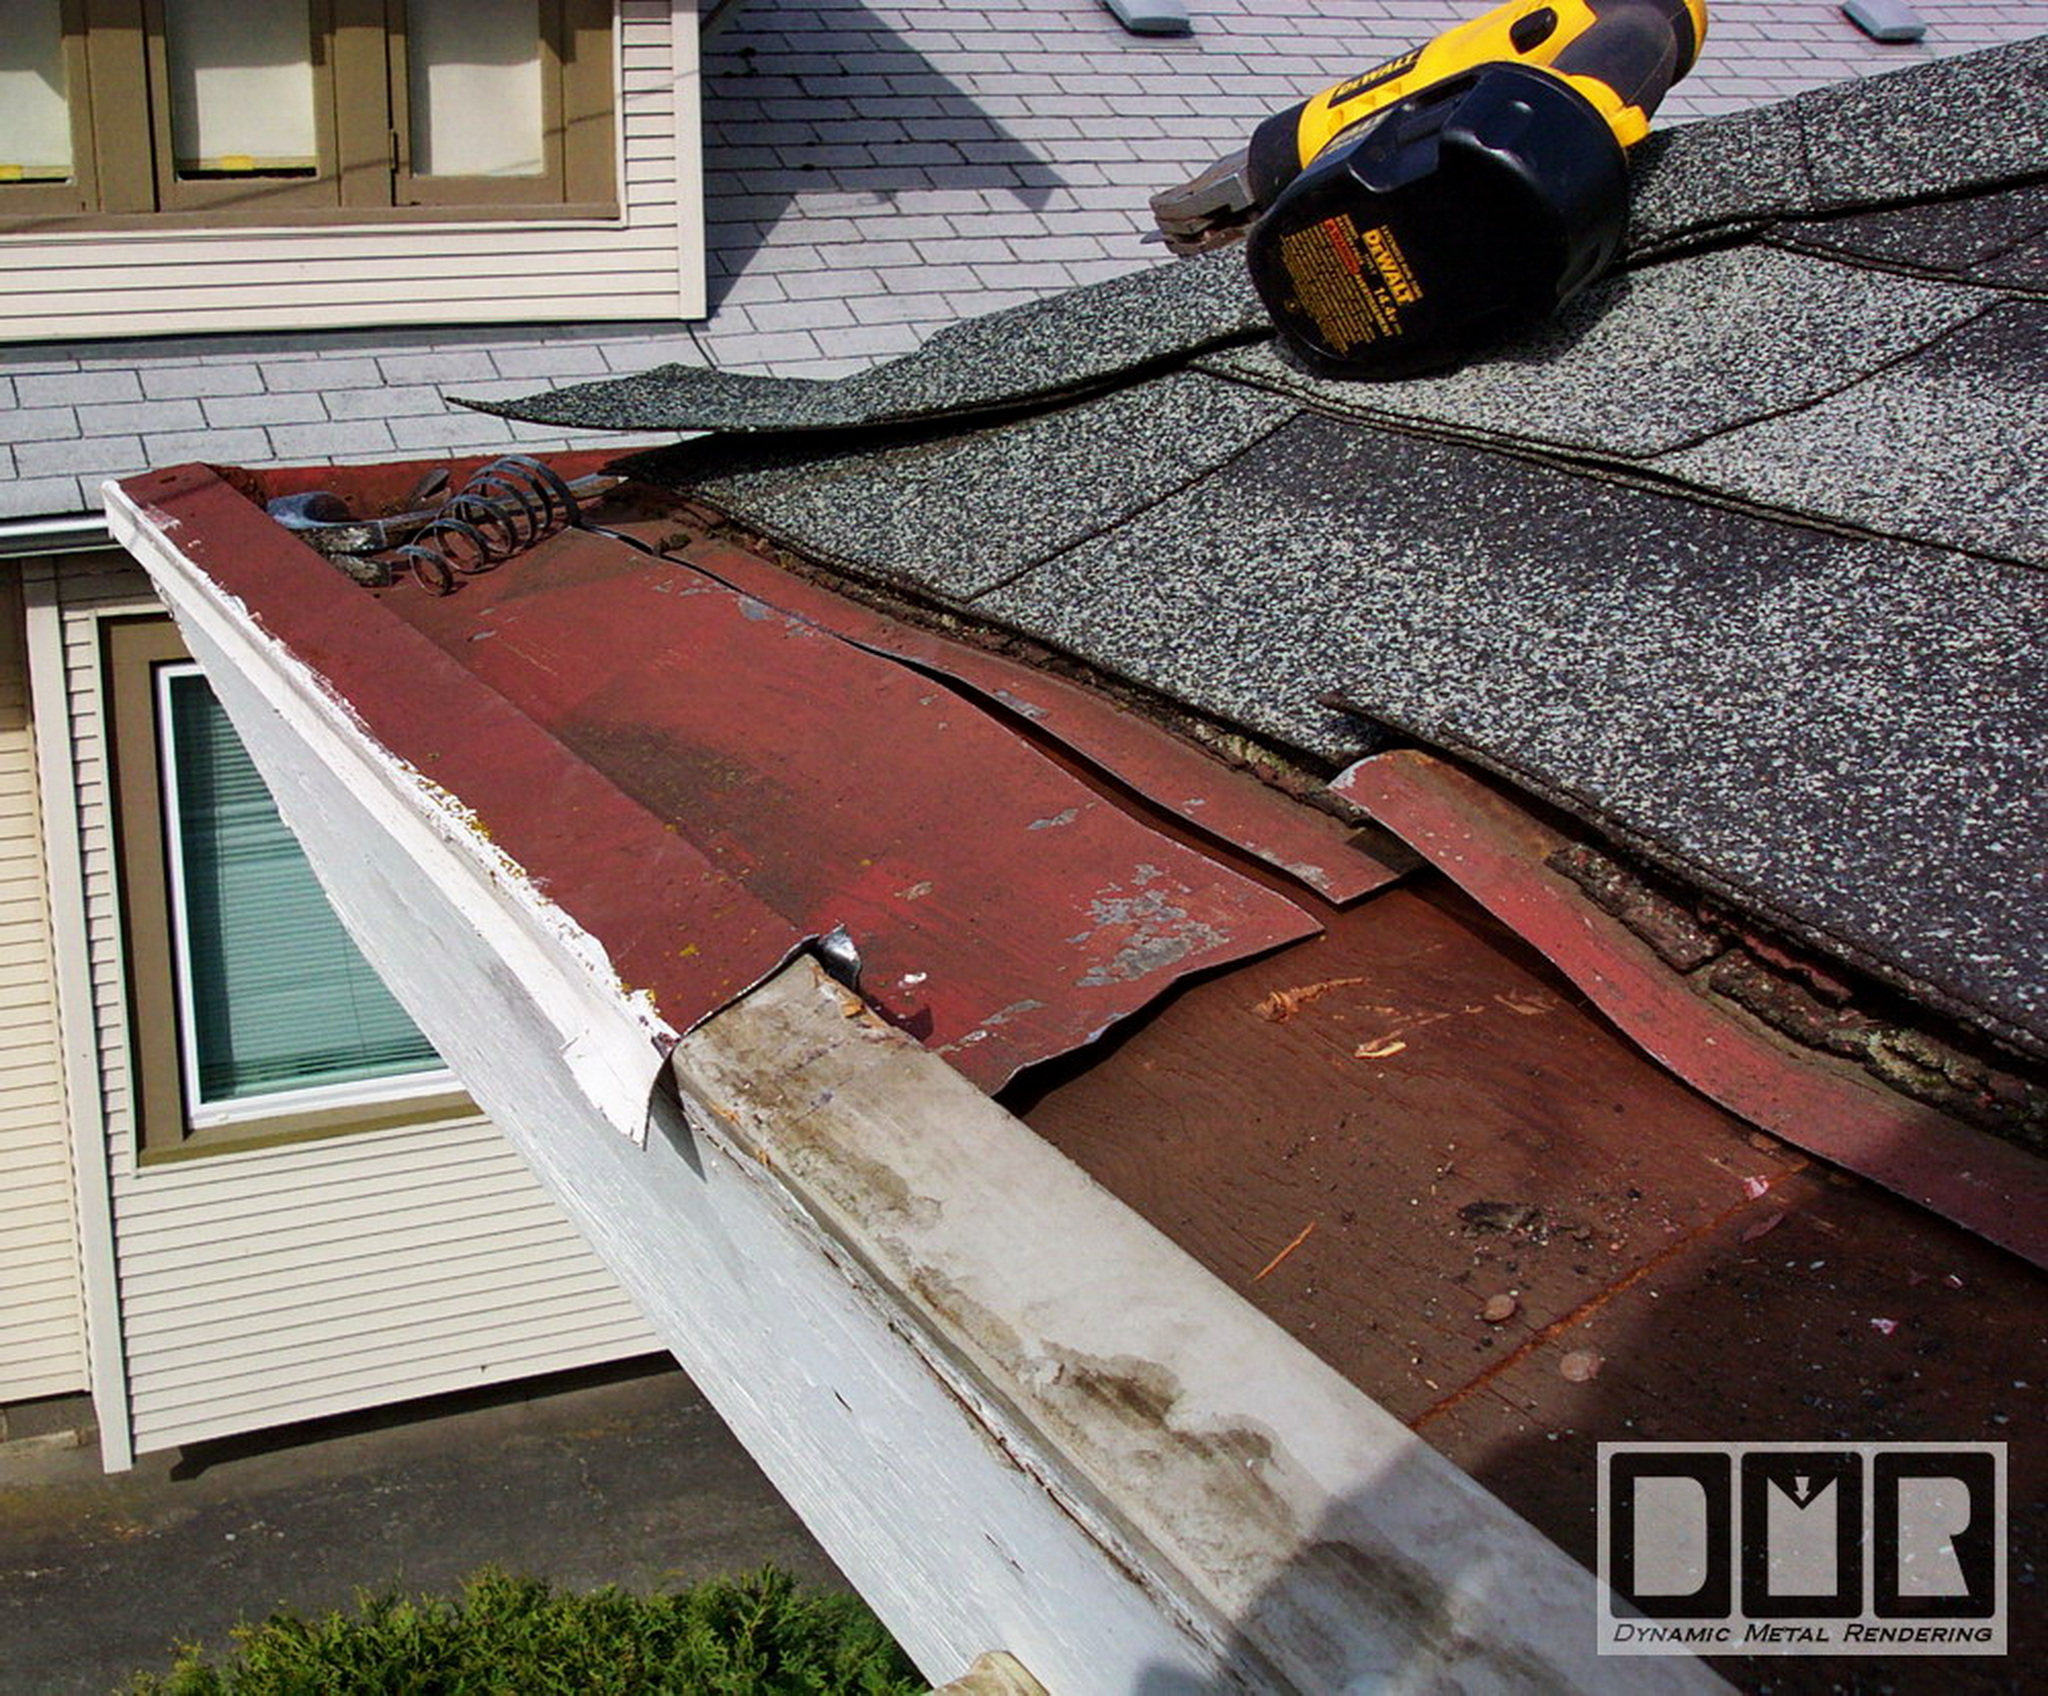
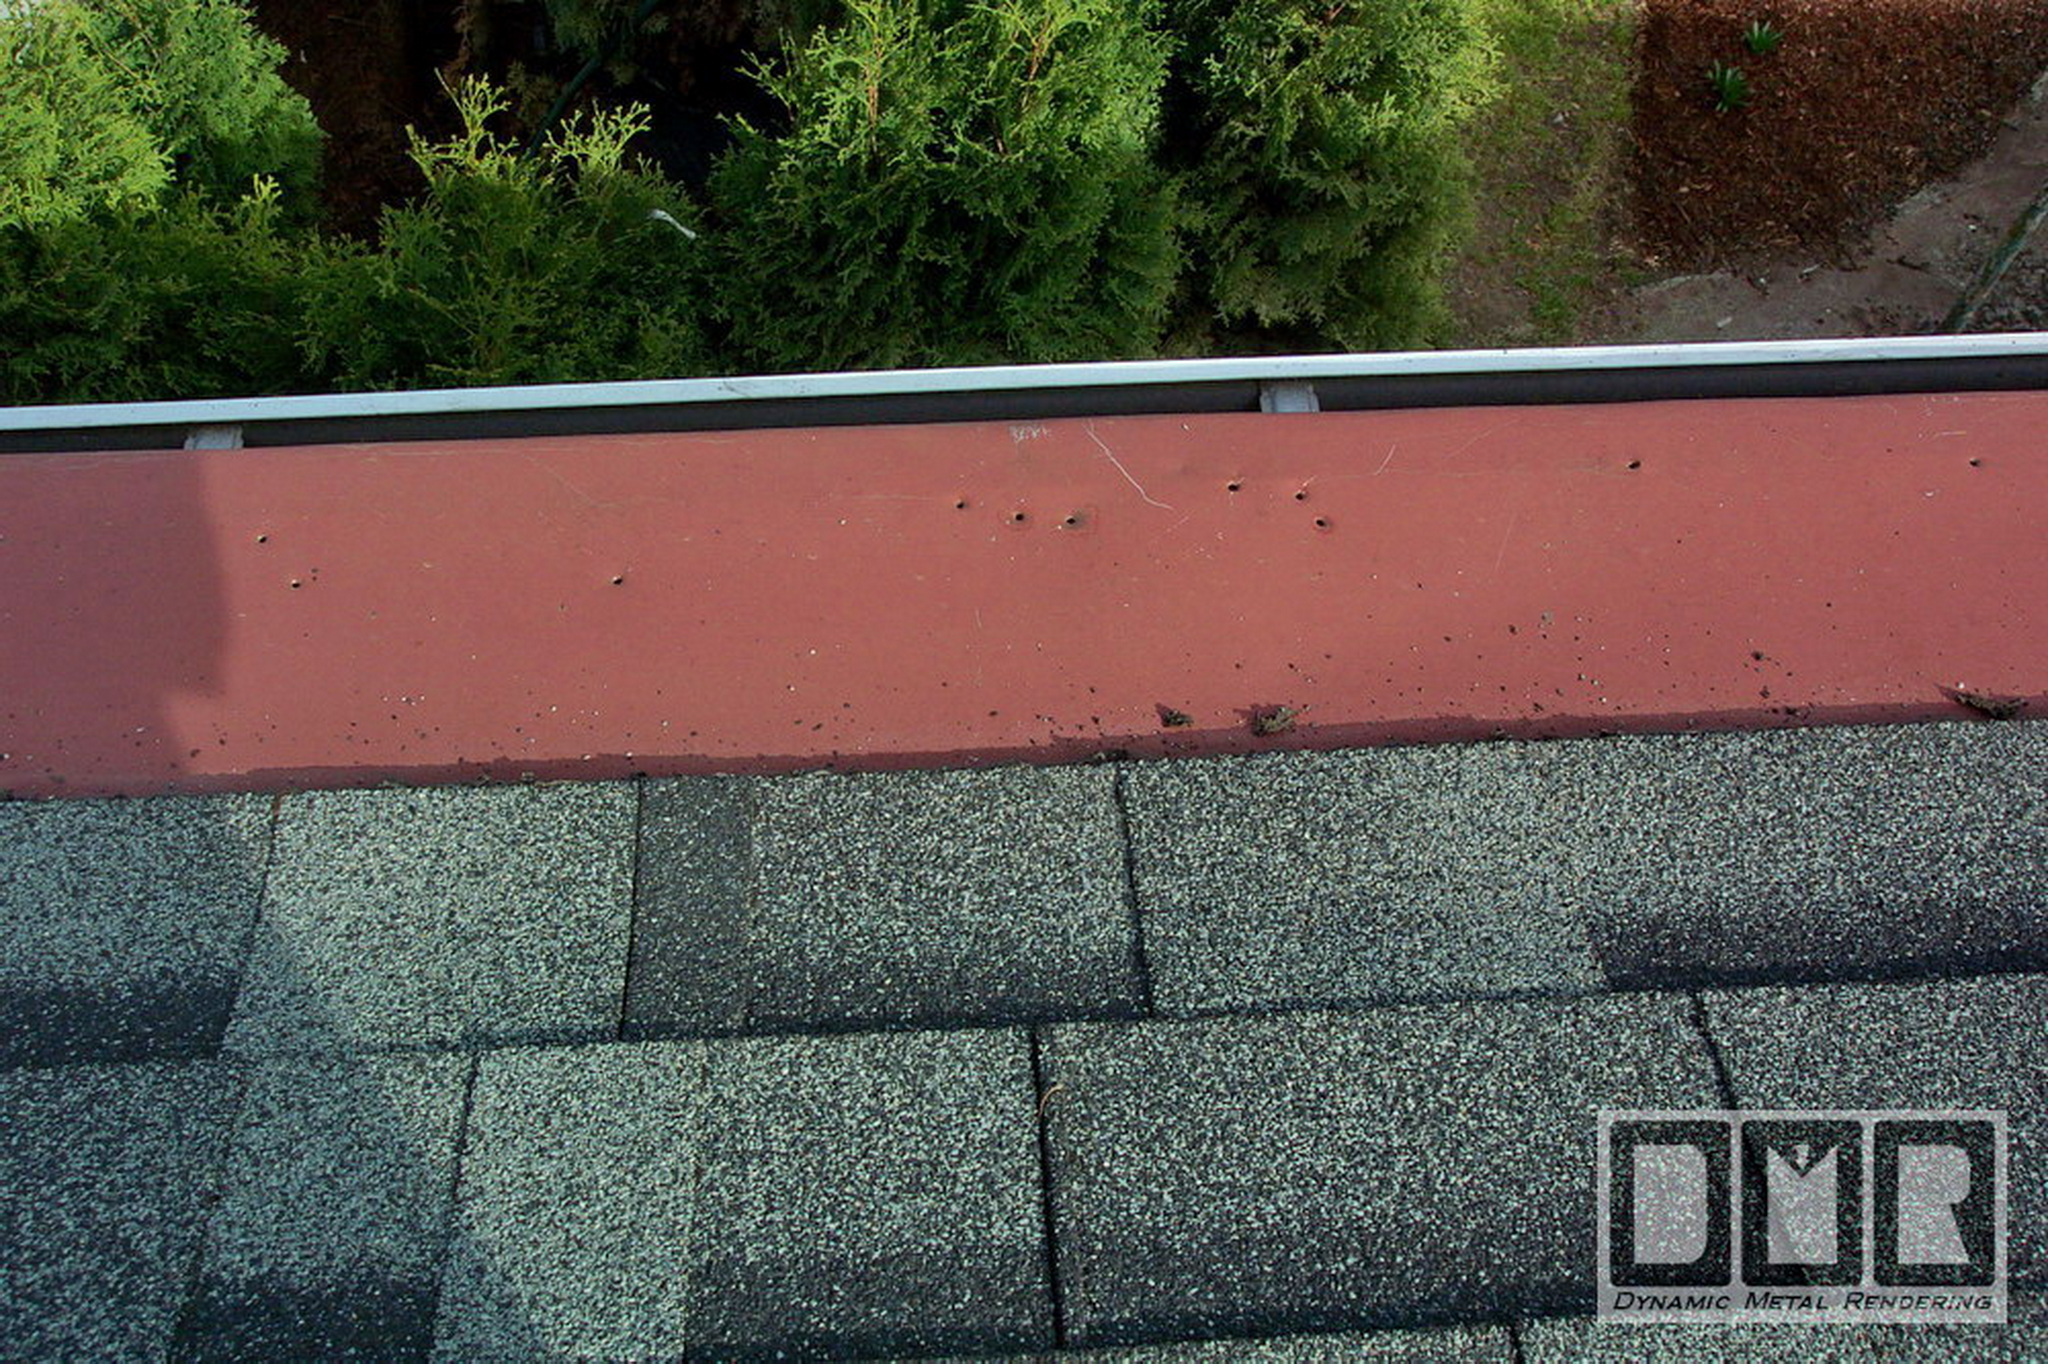
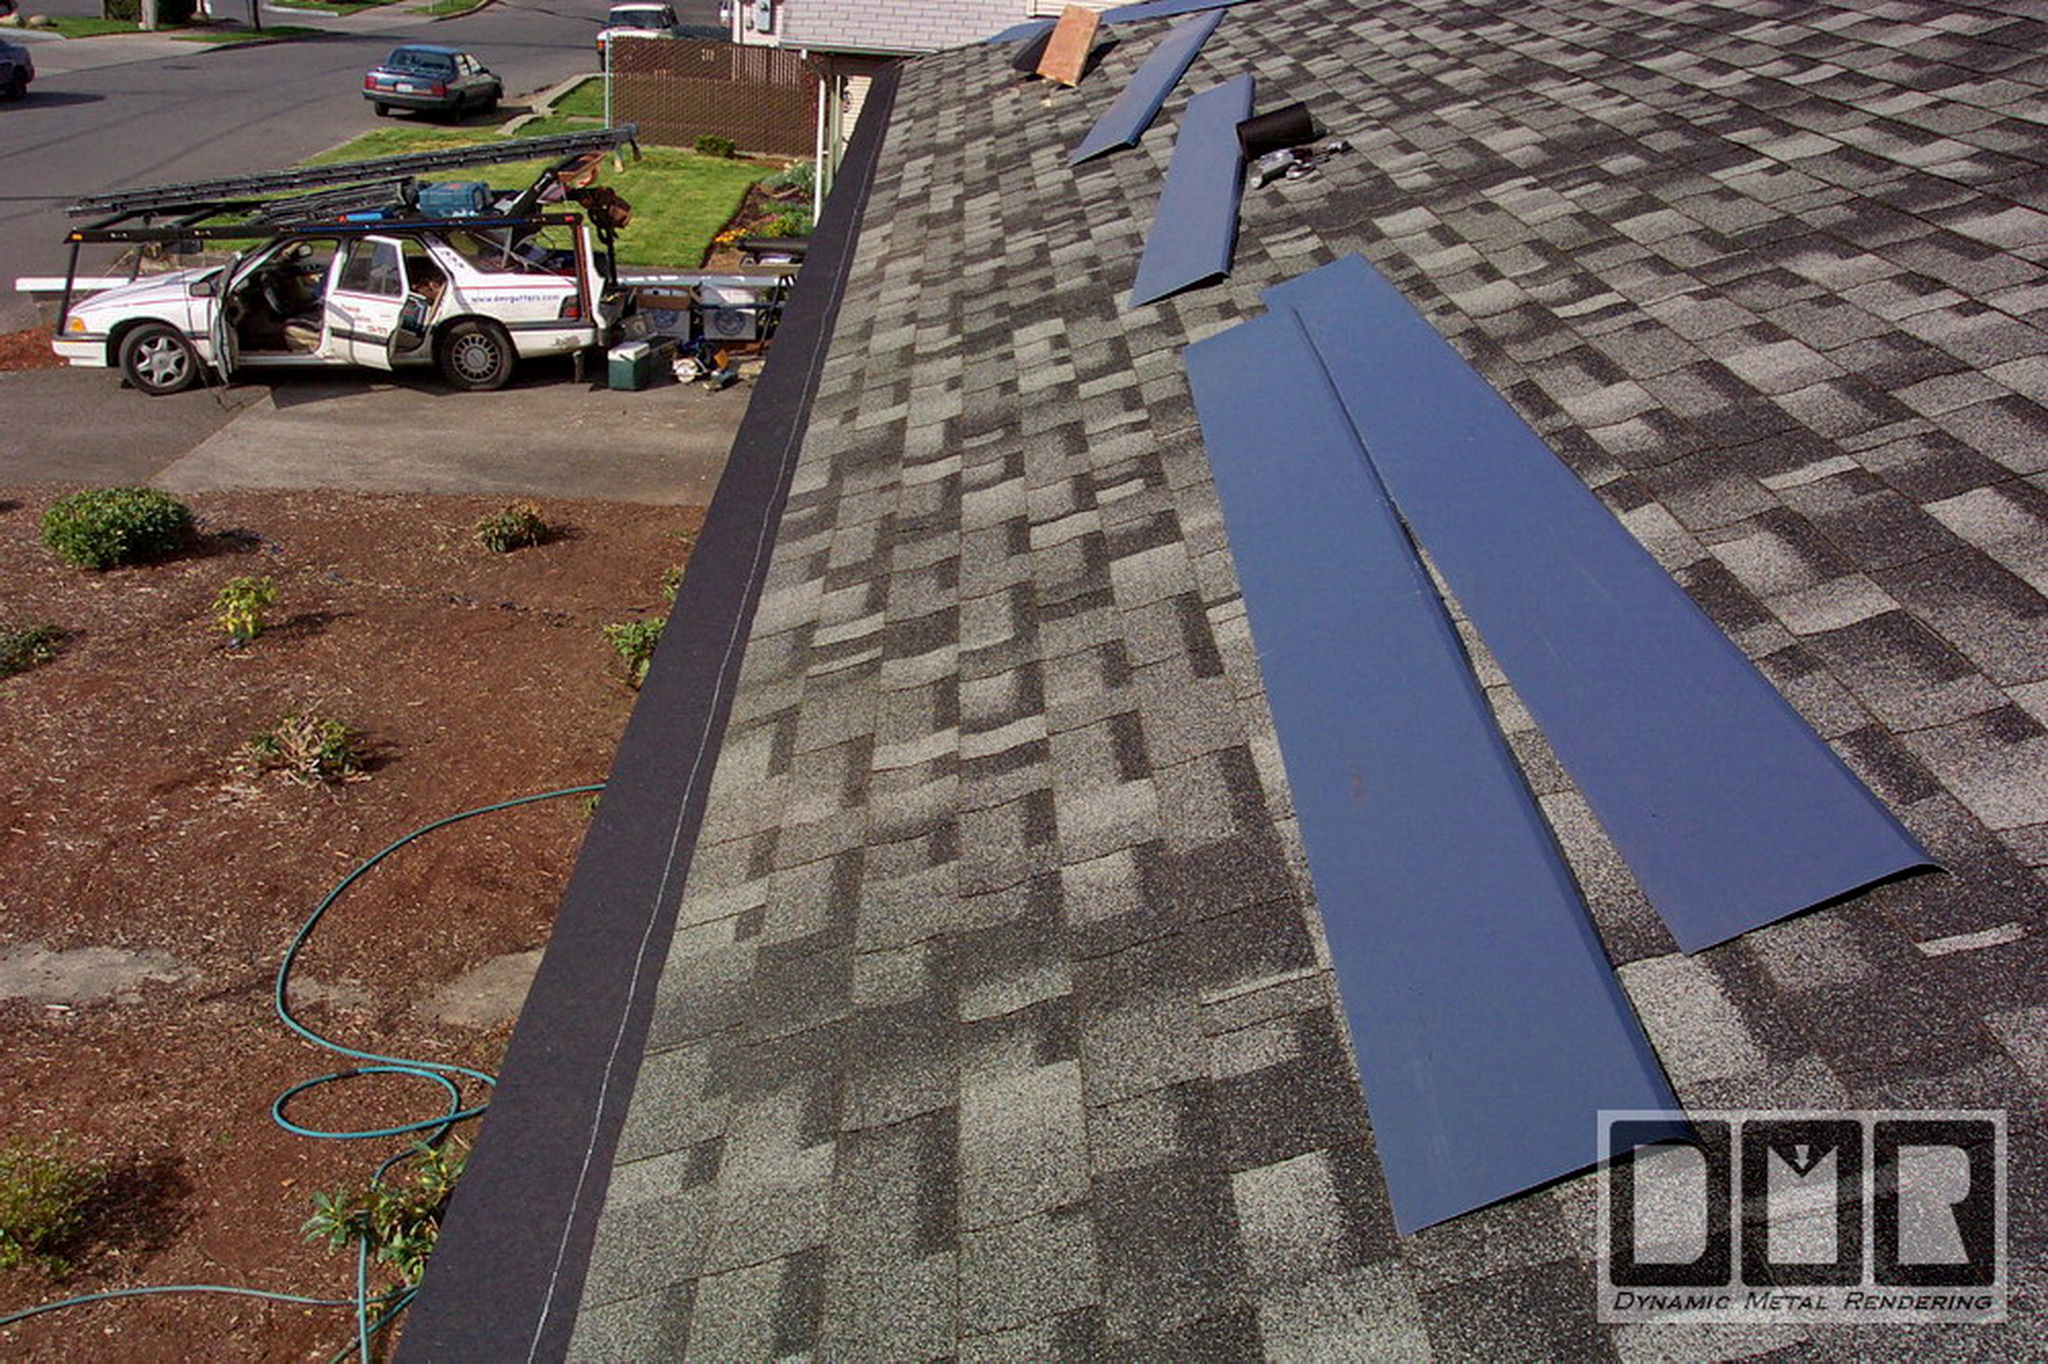
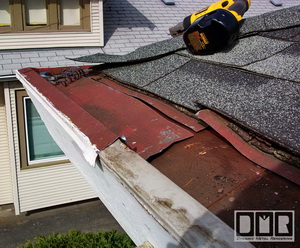
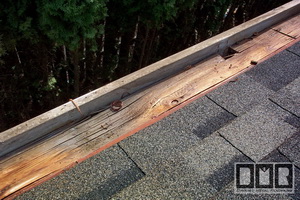
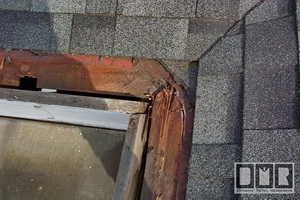
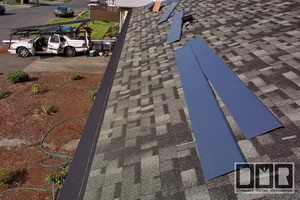
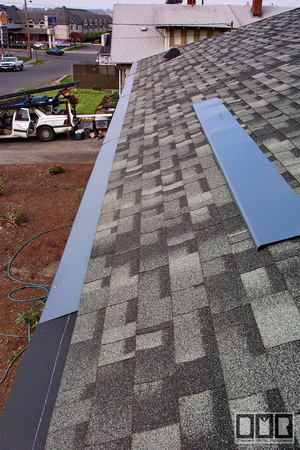
This is the clay red painted aluminum cover
we had installed 10 years earlier. Back then we tried to minimize the cost
by not removing the old gutter and cutting that edge down. We just covered
over the old gutter with this 64' long seamless sheet that was 12" wide and
shoved under the bottom edge of the roofing shingles. The roofing at that
time was red as well, so it matched in nicely at the time.
 
This solution would have worked just fine if
the roofers had not pinched about 100 holes through it, and not bothering to
seal the holes they made. You can clearly see the holes in the close-up of the picture on
the right. It is even more clear if you click on that photo to see a larger
photo of it. |
|
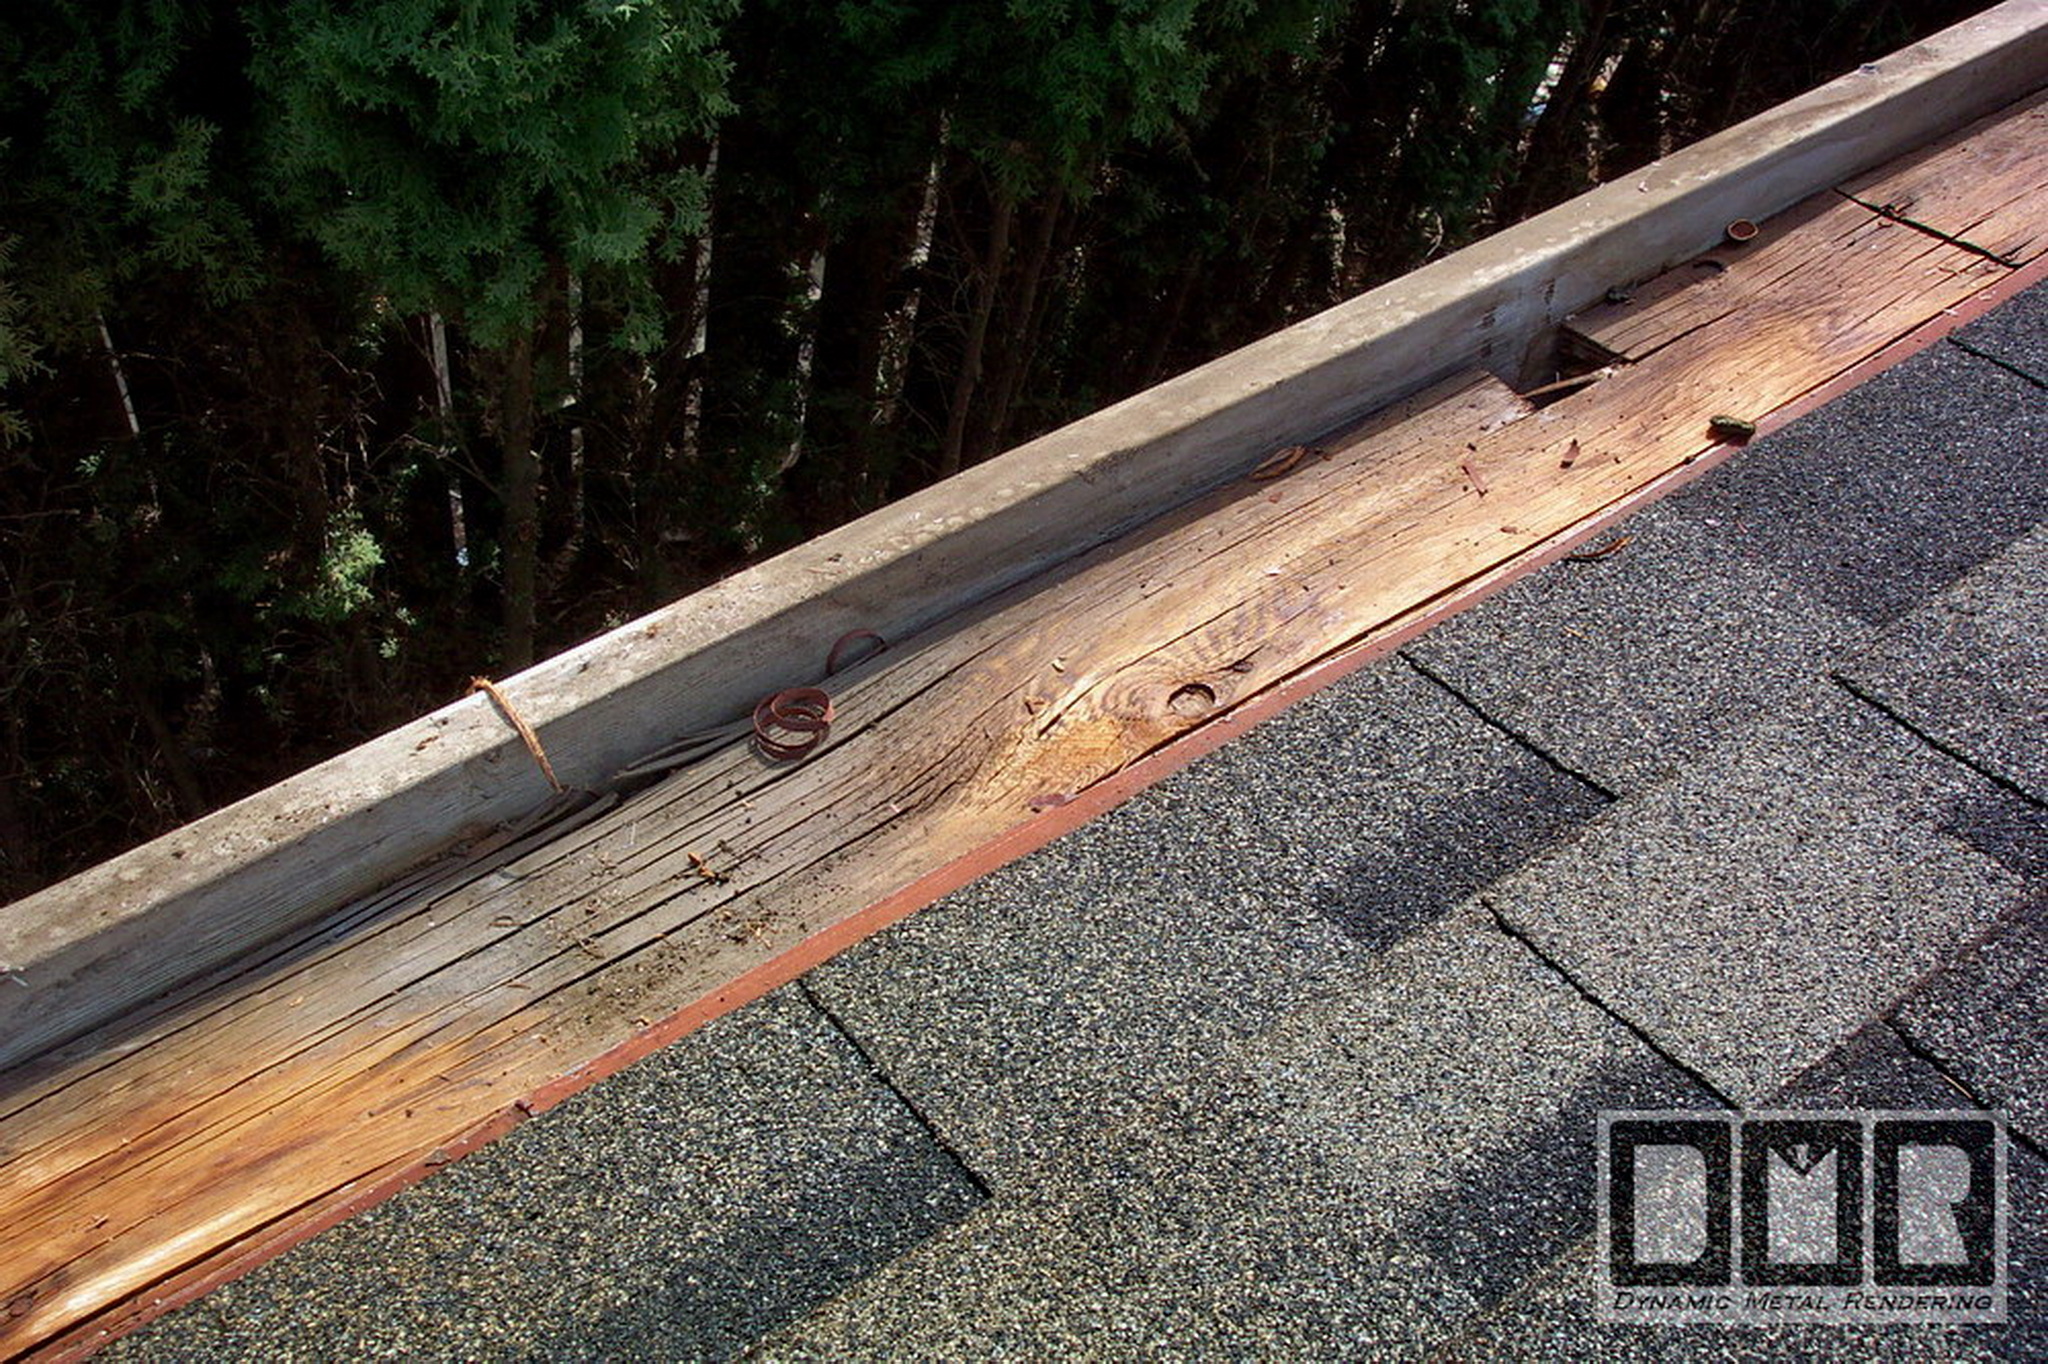
Here photos showing some of the dry-rot we found under the old
gutters. About 35% of the roof edge was severely rotten and had to be
replaced. Luckily Mr. Gamenara was very good about being understanding with
these changes in the original contract, since this sort of dry-rot repair
was not anticipated and written into the contract prior to beginning the
work. It is not too common, but we do run into complications from time
to time. |
|
 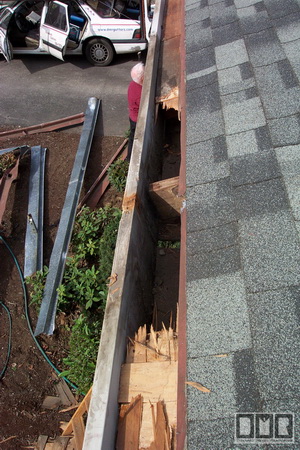
I was able to lift much of the rotten woocd out with my
bare hands without straining. That plywood had fallen apart in my hands as I
lifted it out. They were especially bad around the outlets going
through the roof, where the original gutter contractor had soldered the
outlets to the gutter sheet-metal. |
|
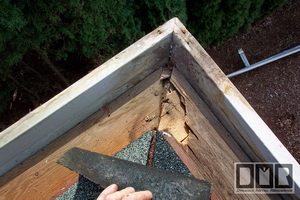 
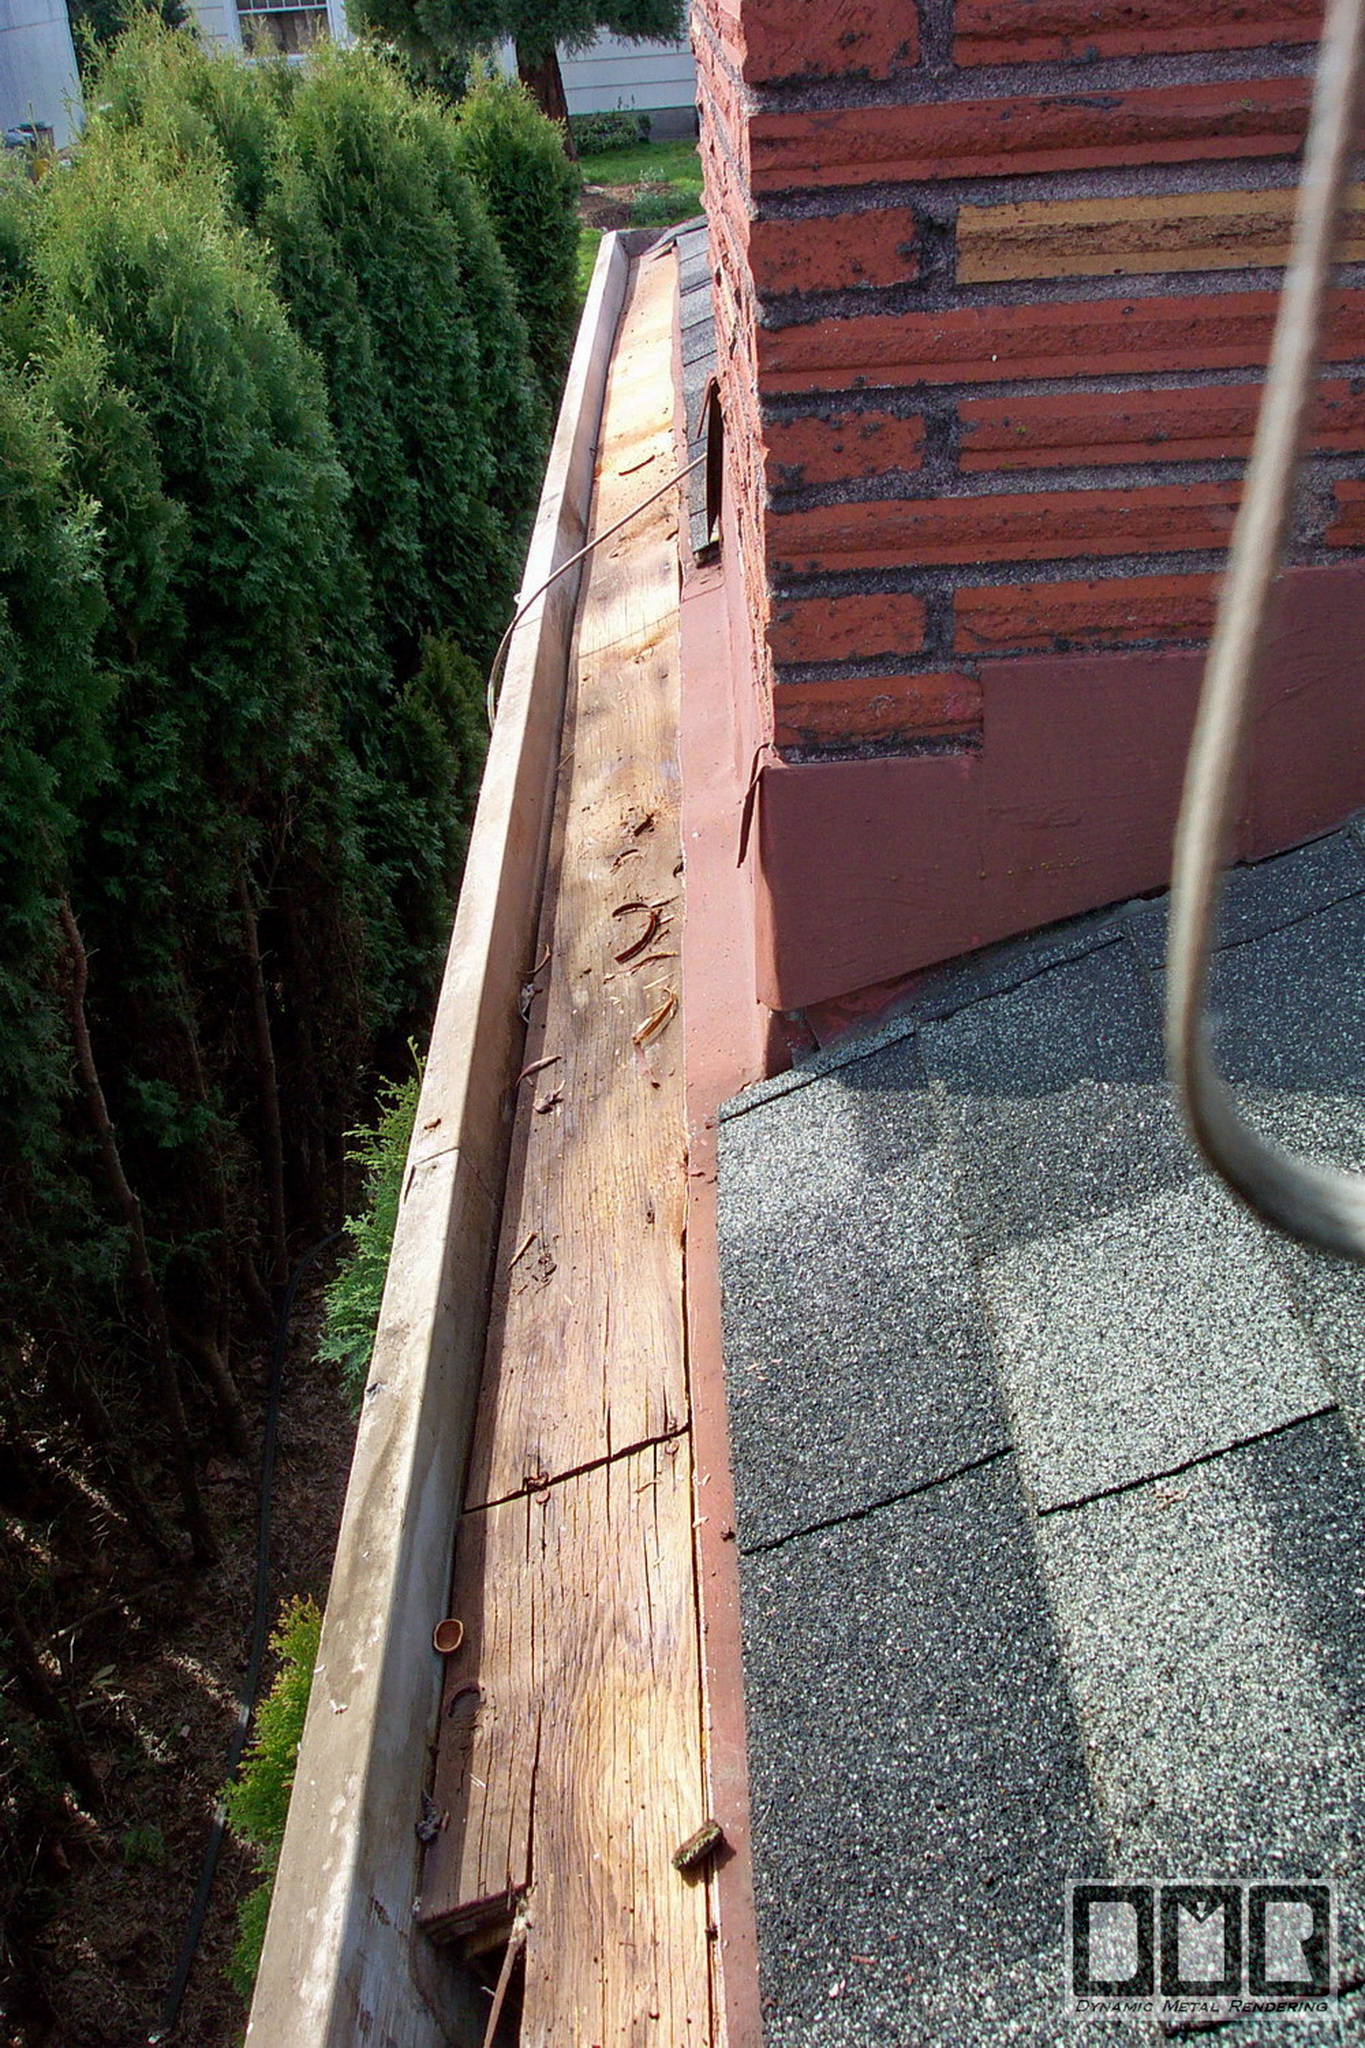
These show the damage in the corners that
suffered a great deal, being under a seam that had pulled apart. |
|
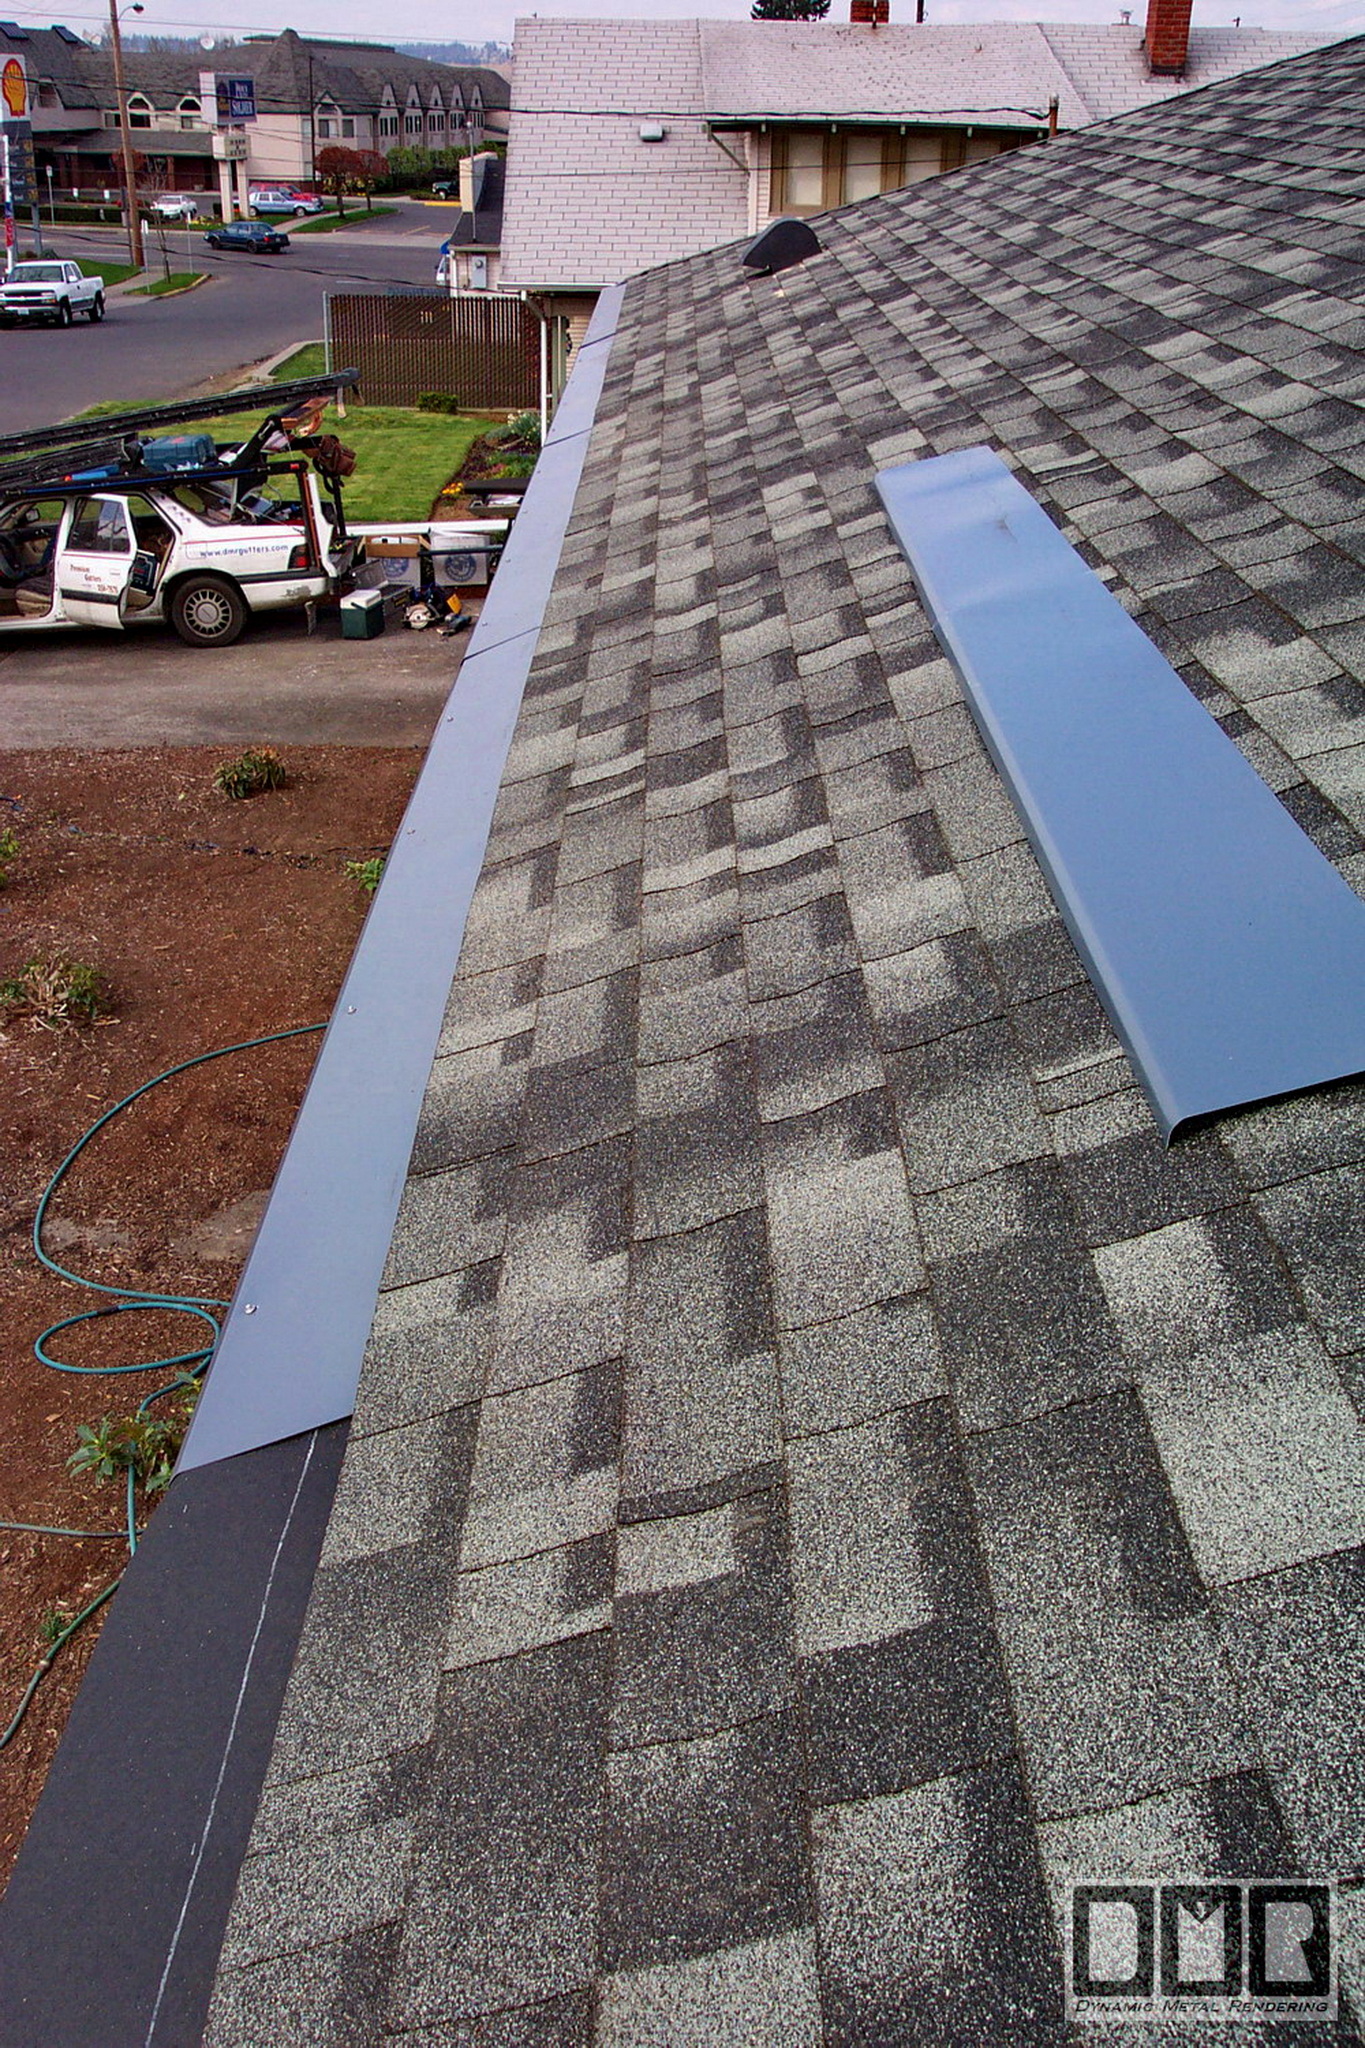
This shows the right edge cut down and the
old 1/2" plywood removed. The second photos shows the new 3/4" plywood screwed down
with coated deck screws. It is covering the fascia board as well to
make all this a lot stronger improved design. |
|
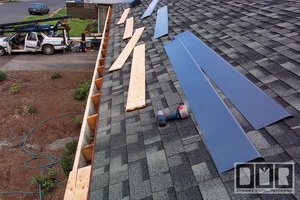 
This shows the 3/4" plywood and aluminum sheet
metal ready to go in place. The second photo shows the 30lb roofing felt
over the new plywood to work as the vapor barrier between the wood and
aluminum sheet-metal. |
|
 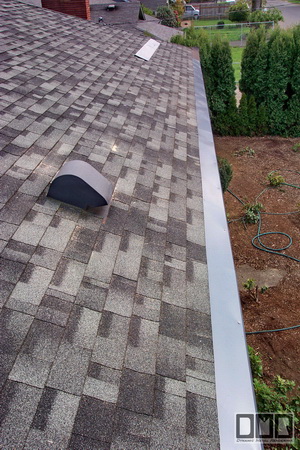
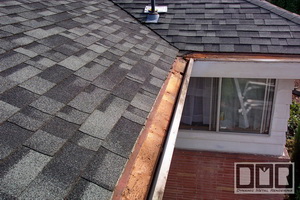
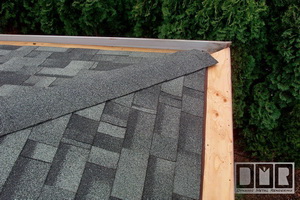
These show all but one of the pre-painted gray aluminum
sheets over the new wood work. The lower edge of the metal has a pair of 45
degree bends to it to also be the dripedge and cover the end of the plywood
to keep it dry. |
|
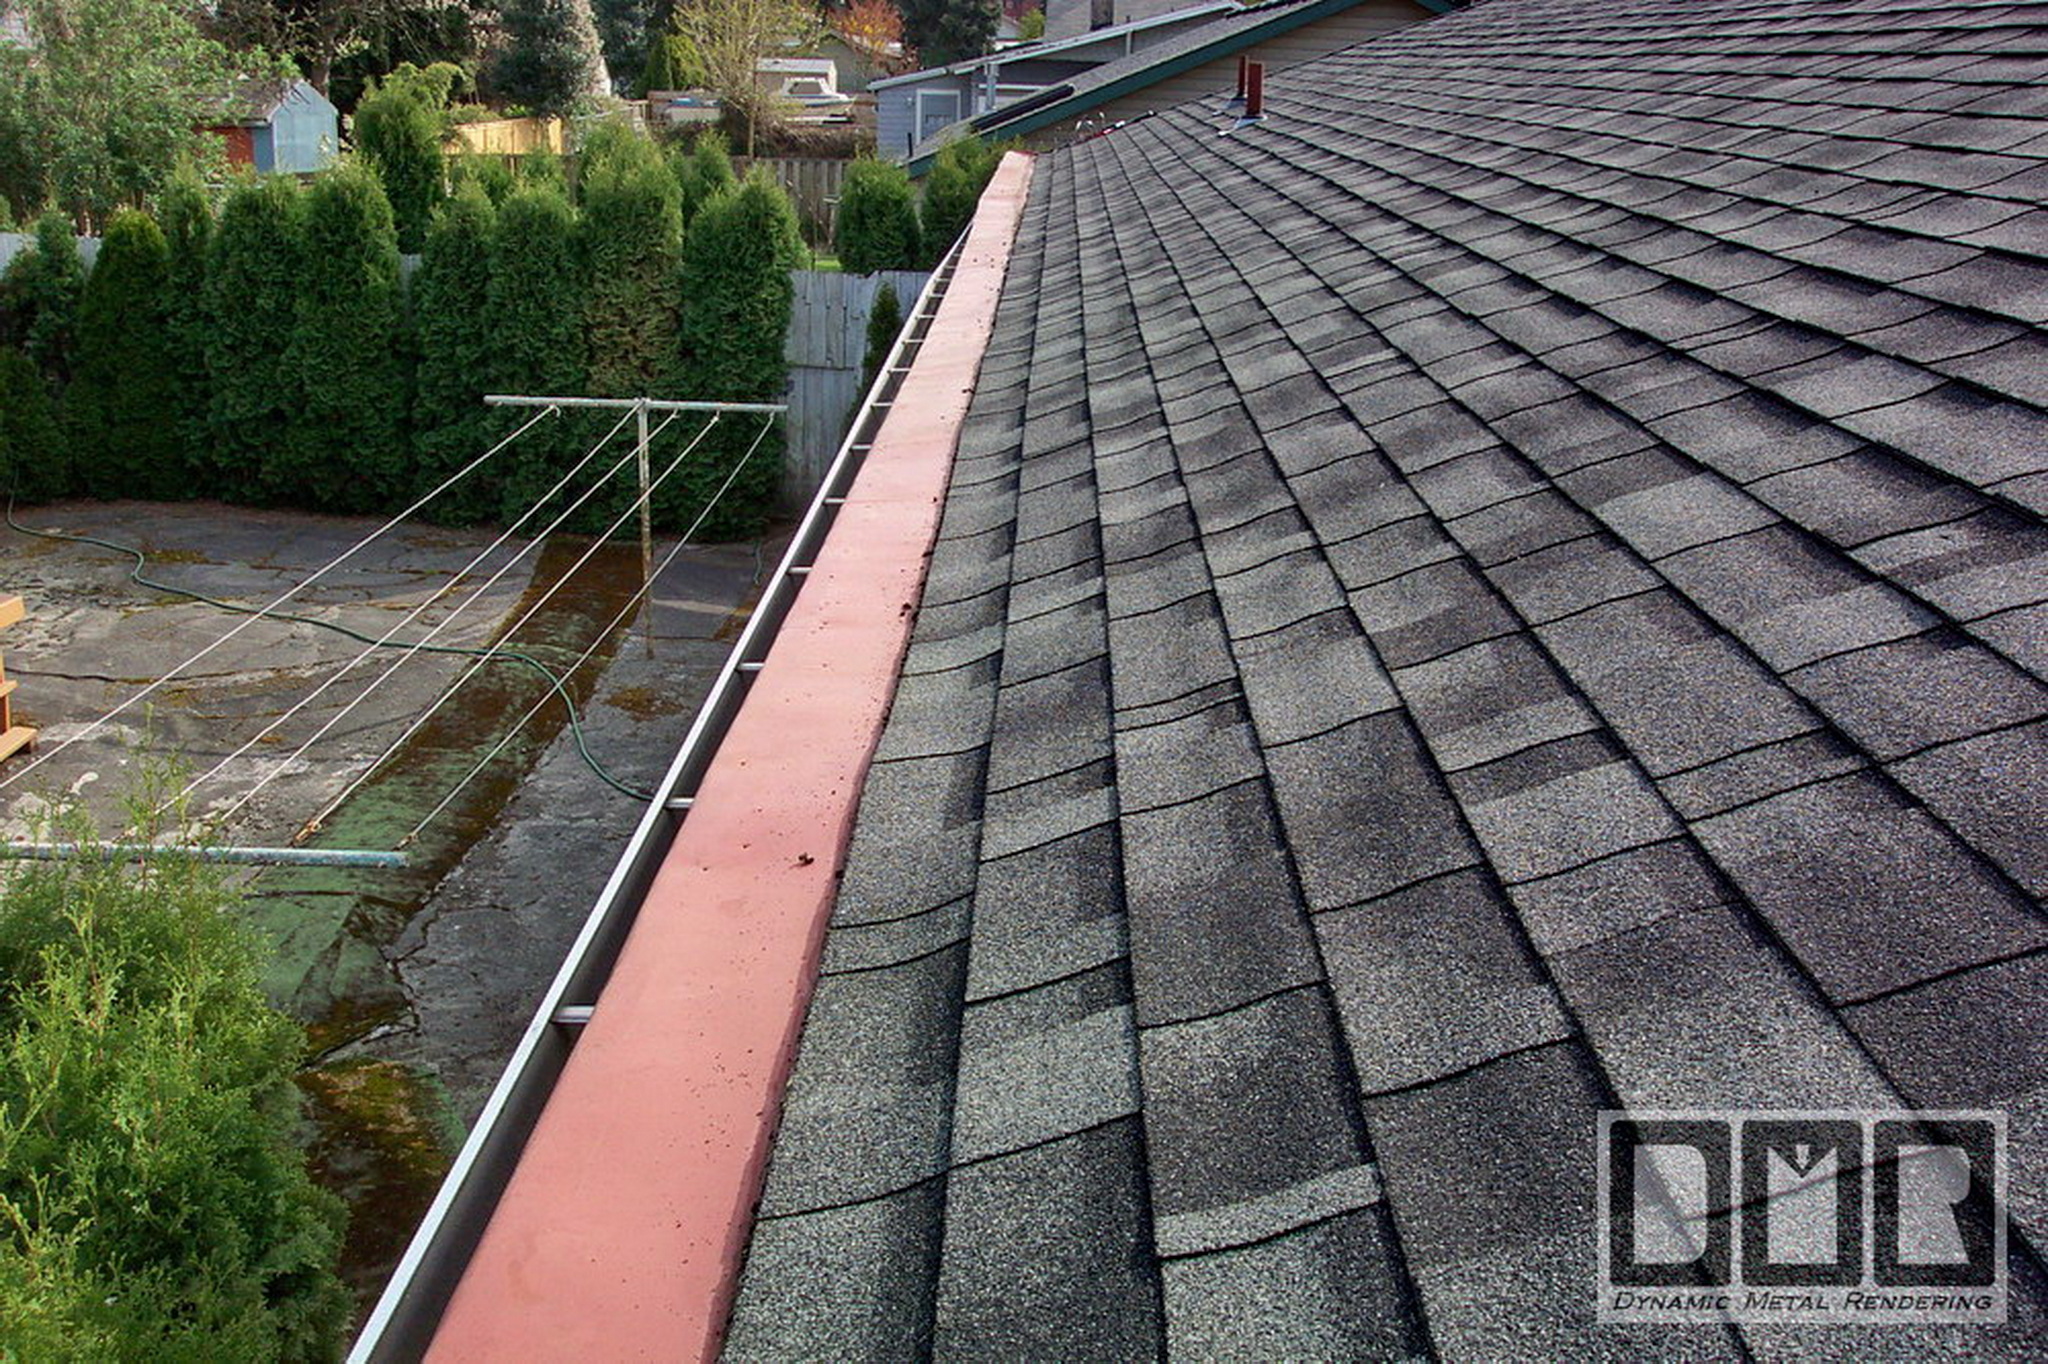
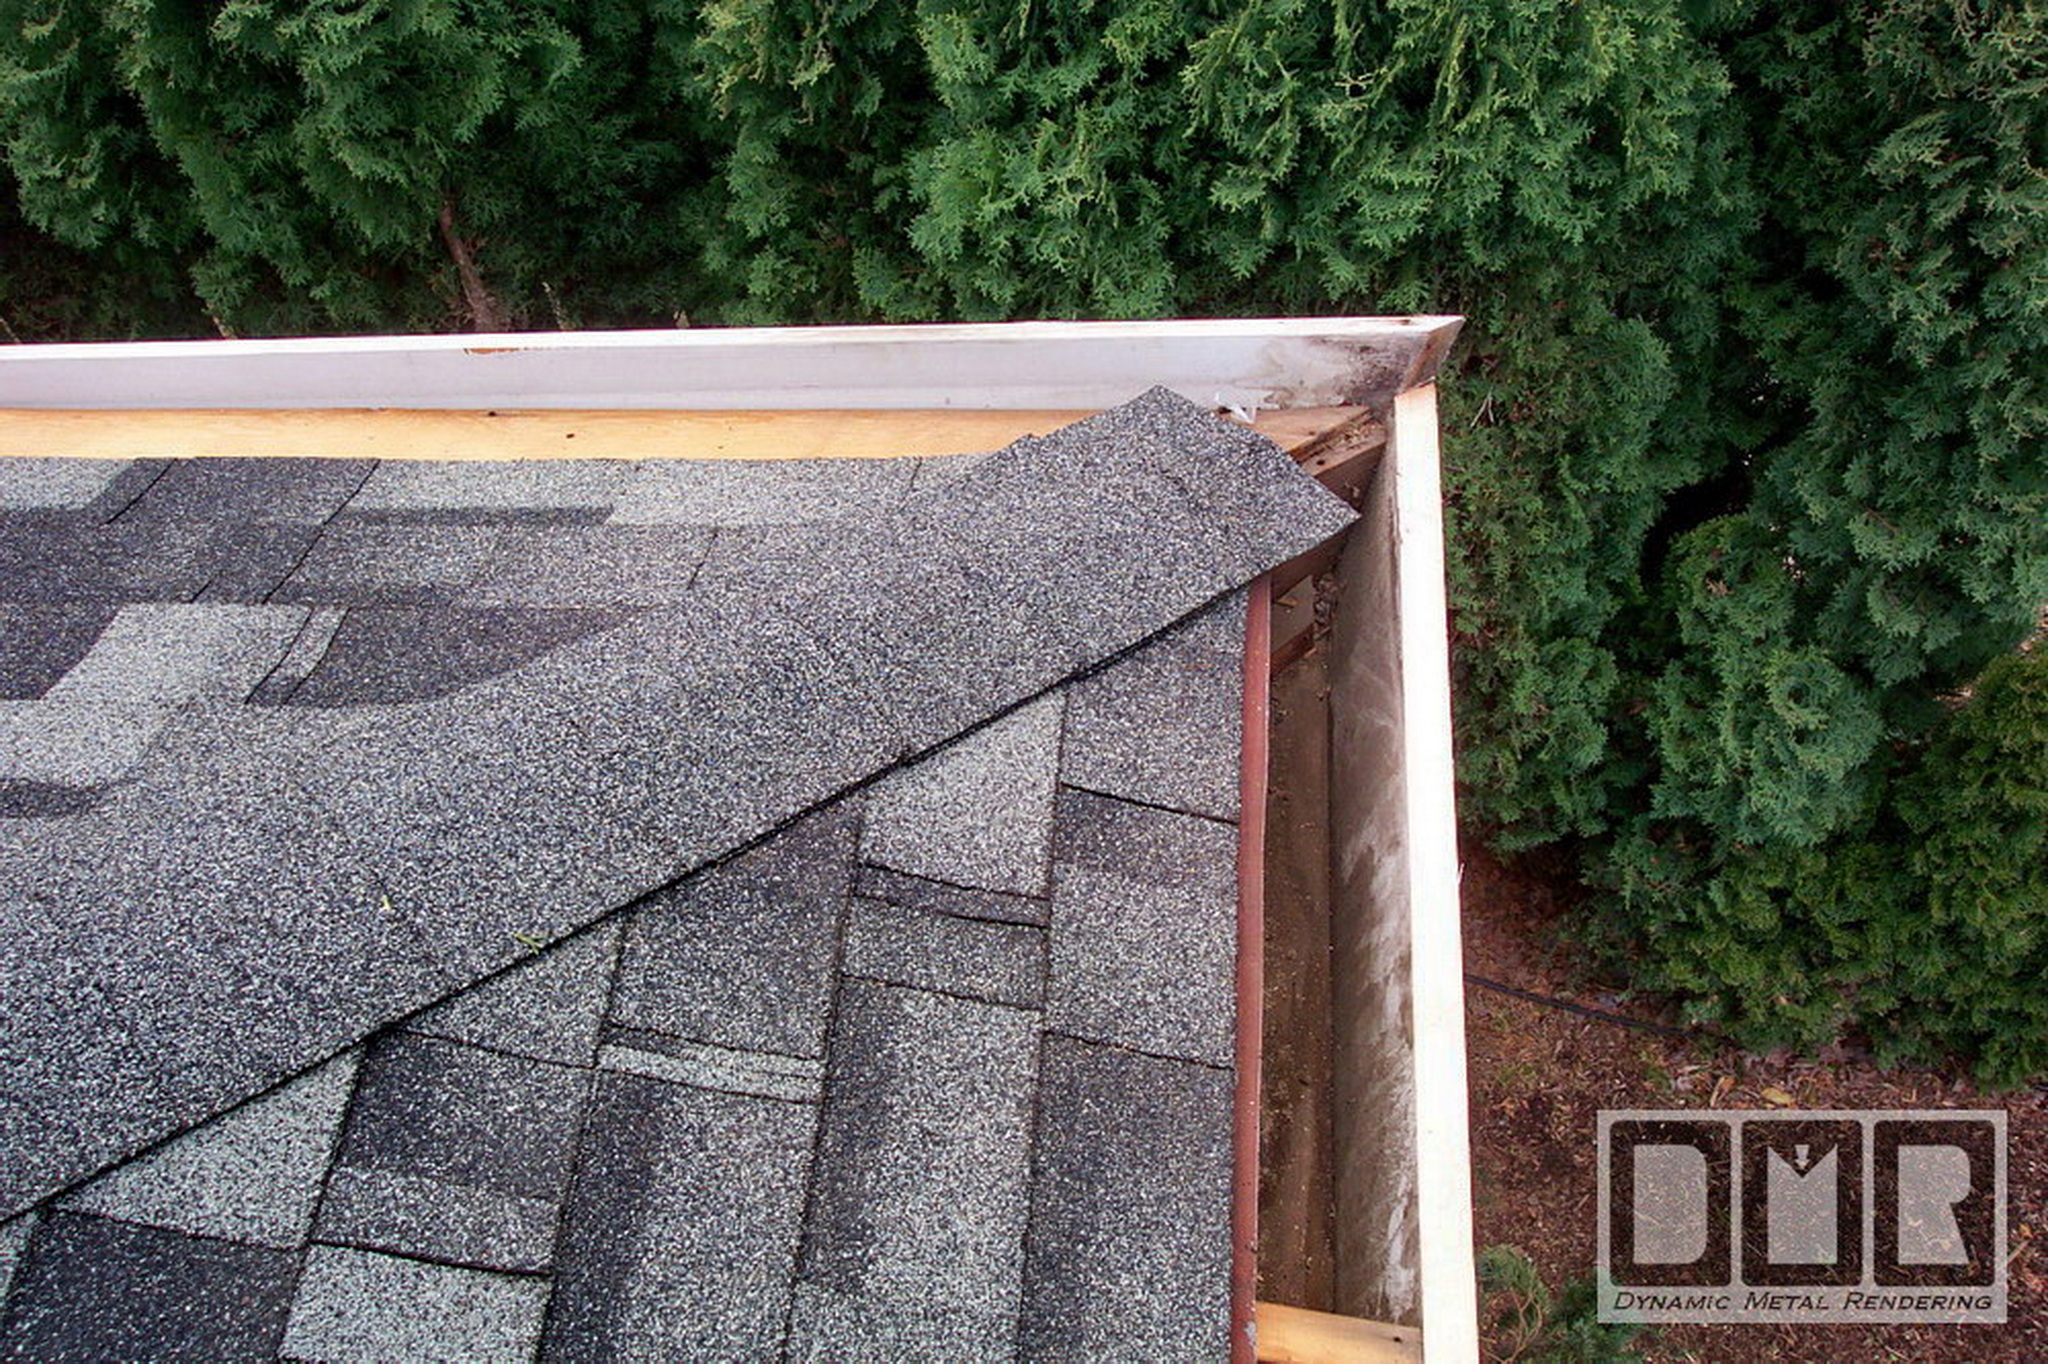
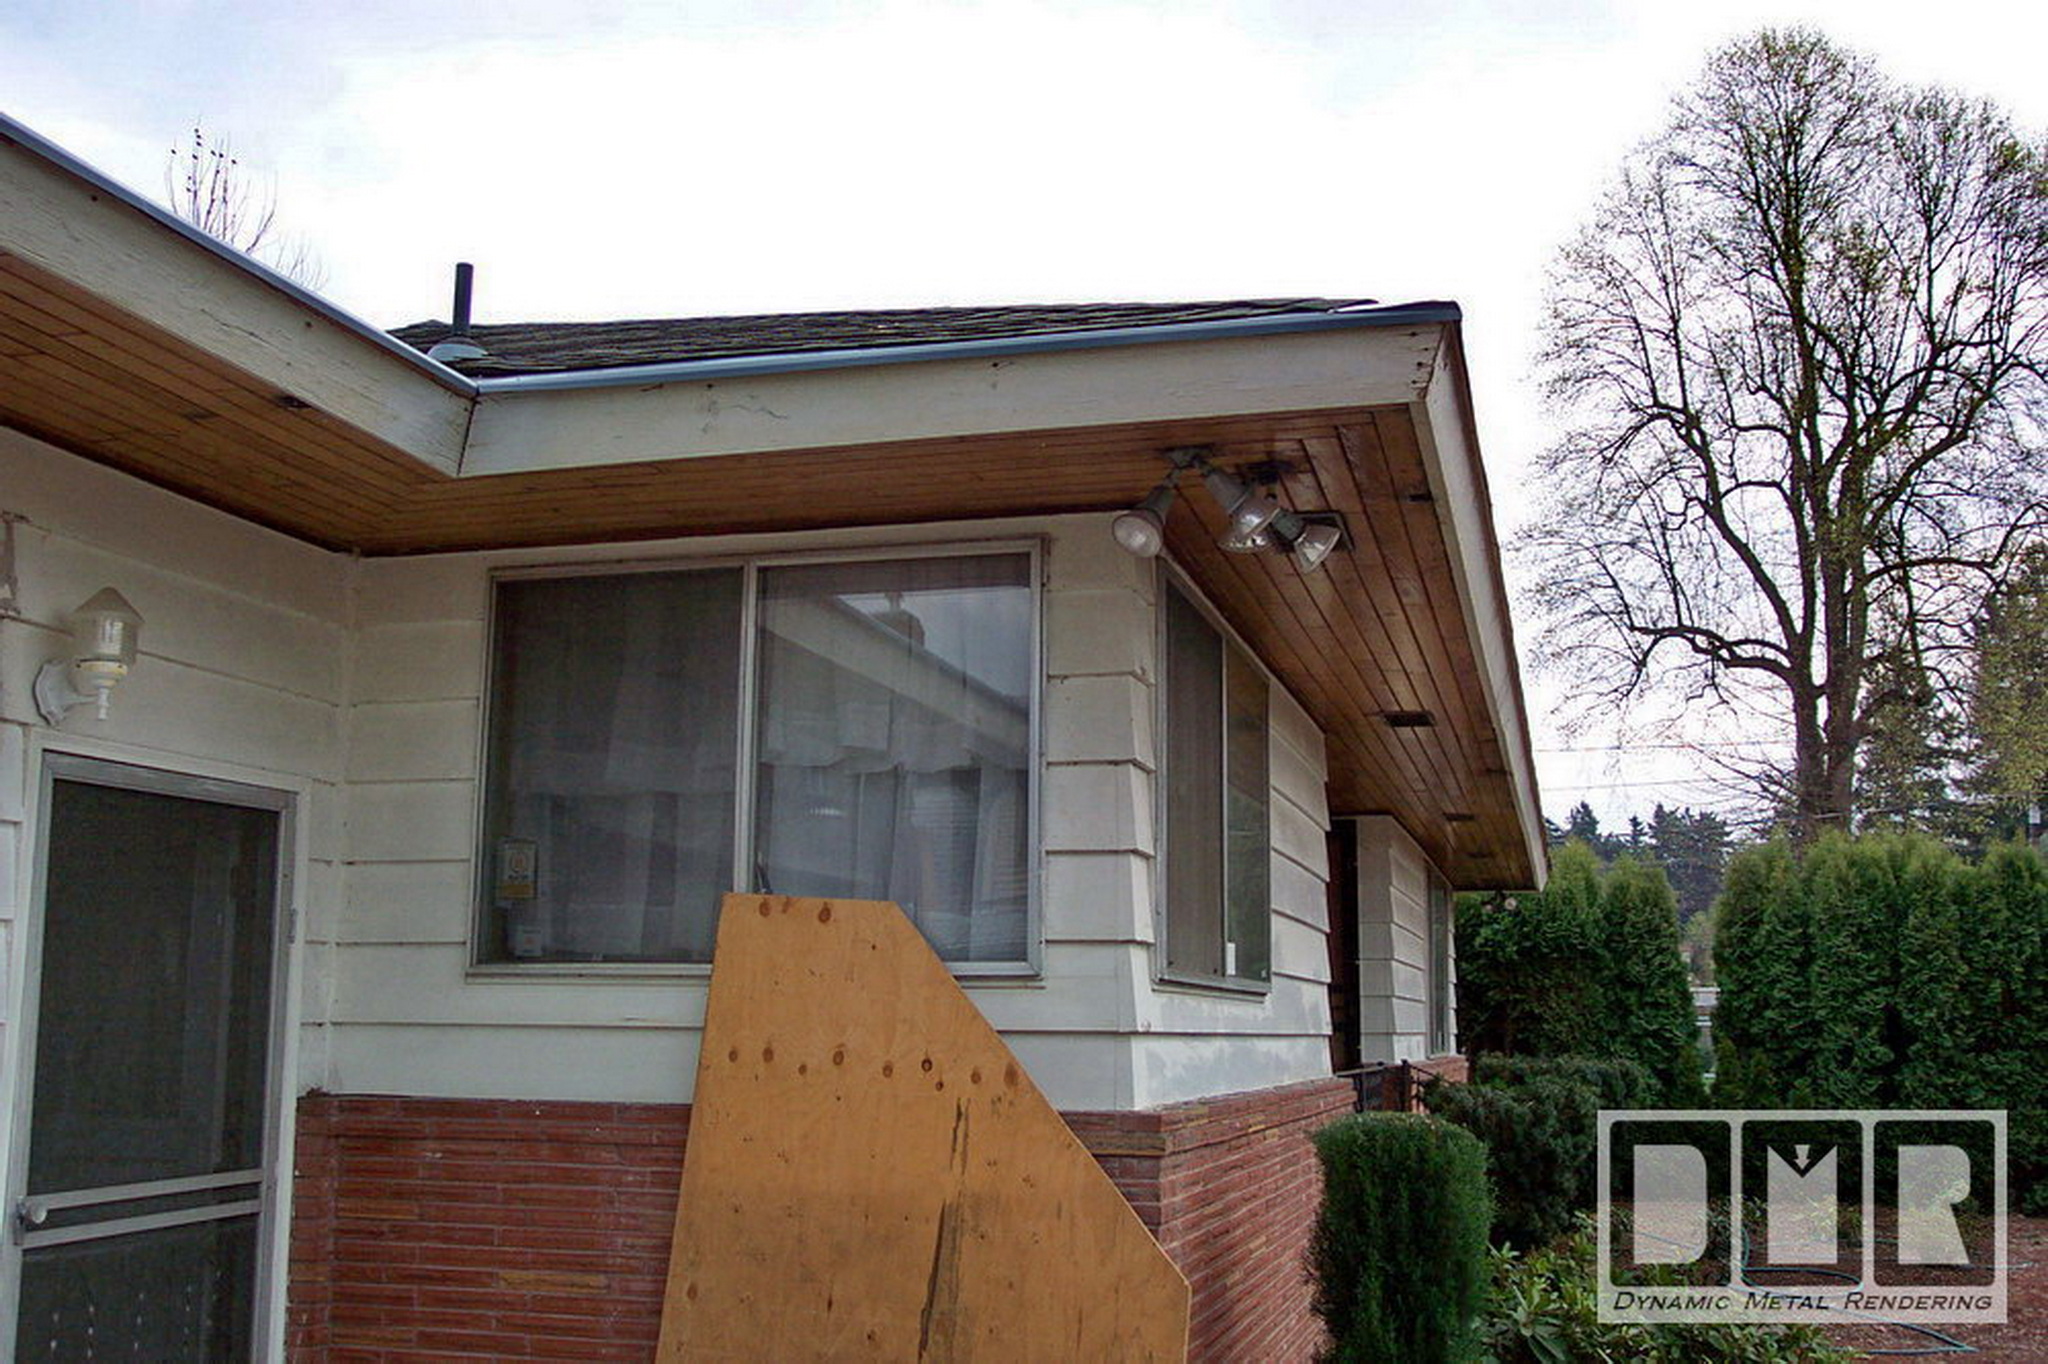
Here is the front inside
corner before and after the new aluminum gutters are installed. Since the
fascia board is not vertical, we had to fabricate a custom spacer to run the
length of the new gutters that pushes out the bottom of the gutter to level
it off. It is seal the length of it, so not to allow for bees to nest behind
the gutters, as they do when small spacer wedges are used instead. |
|
 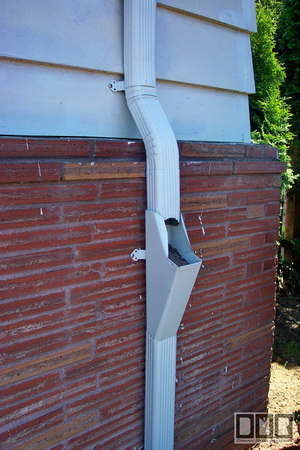
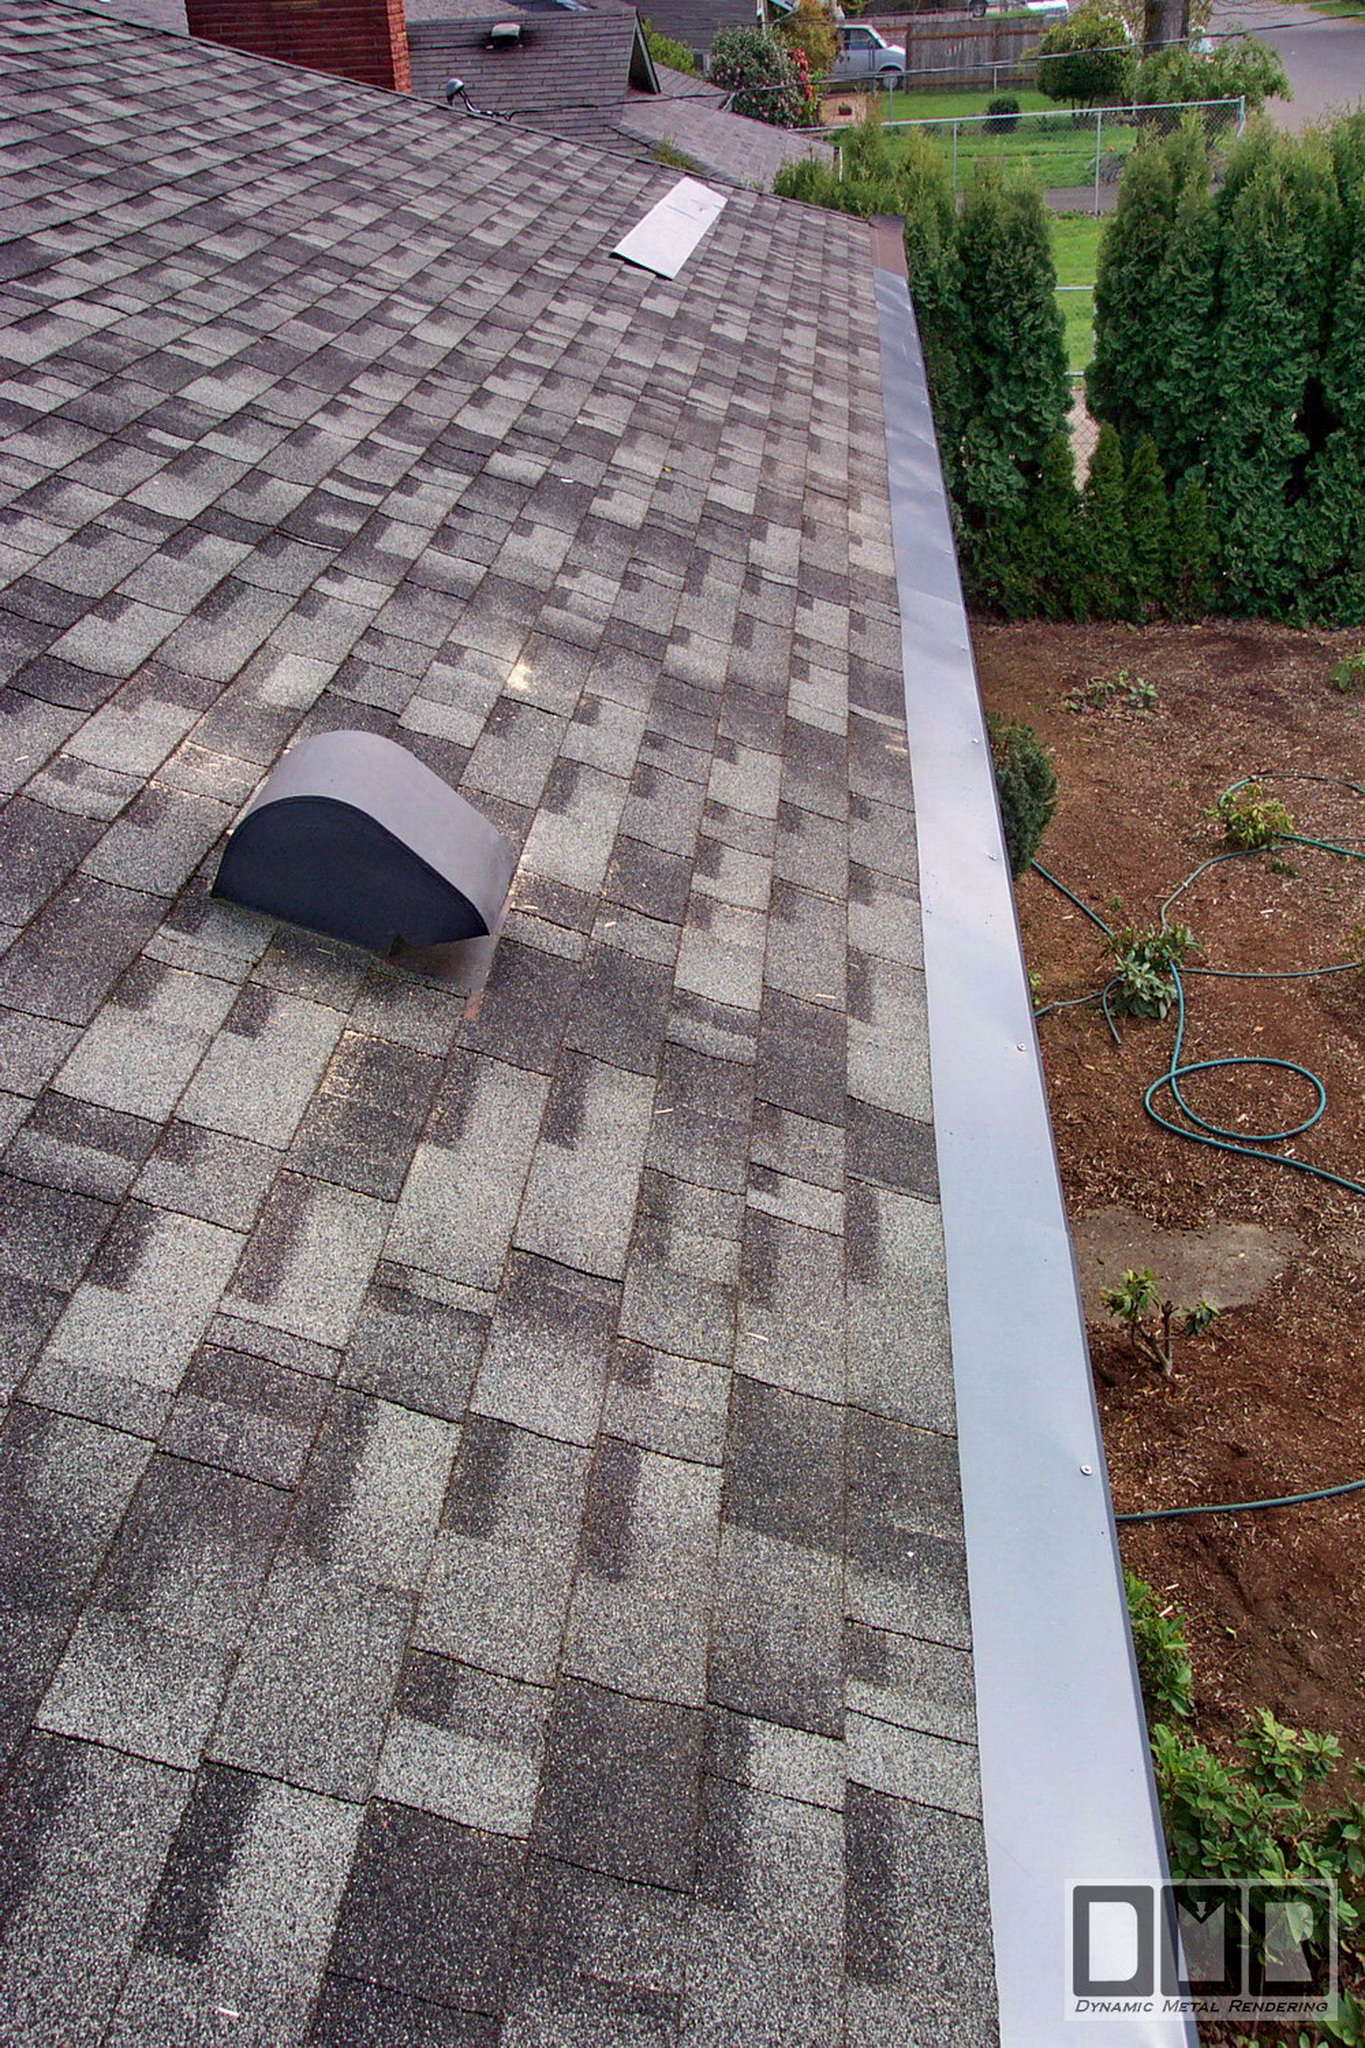
This shows the larger
No-clog outlets, special elbows, and the Leaf-catcher in the downspout to
strain out the debris that settles in the gutters and washed out in a heavy
downpour. |
|
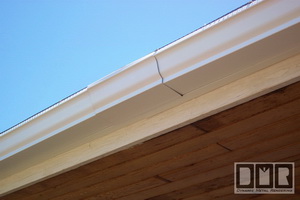 
Here is the underside of the
expansion joints we do in the middle to prevent stress on the corners, so
they are much less likely to pull open from the expansion and contraction
that is different than the wood structure as the temperature changes. Above
this cover is the gutter split in two. There are endcaps sealing them off.
Then there is a custom cap we make to go over the two endcaps so it will not
leak between them. Then this short section of gutter to cover this gap.
  |