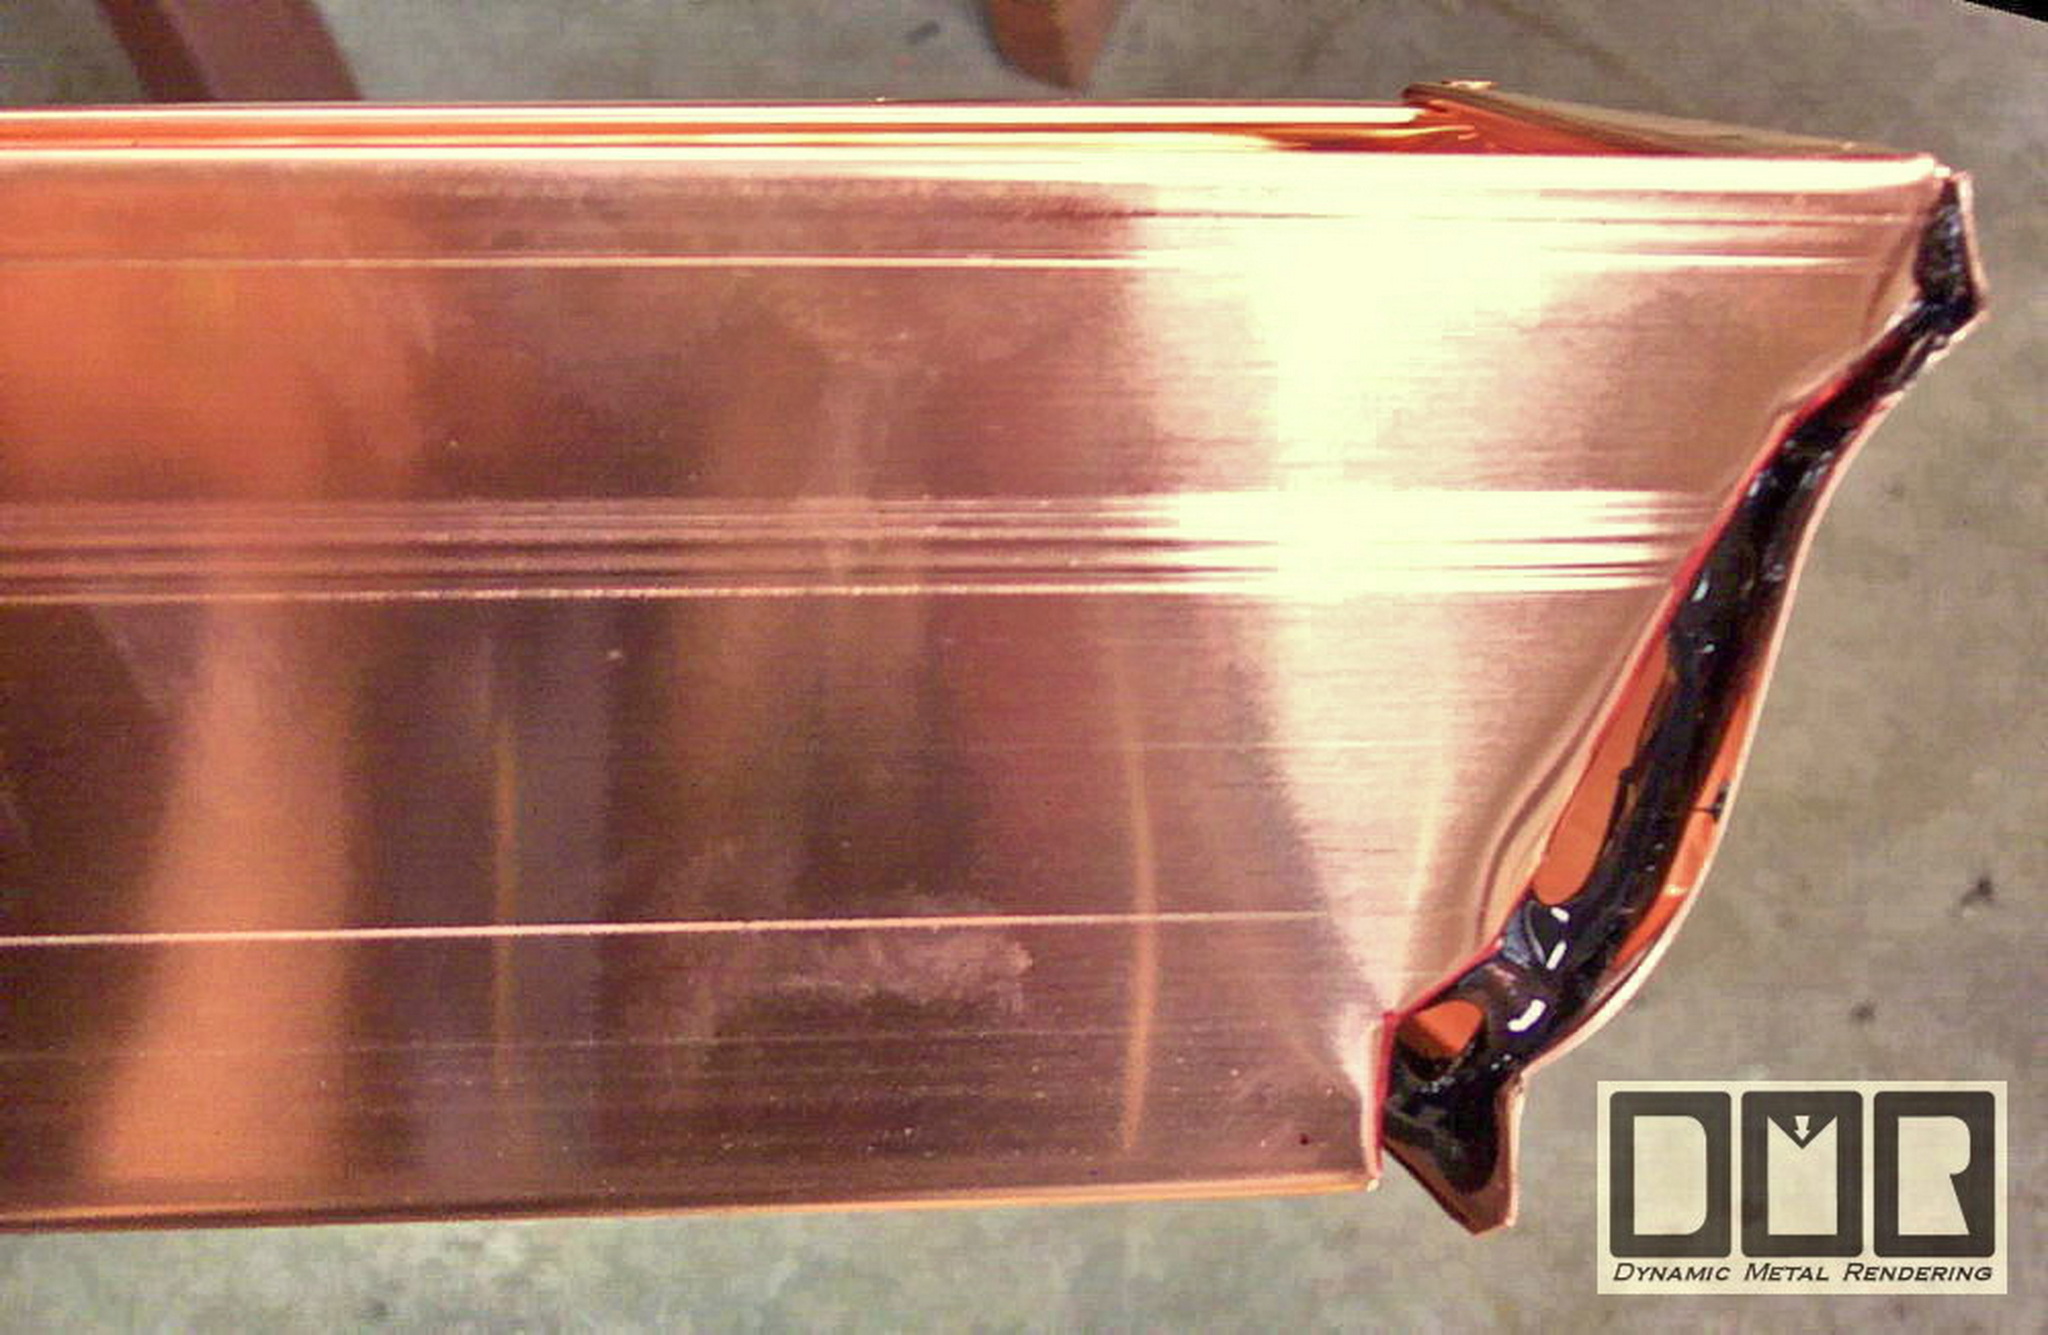
Endcap & Outlet Prep
The Kistler Copper Gutter Project Photo & Description Page #5
2325 A St., Forest Grove, Oregon
(11/04)

Updated 5 / 2013

Company
Profile
Aluminum
Gutters
Copper
Gutters
Custom
Work
Award &
Referrals
Personal
Ethics

Our Contact
Information

.

Remember you can click on each pictures below for a better view

Solder - V - Caulk & Rivets

I use a better caulk than all the other gutter installers.  They use to use a lead based solder to seal gutters. Soldering still is a good way to seal water pipes that can be made with a very tight clearances, with much less room for any expansion and contraction.  Although with the risk of open flame so near the wood structure of the house, the brittleness of this solder, and the new advanced caulks we have today, we believe it is best to caulk and rivet the seams together, instead of soldering them.

Below you will read about and see how I join and seal gutters together.

.

Standard Endcaps

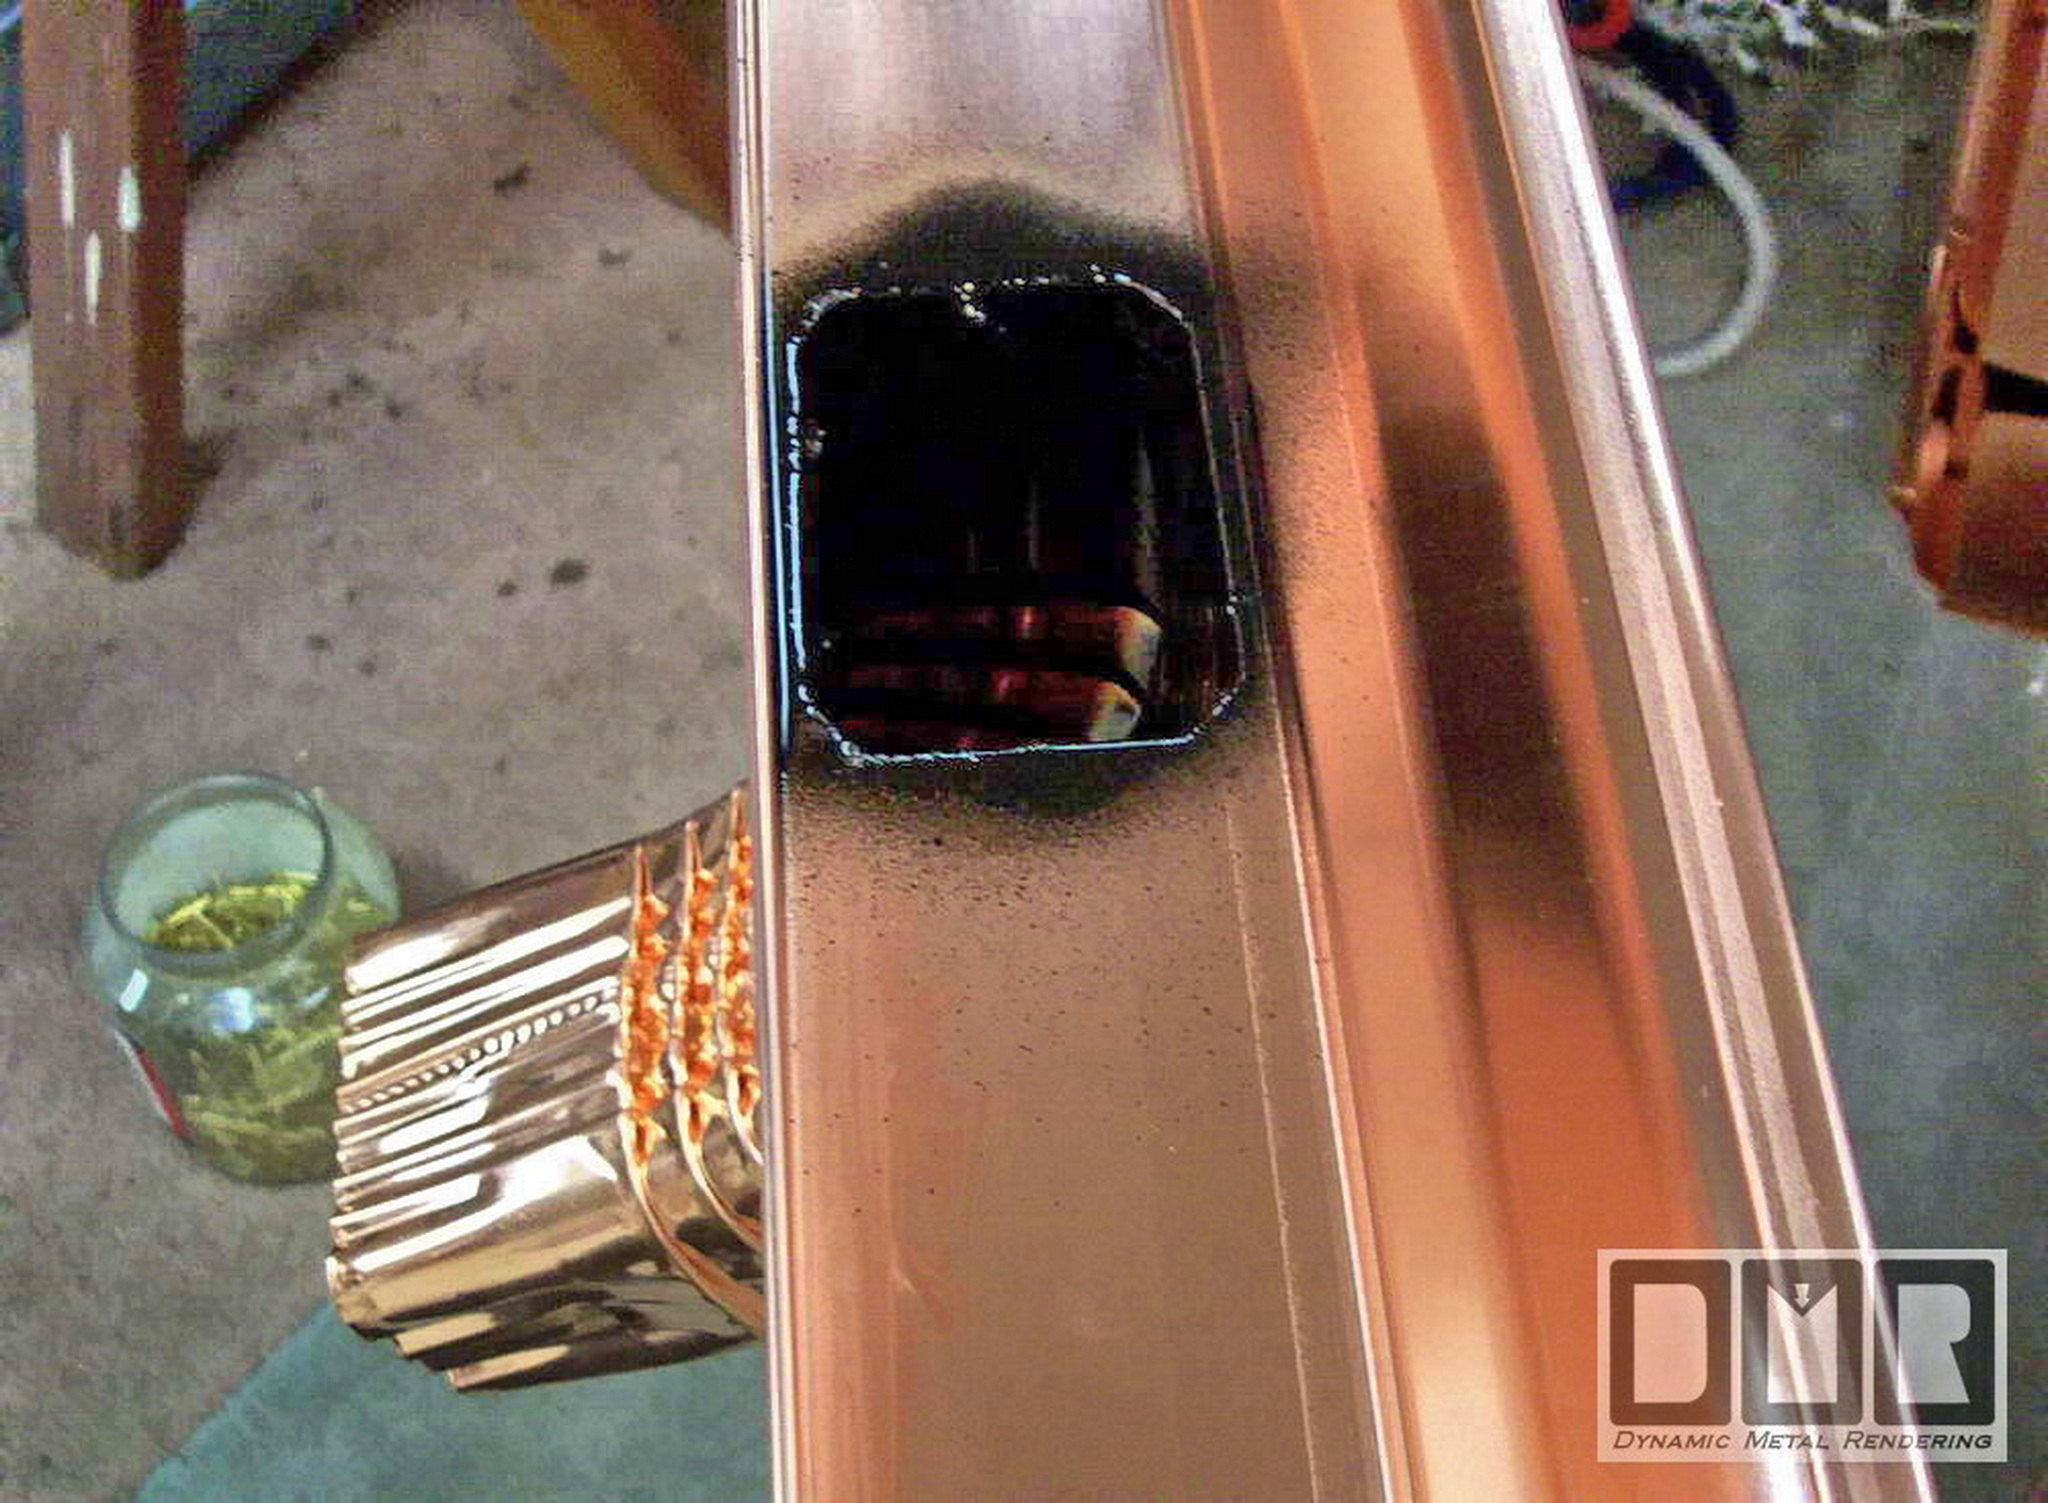
Below is an example of a standard simple press-on endcap.  It works just fine and goes on quick and easy, so this is what pretty much all other installers will use.  I have yet to see or hear of any one else who is willing to offer the custom mitered endcap that I do on most copper gutter jobs, shown below in the next section.  I used this standard endcap since this end of the gutter butts up against the siding, so a mitered endcap would have been a waste to do on this end.  The cost was $9 for the standard press-on endcap, caulk, paint, and the labor to seal and crimp it in place.

Here is how it is done:

Make sure the end is cut off straight

Press on the preformed endcap over
the end of the gutter

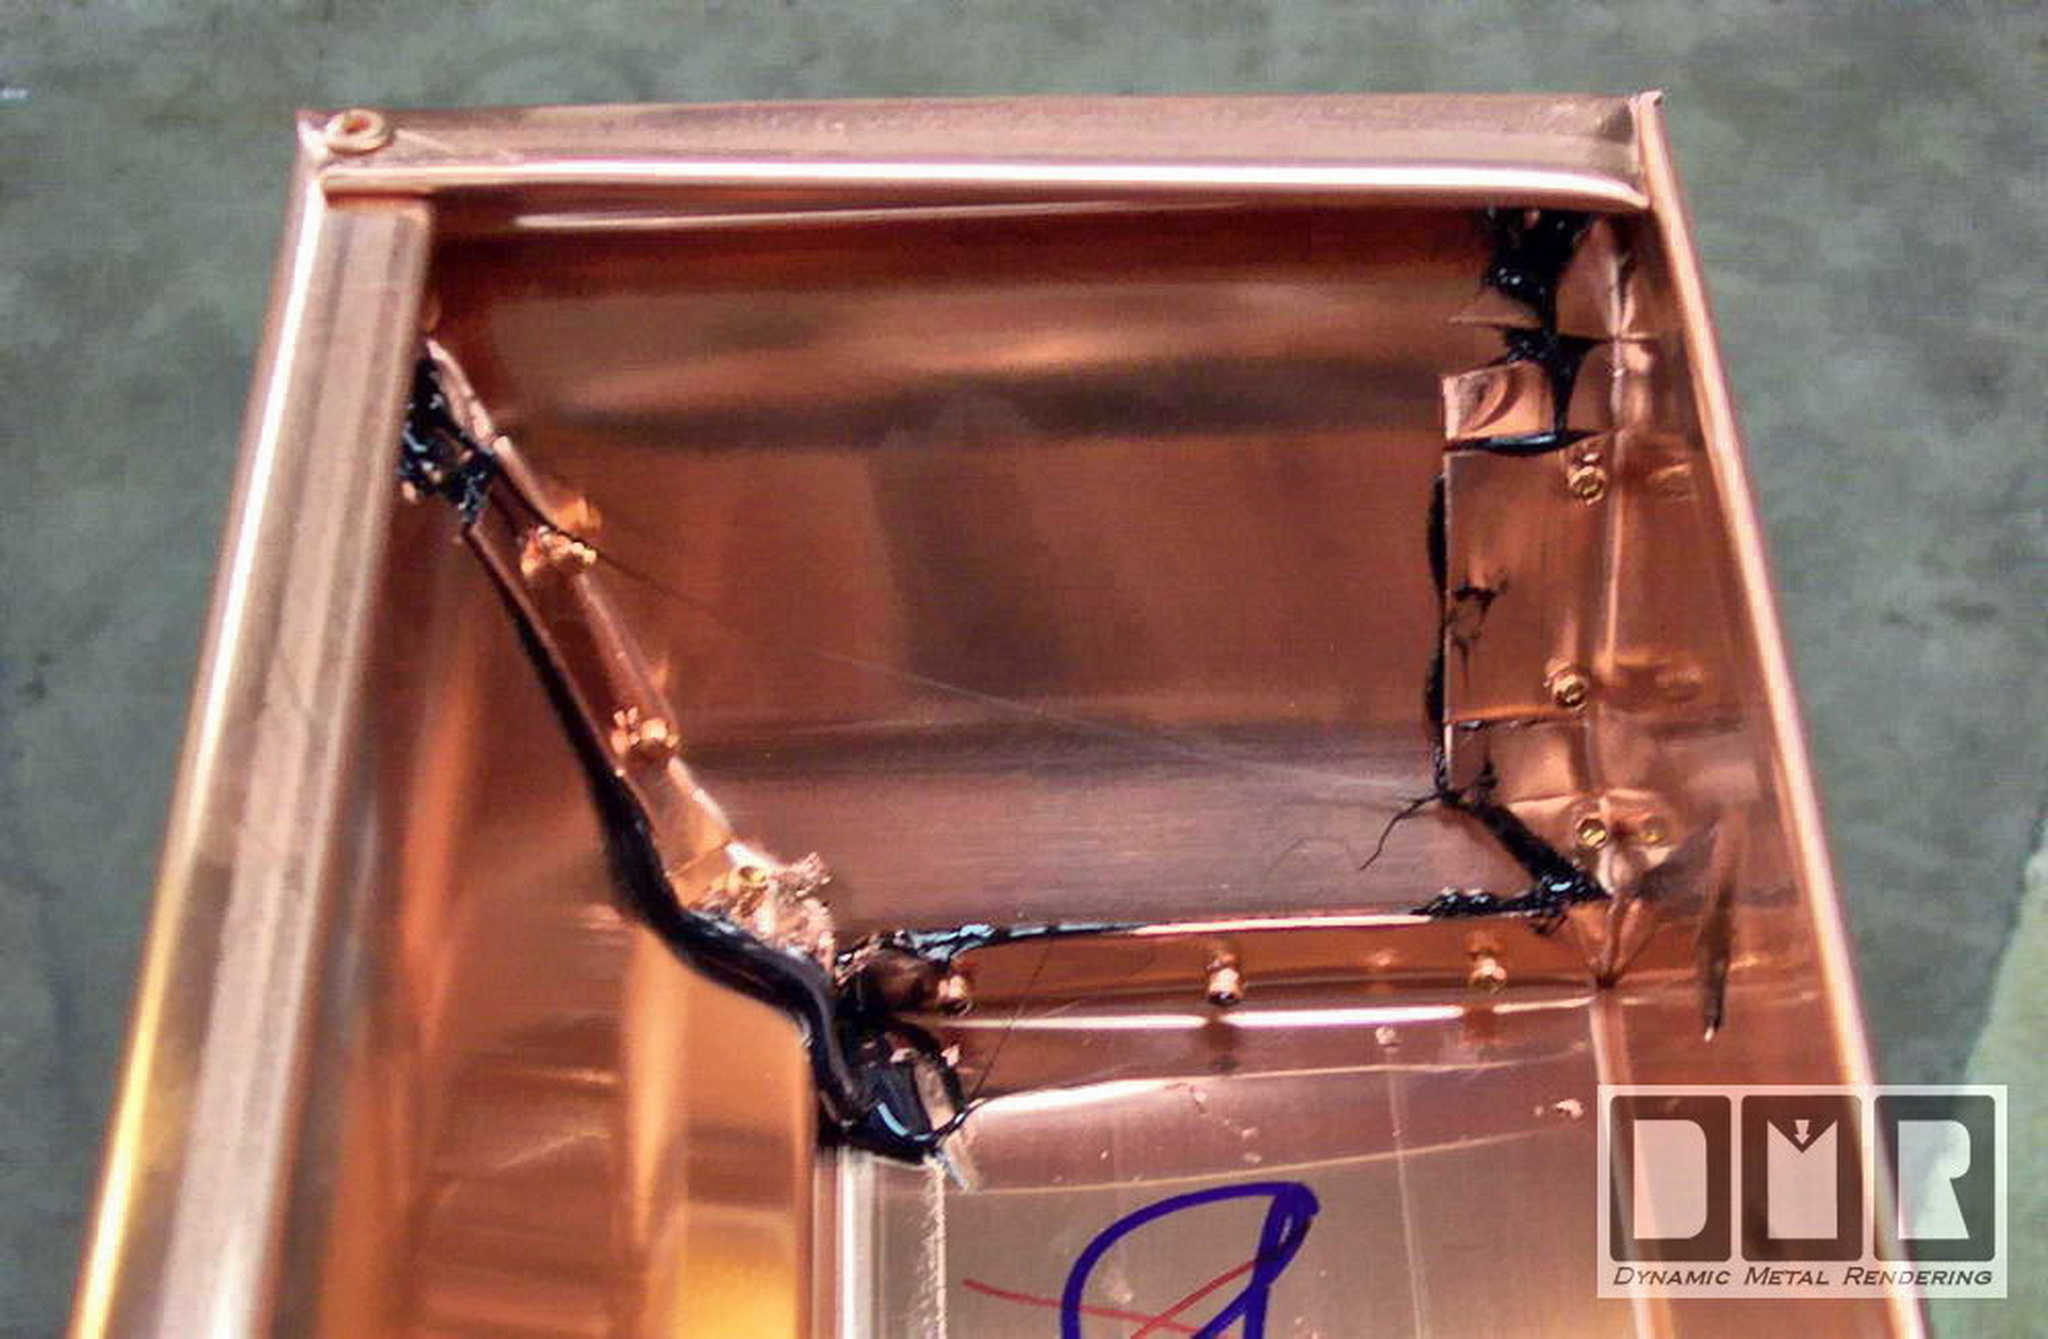
Here it is from the inside

Run a bead of caulk into this seam
and press it in deep with a finger

Crush the outer flanges with pliers
or a 3" seamer tool, and then make
these 6 crimps to lock it on

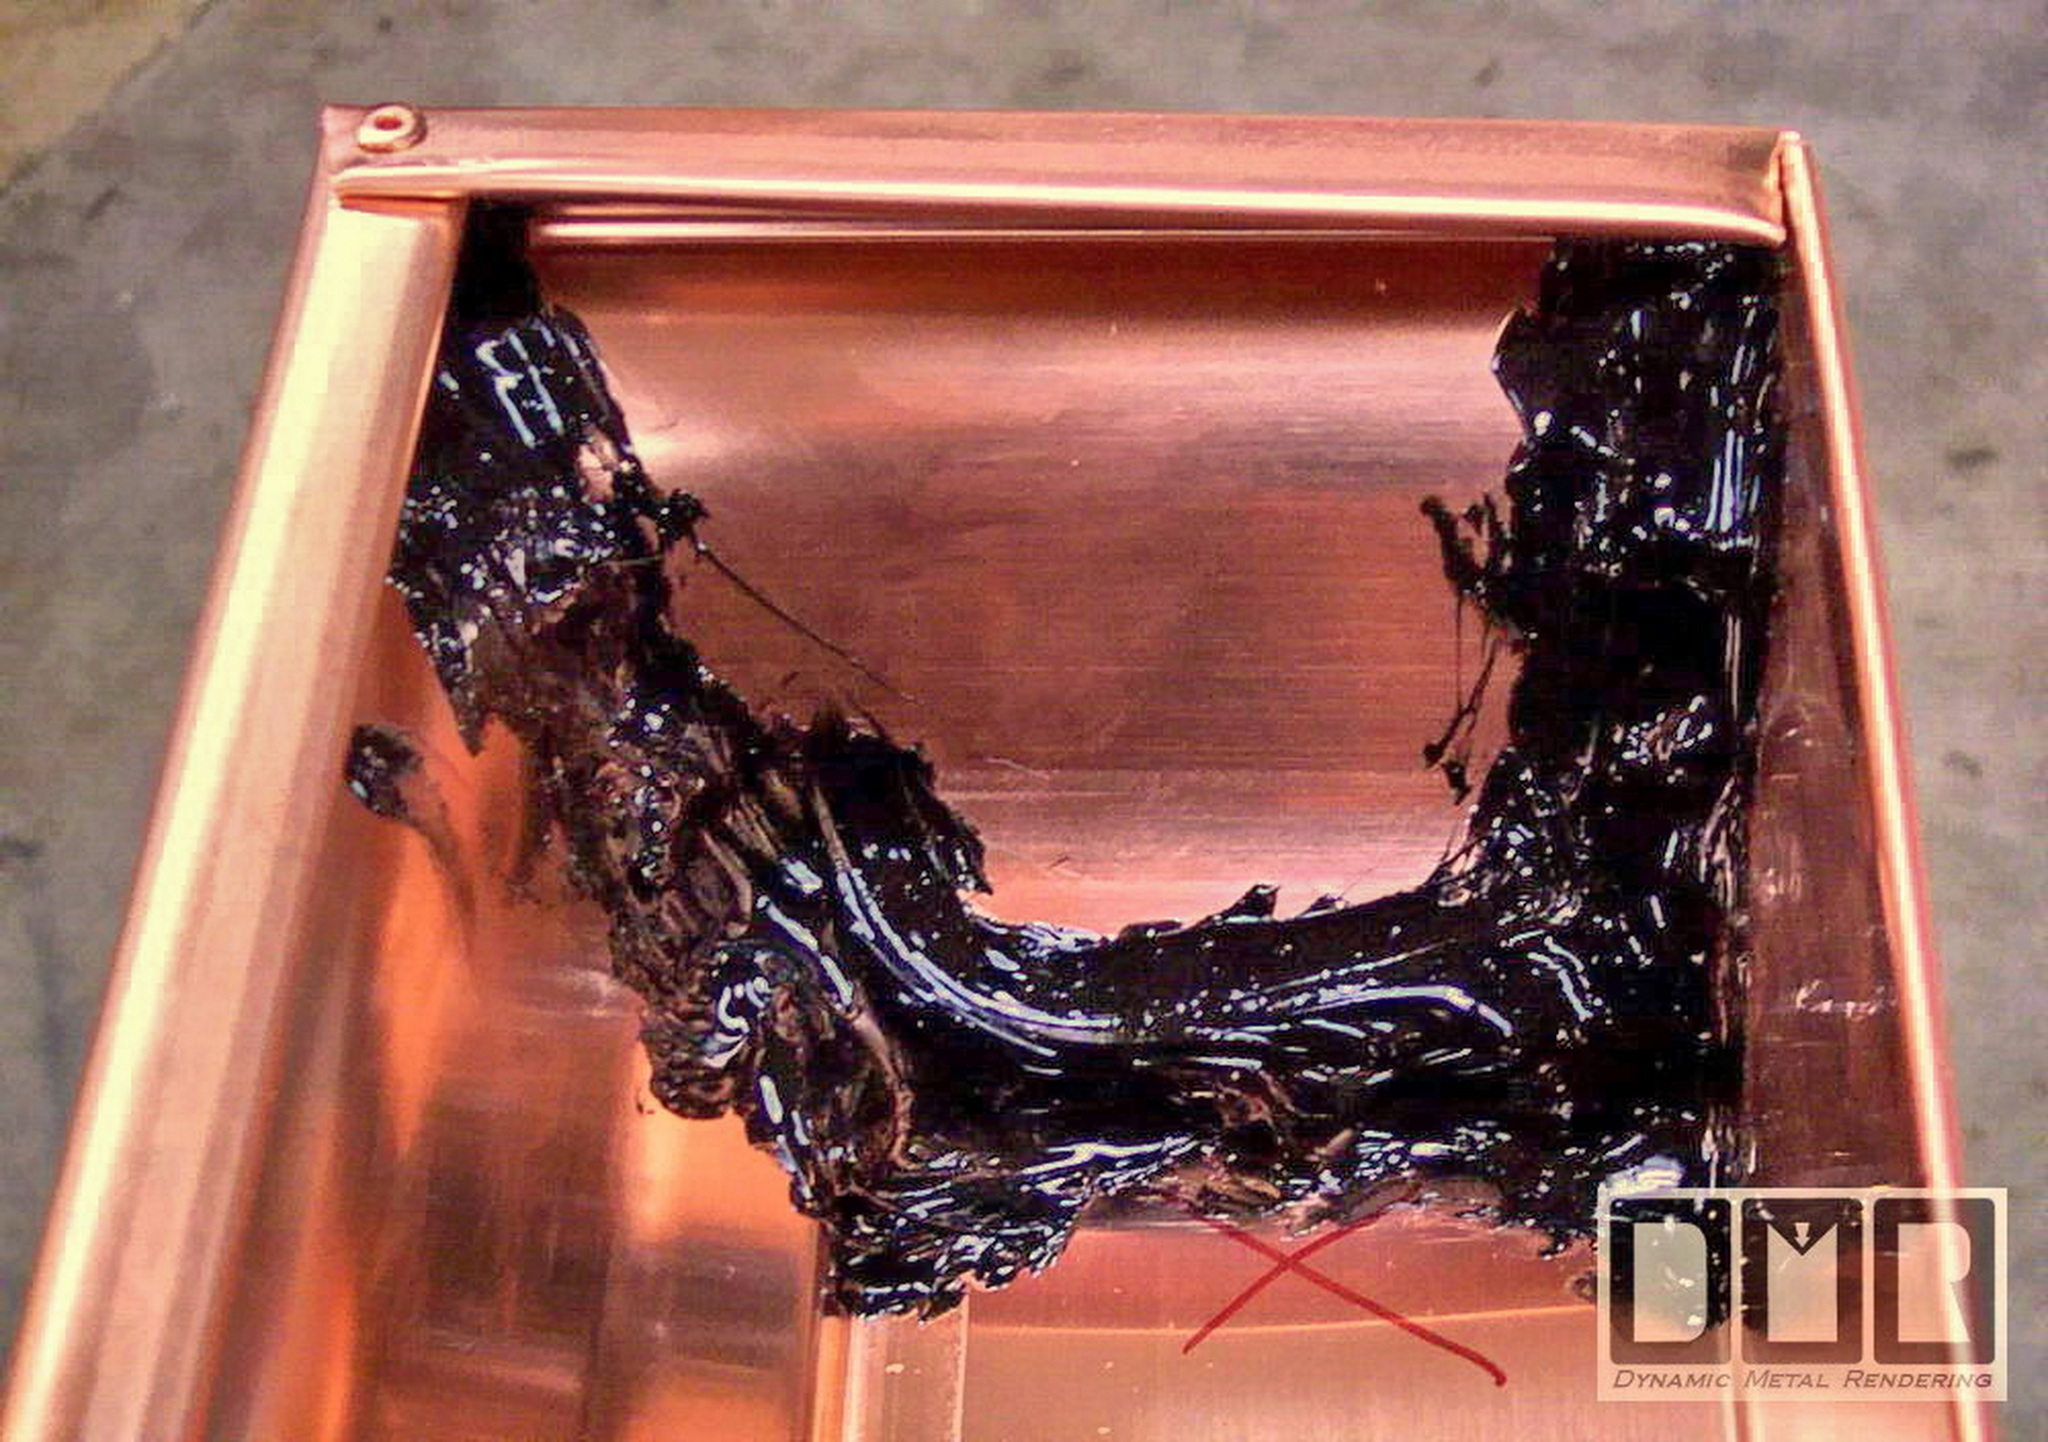
Spray some dark paint over the caulk
inside the gutter to shield it from the sun
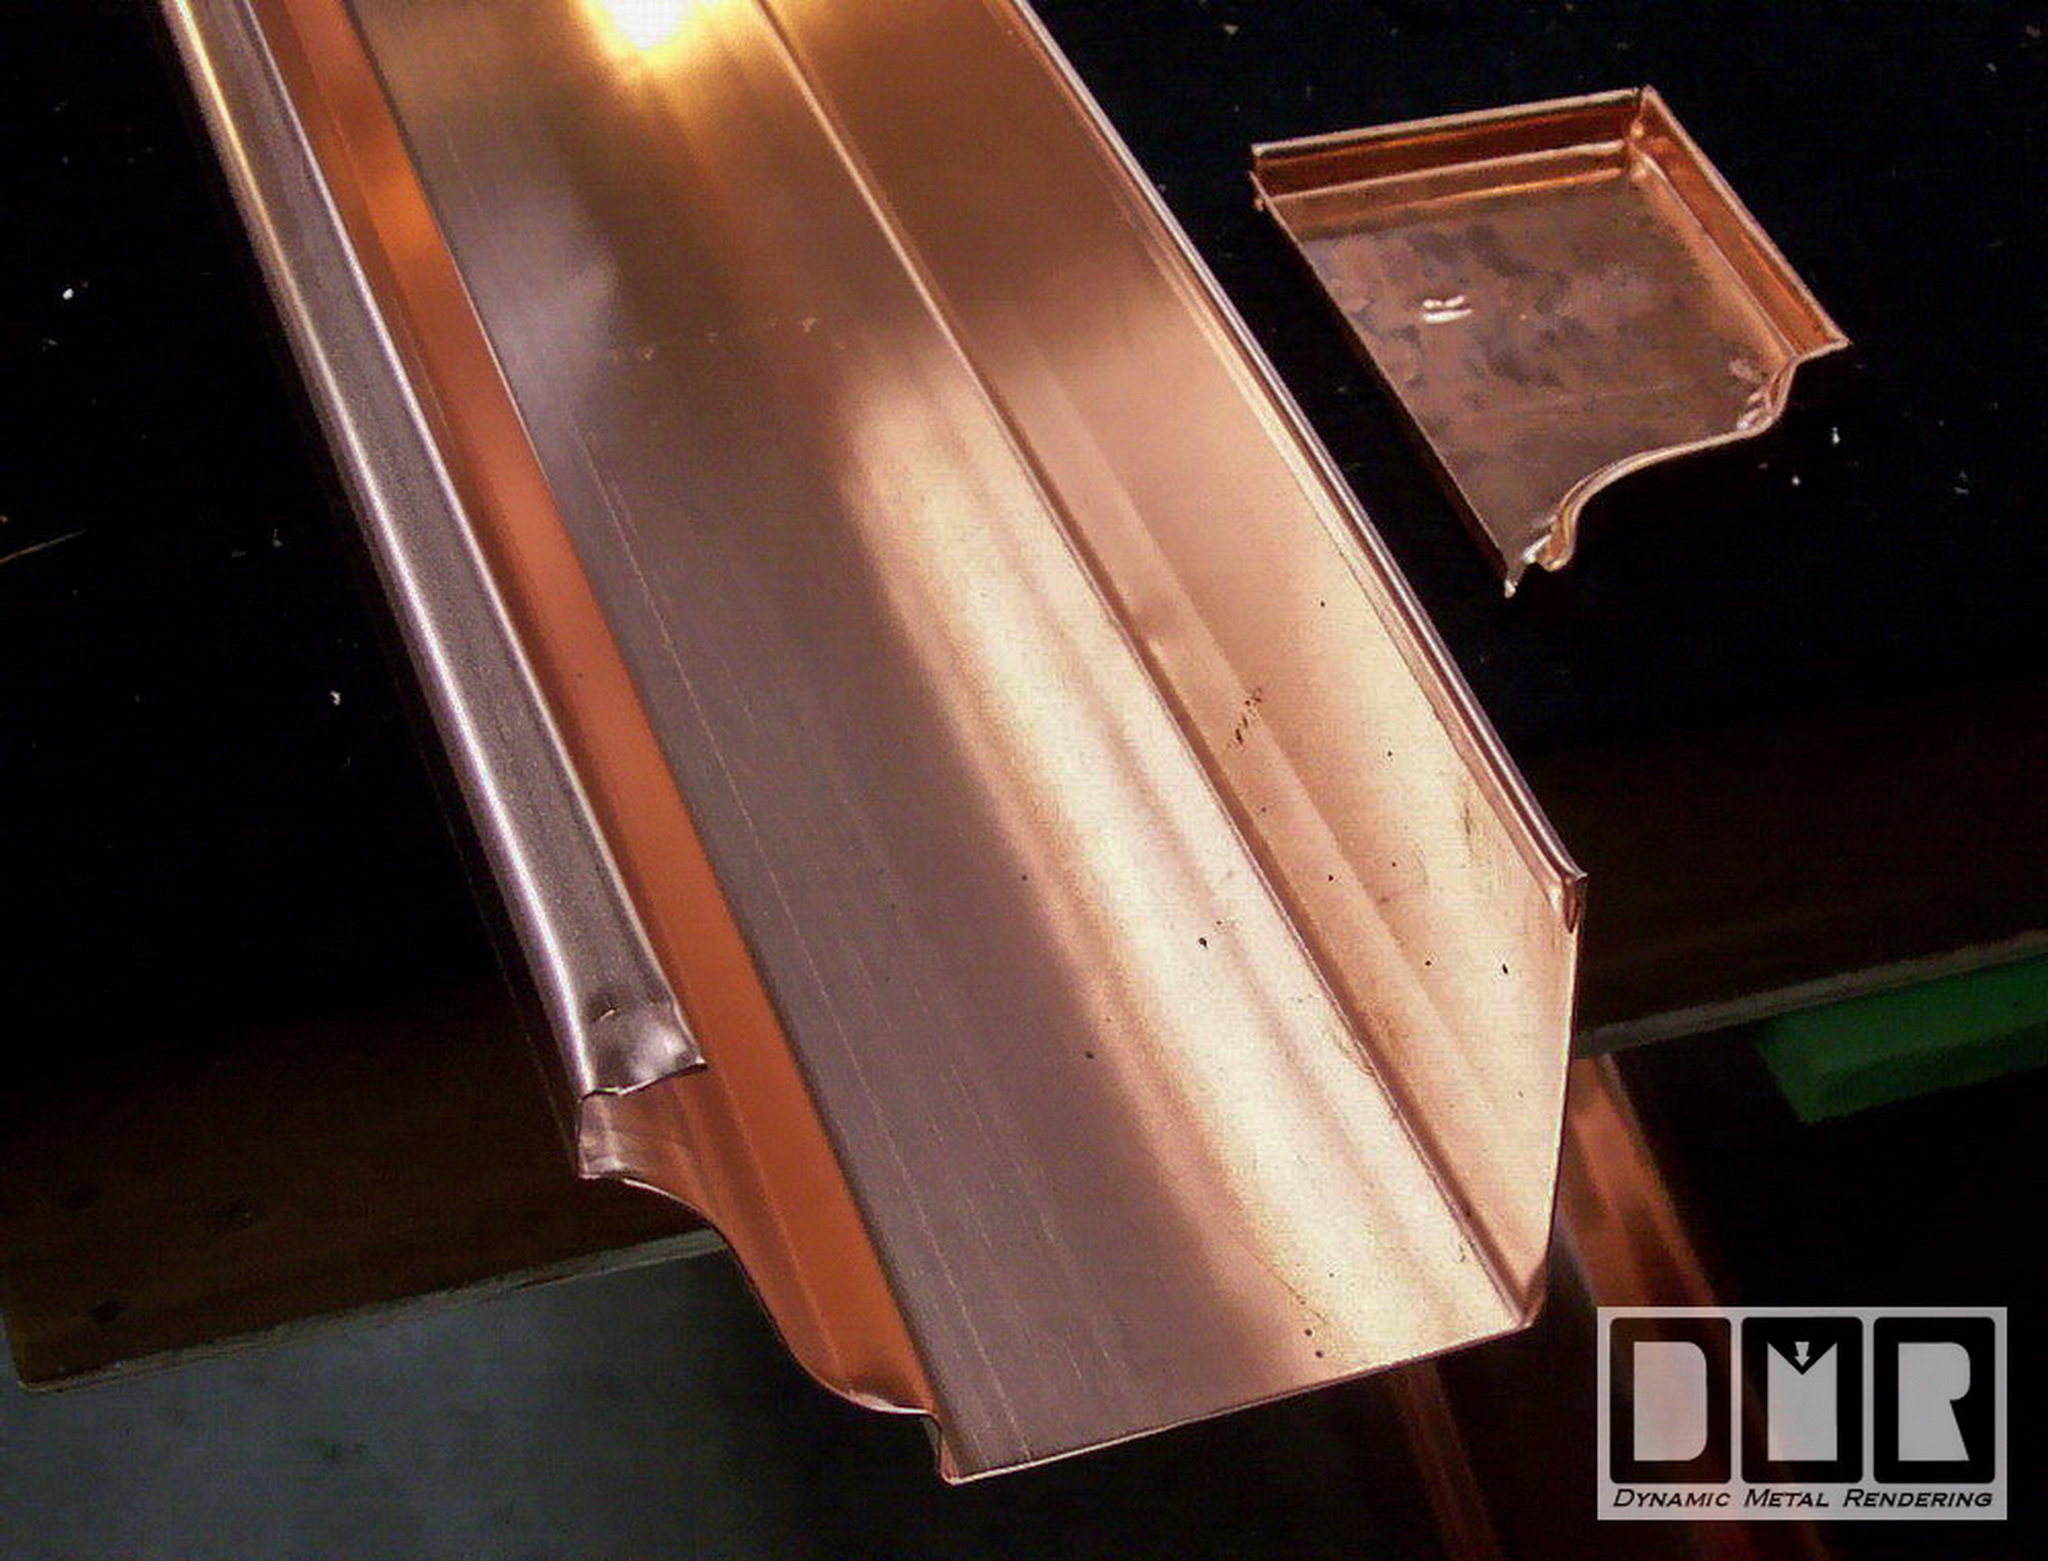
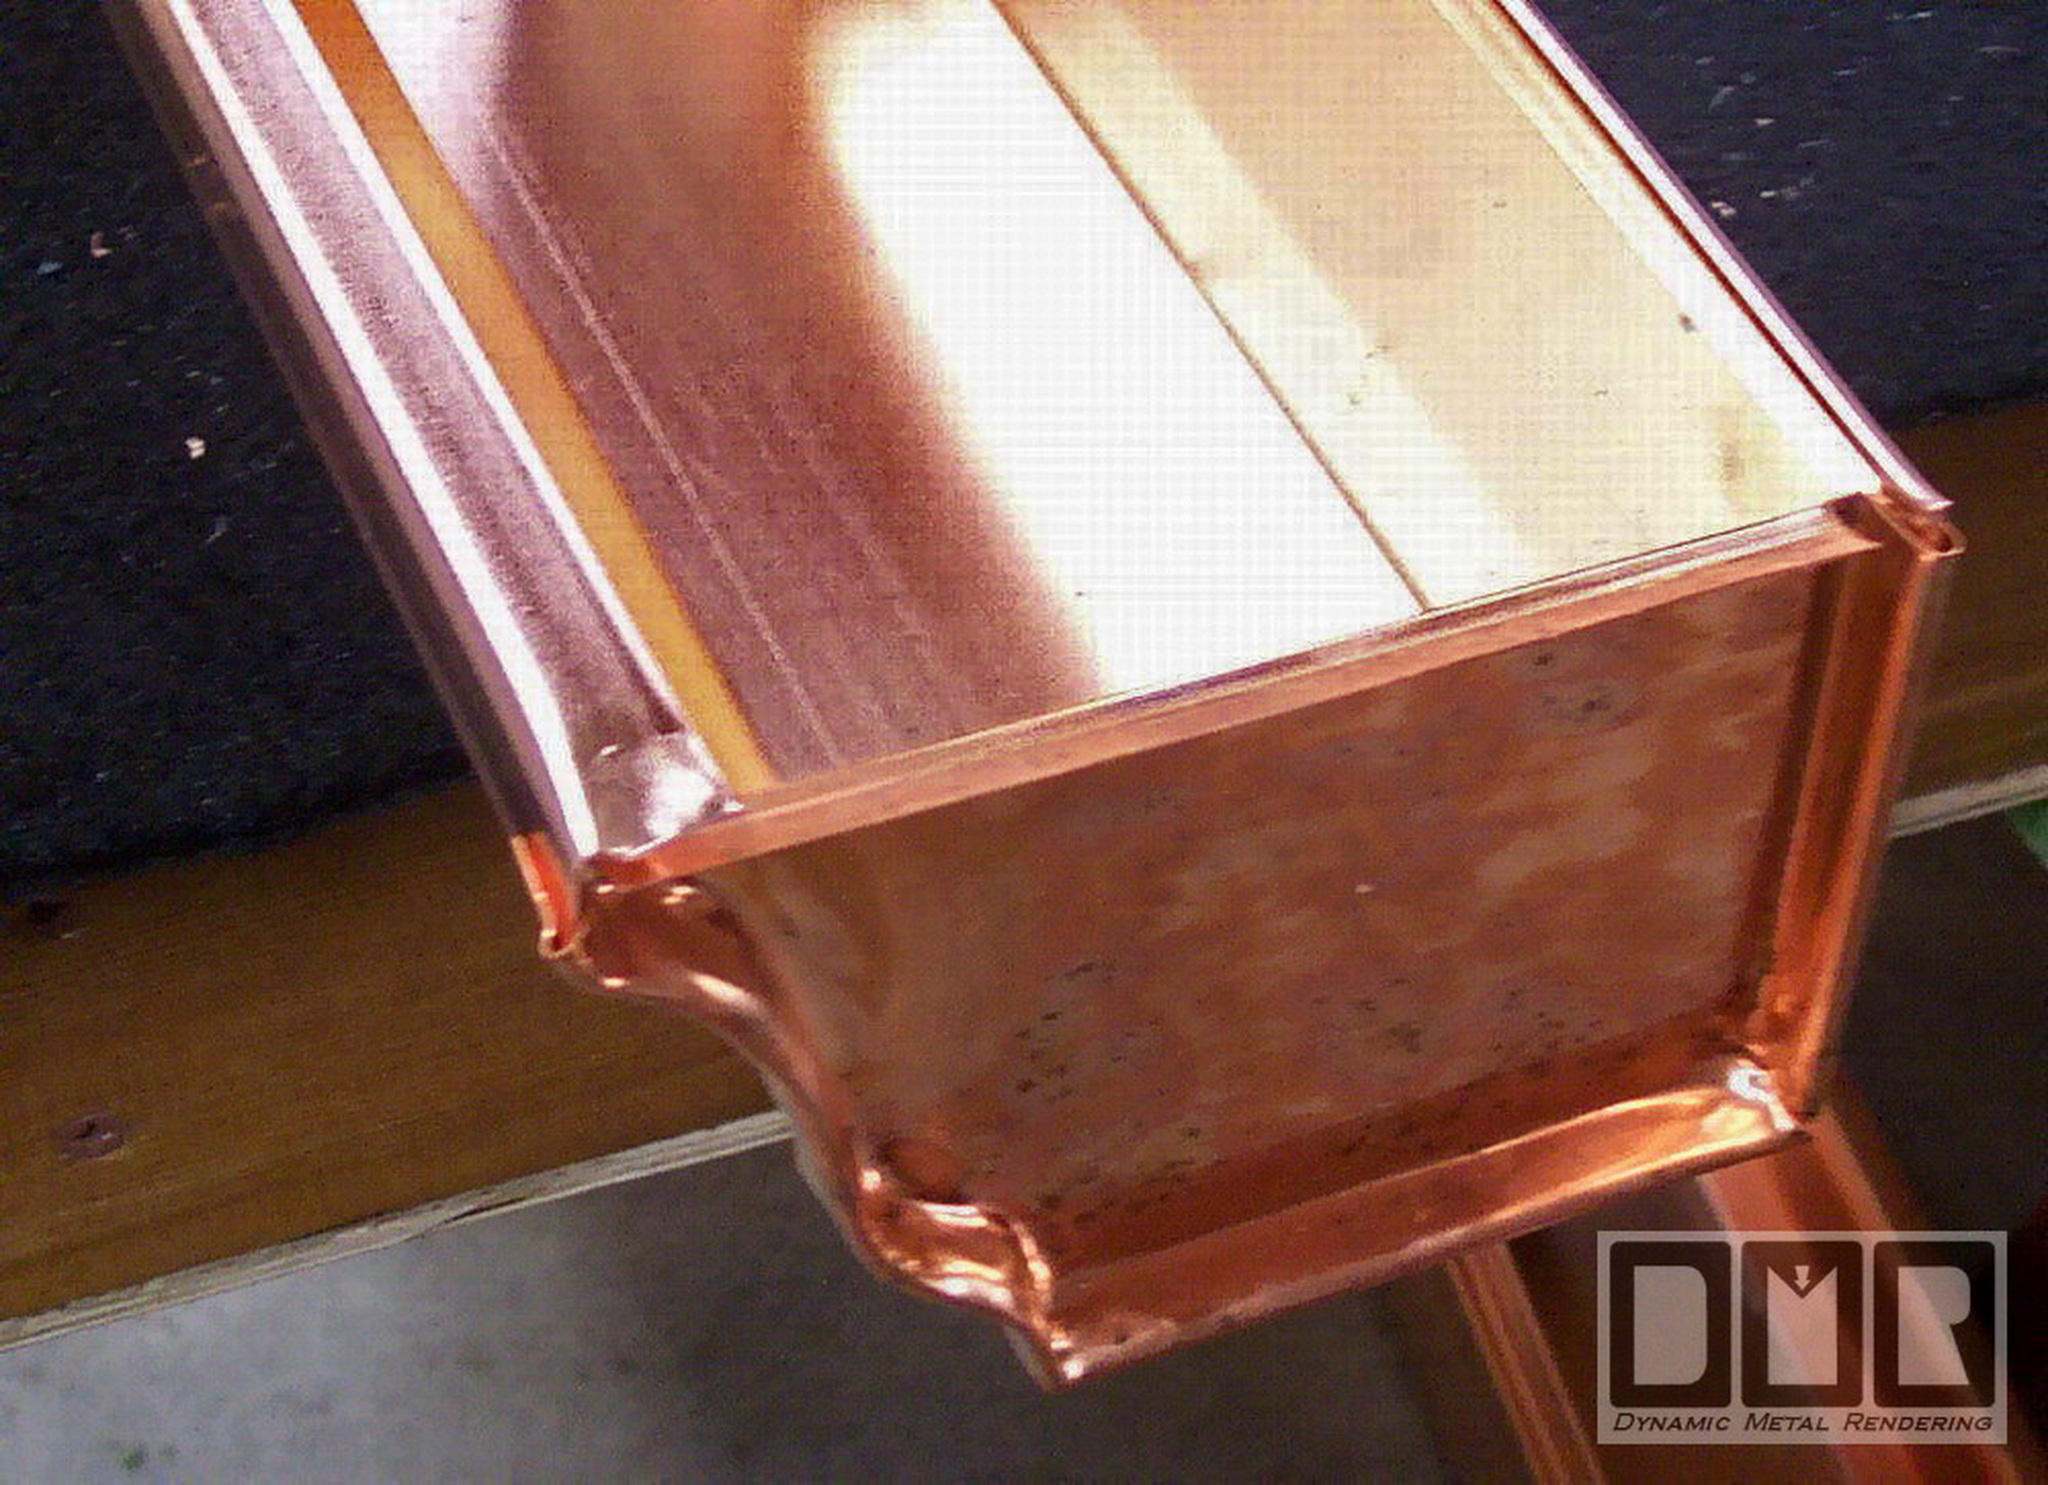
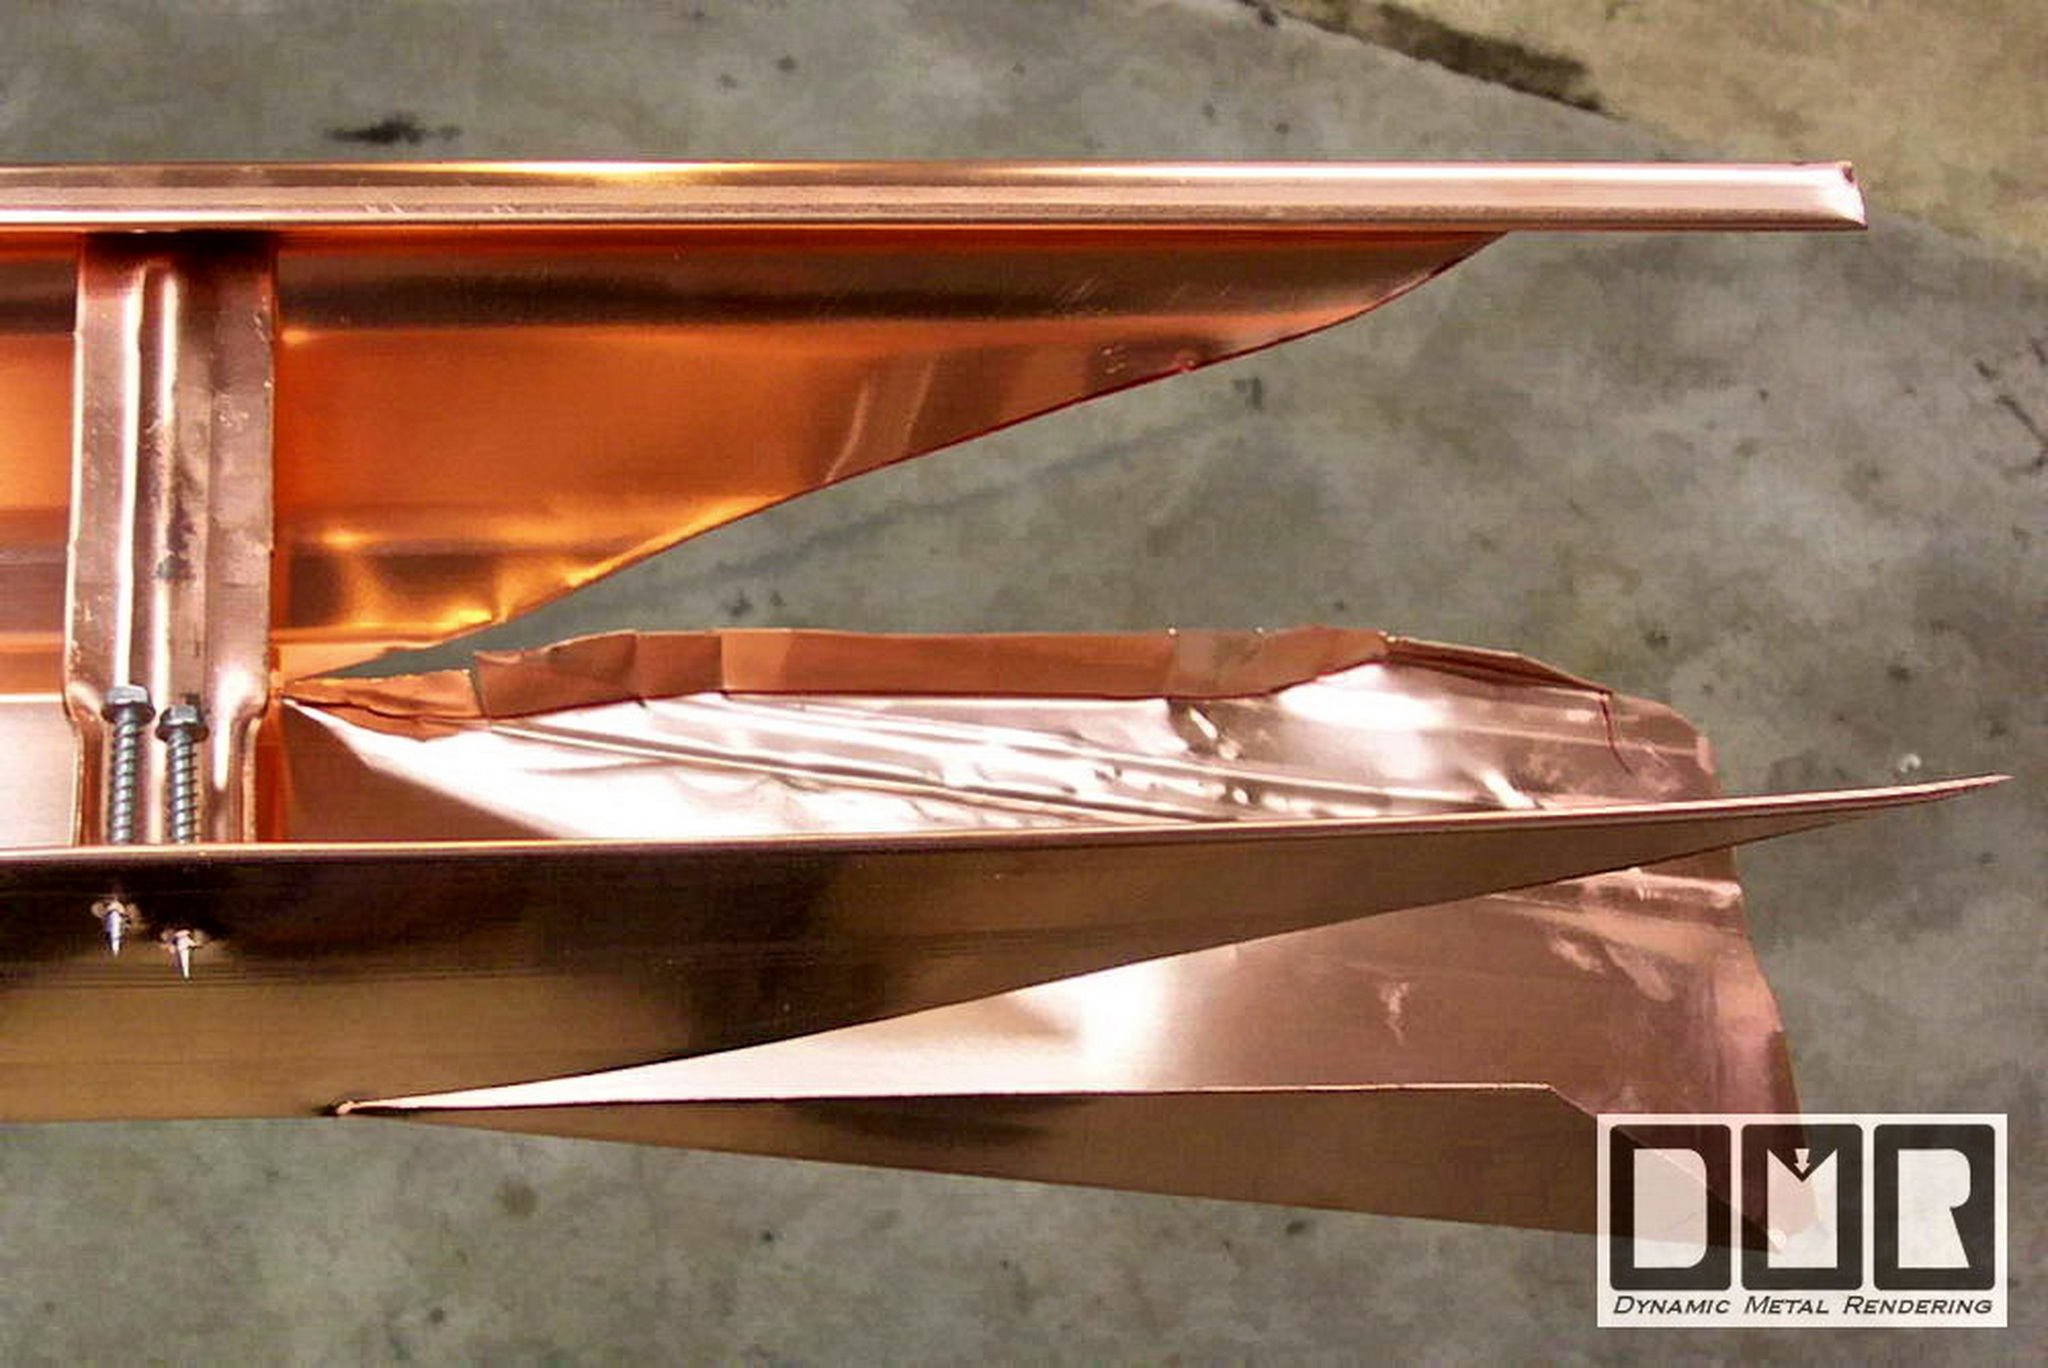
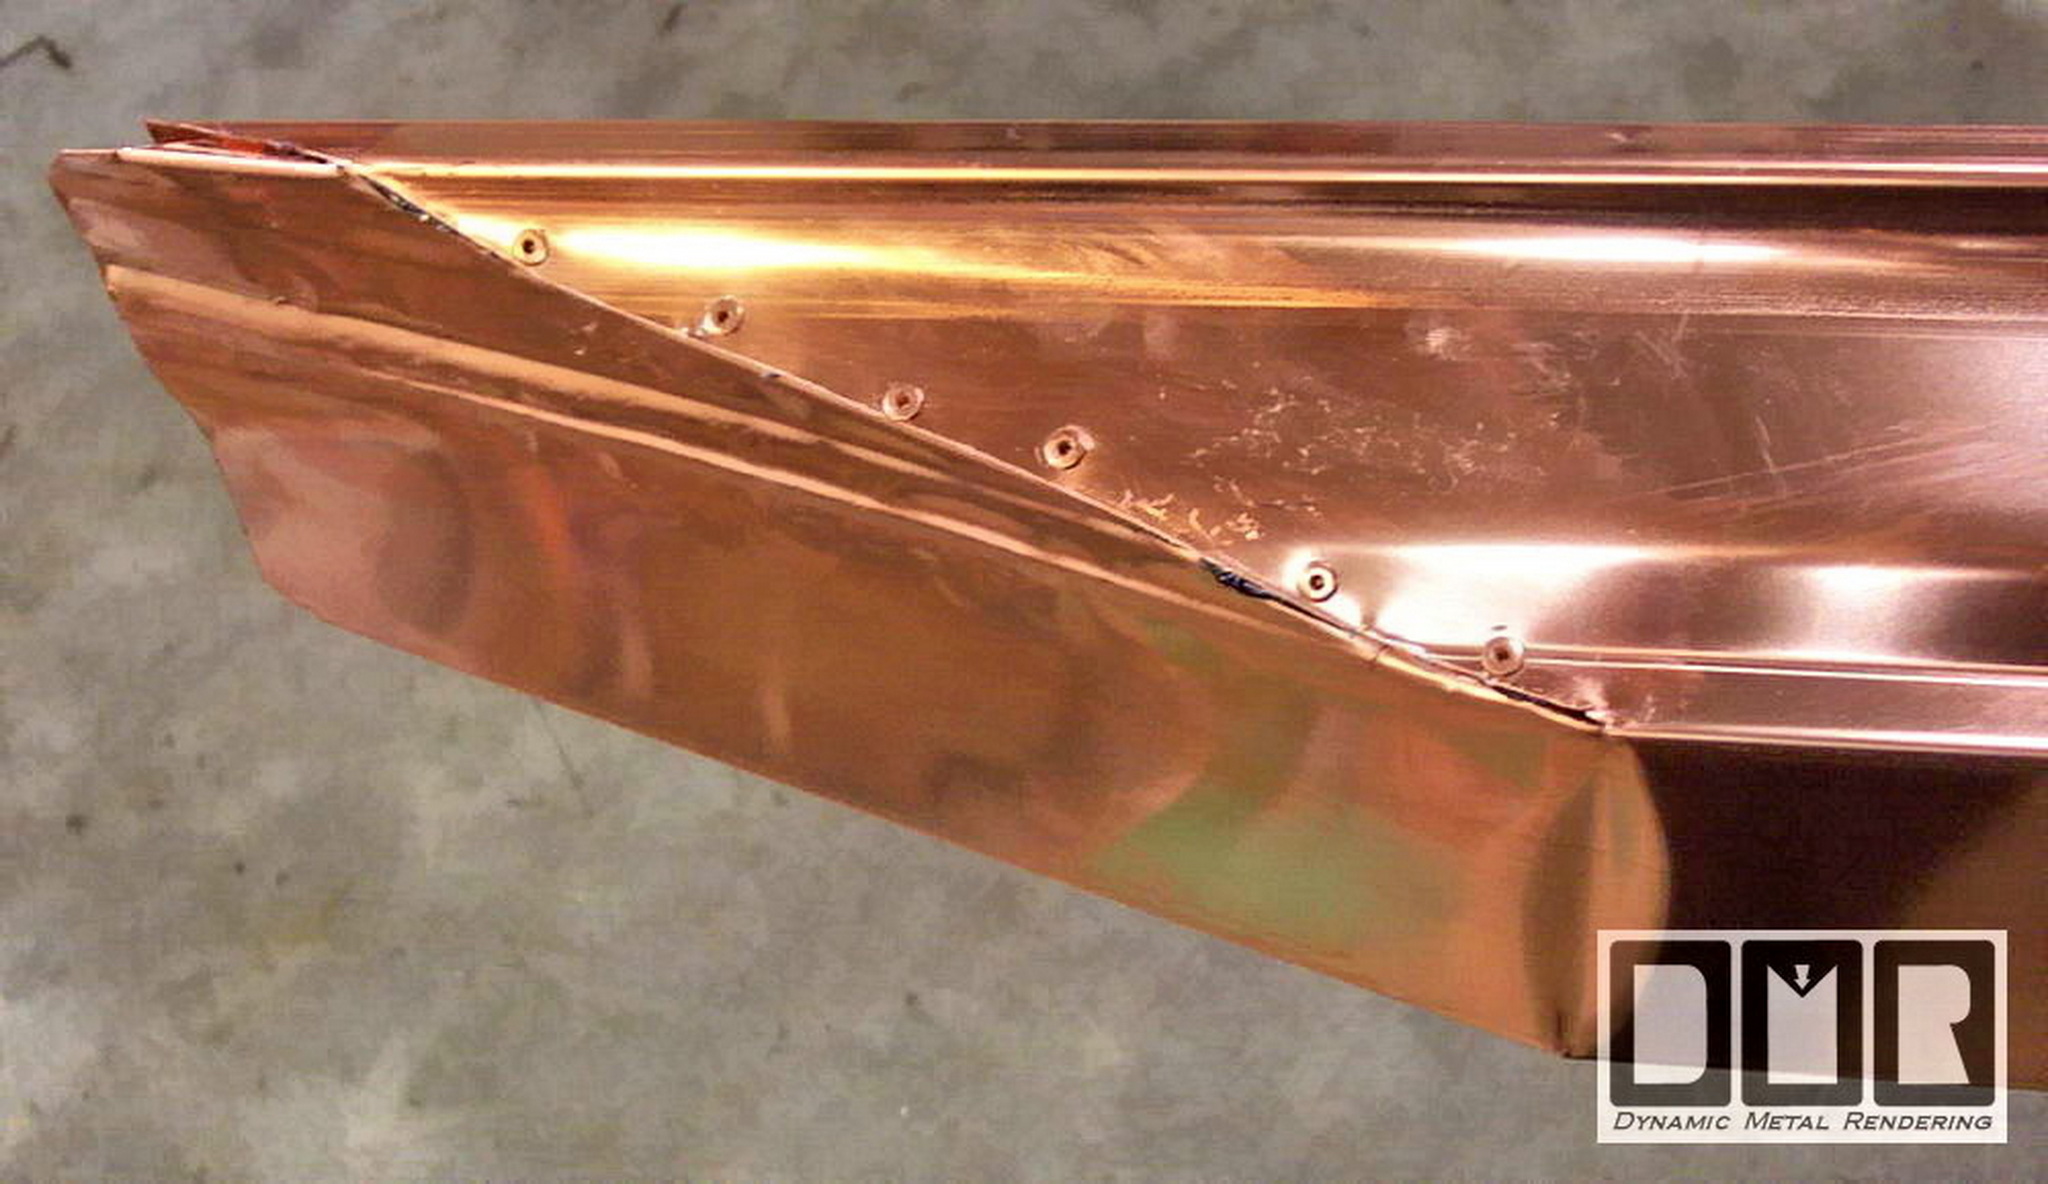
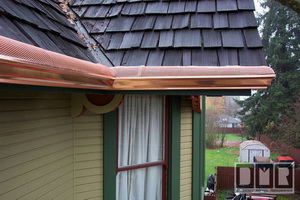
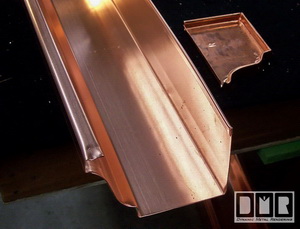
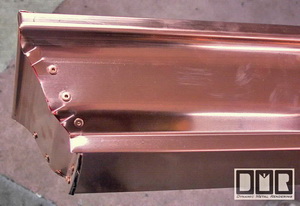
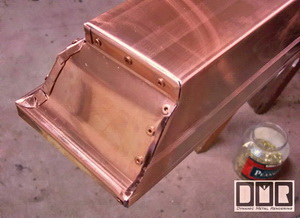
Mitered Endcaps

Below is an example of our custom mitered endcaps we do on most copper gutter jobs.  We do not try to claim it works any better than a simple push-on endcap shown above, but it sure does make the end of the gutters look a lot better.  It takes the same sort of effort and time as fabricating and sealing a corner, so I charged the same $35 extra labor for each one.  And there is the cost of the extra 5" of gutter run-out needed to make it, so that adds $3.75.  The final cost of our custom mitered endcap is $38.75, compared to the $9 of the standard press on endcap, so it is really a $29.75 difference per end.

Here is how it is done:

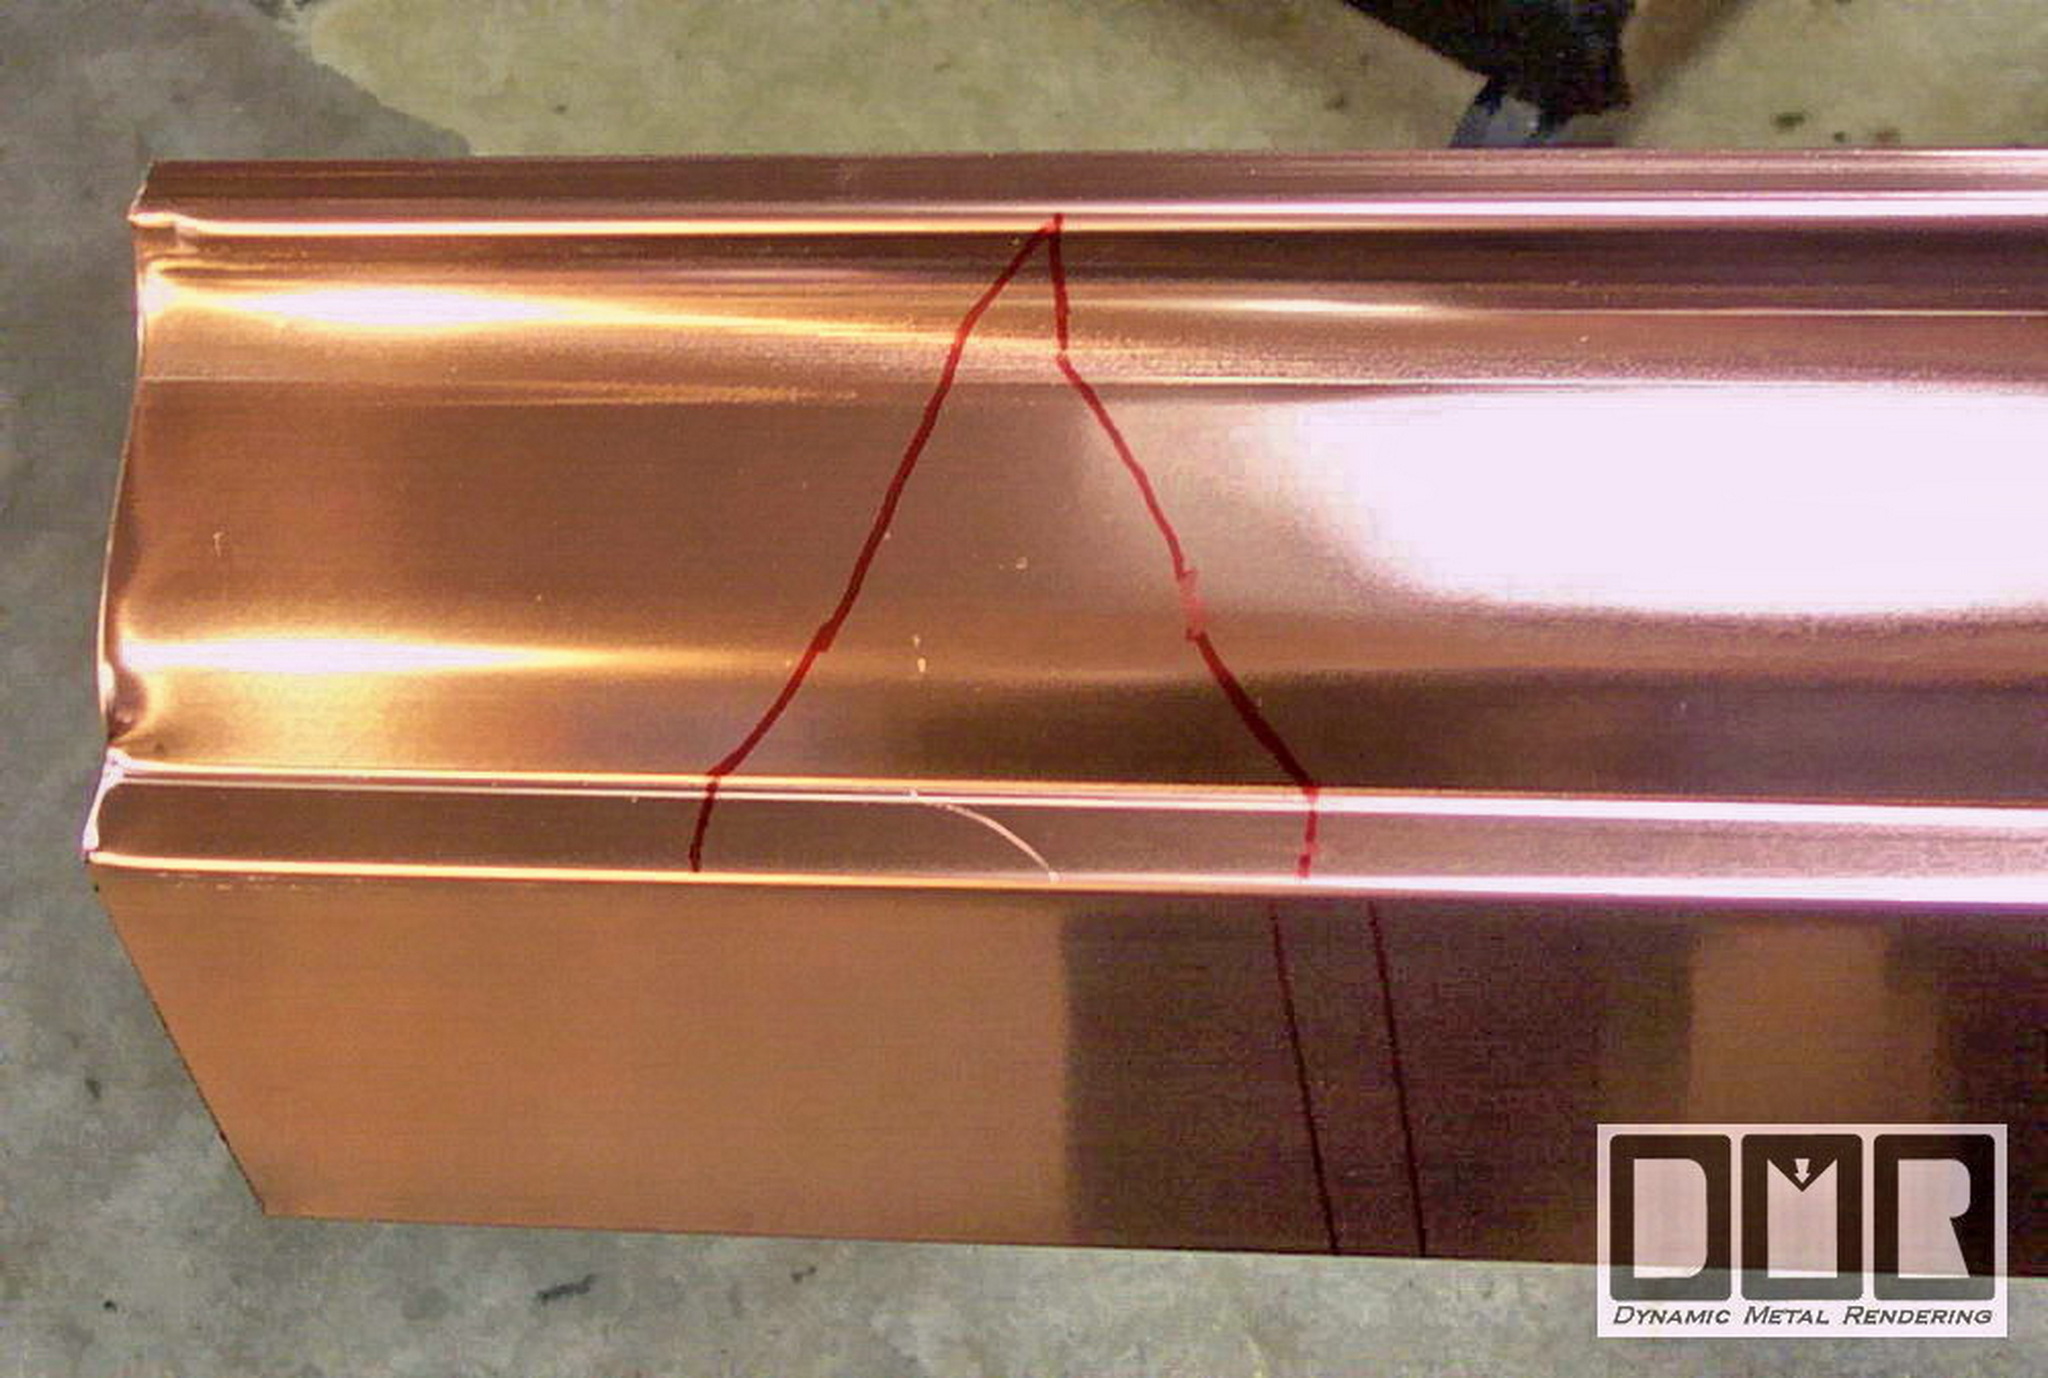
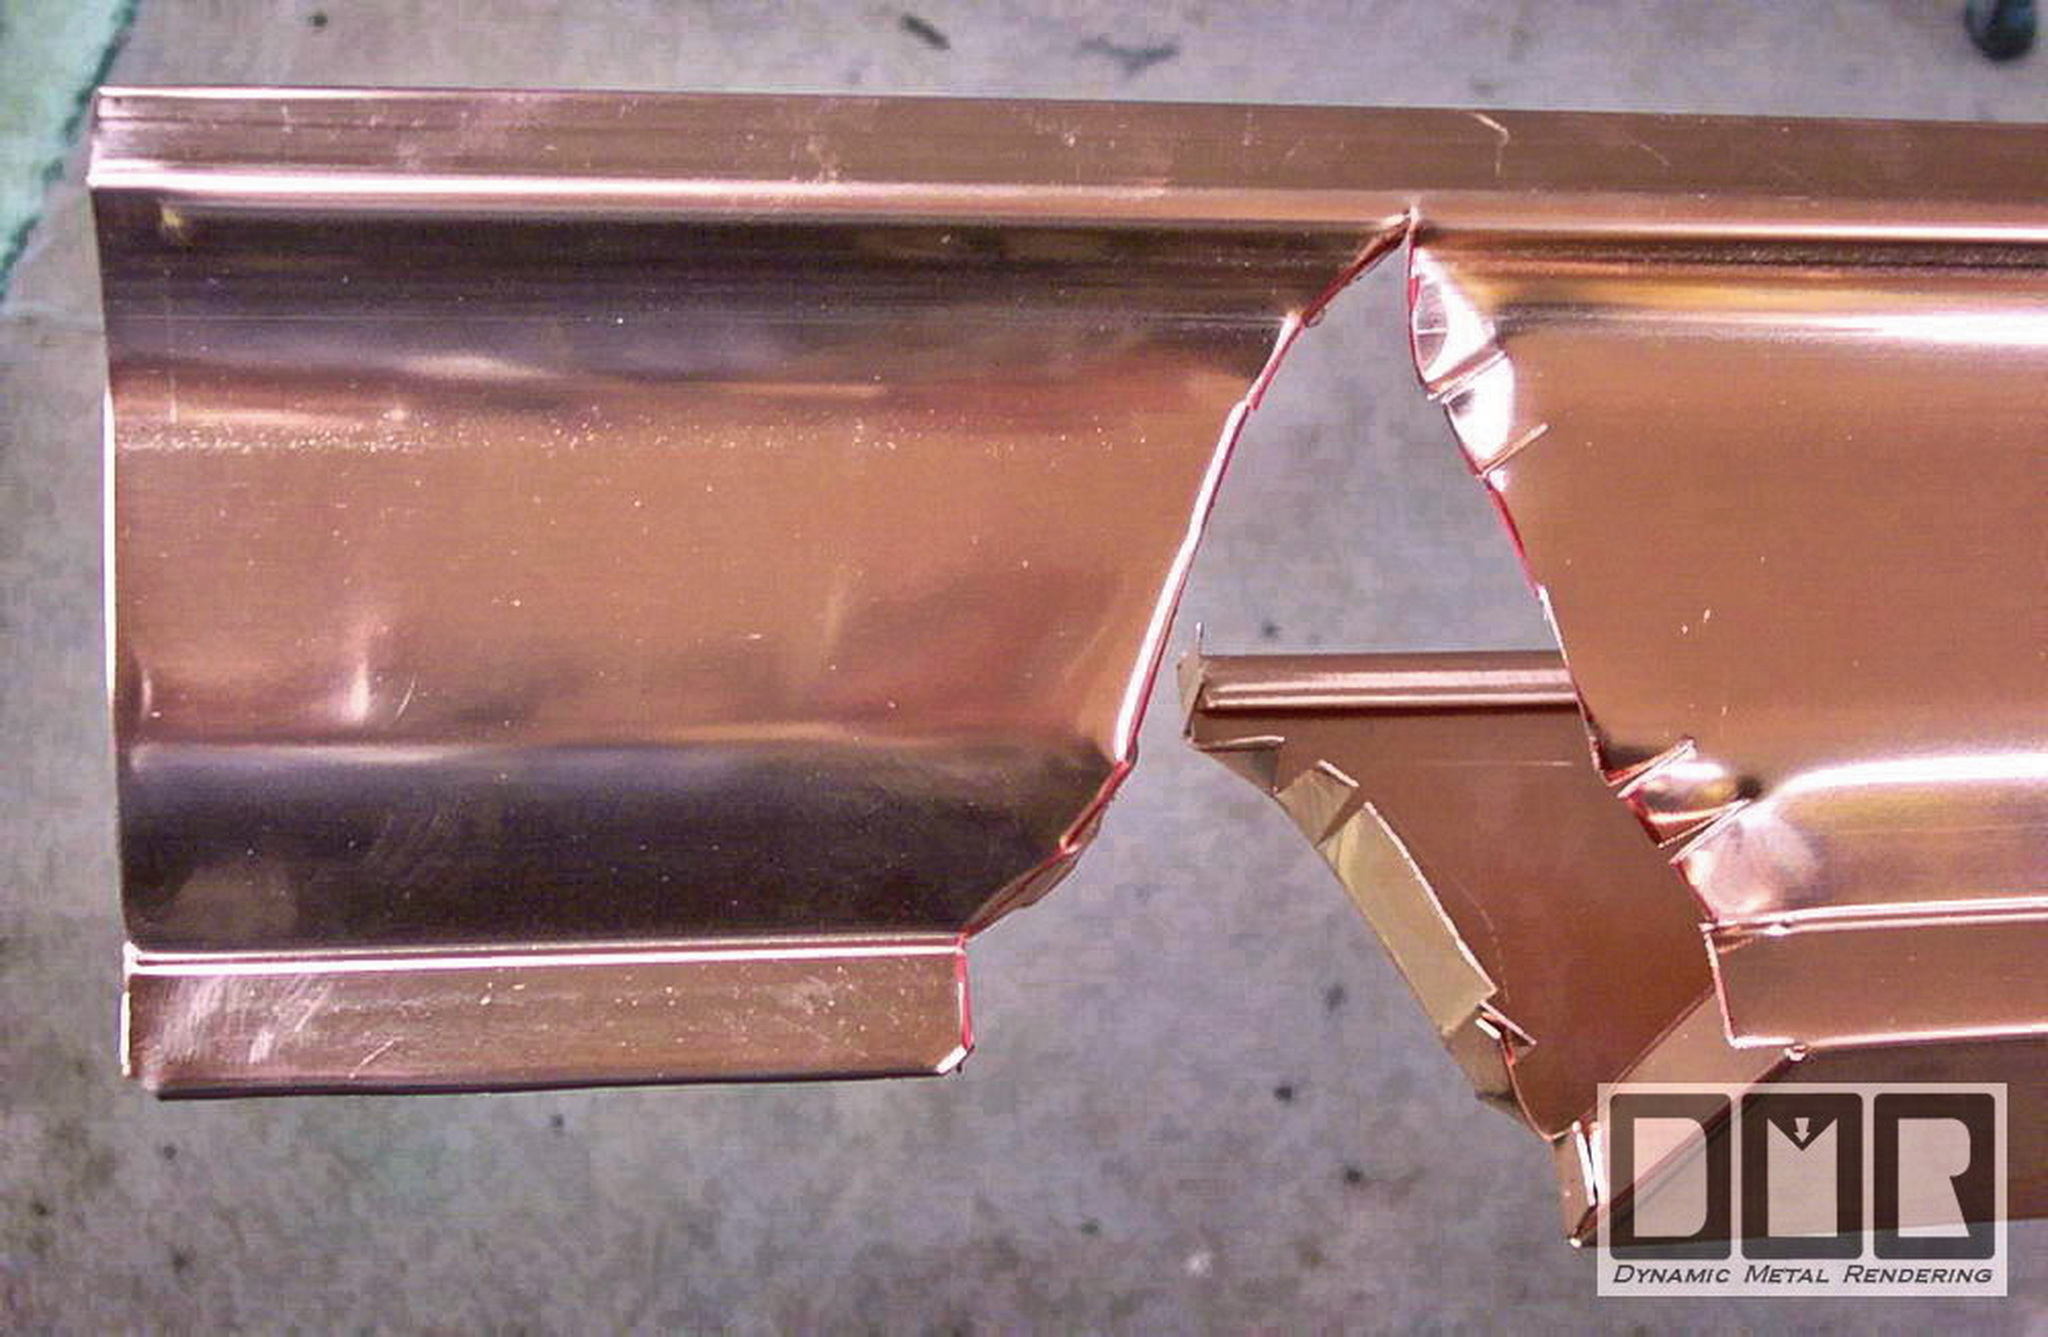
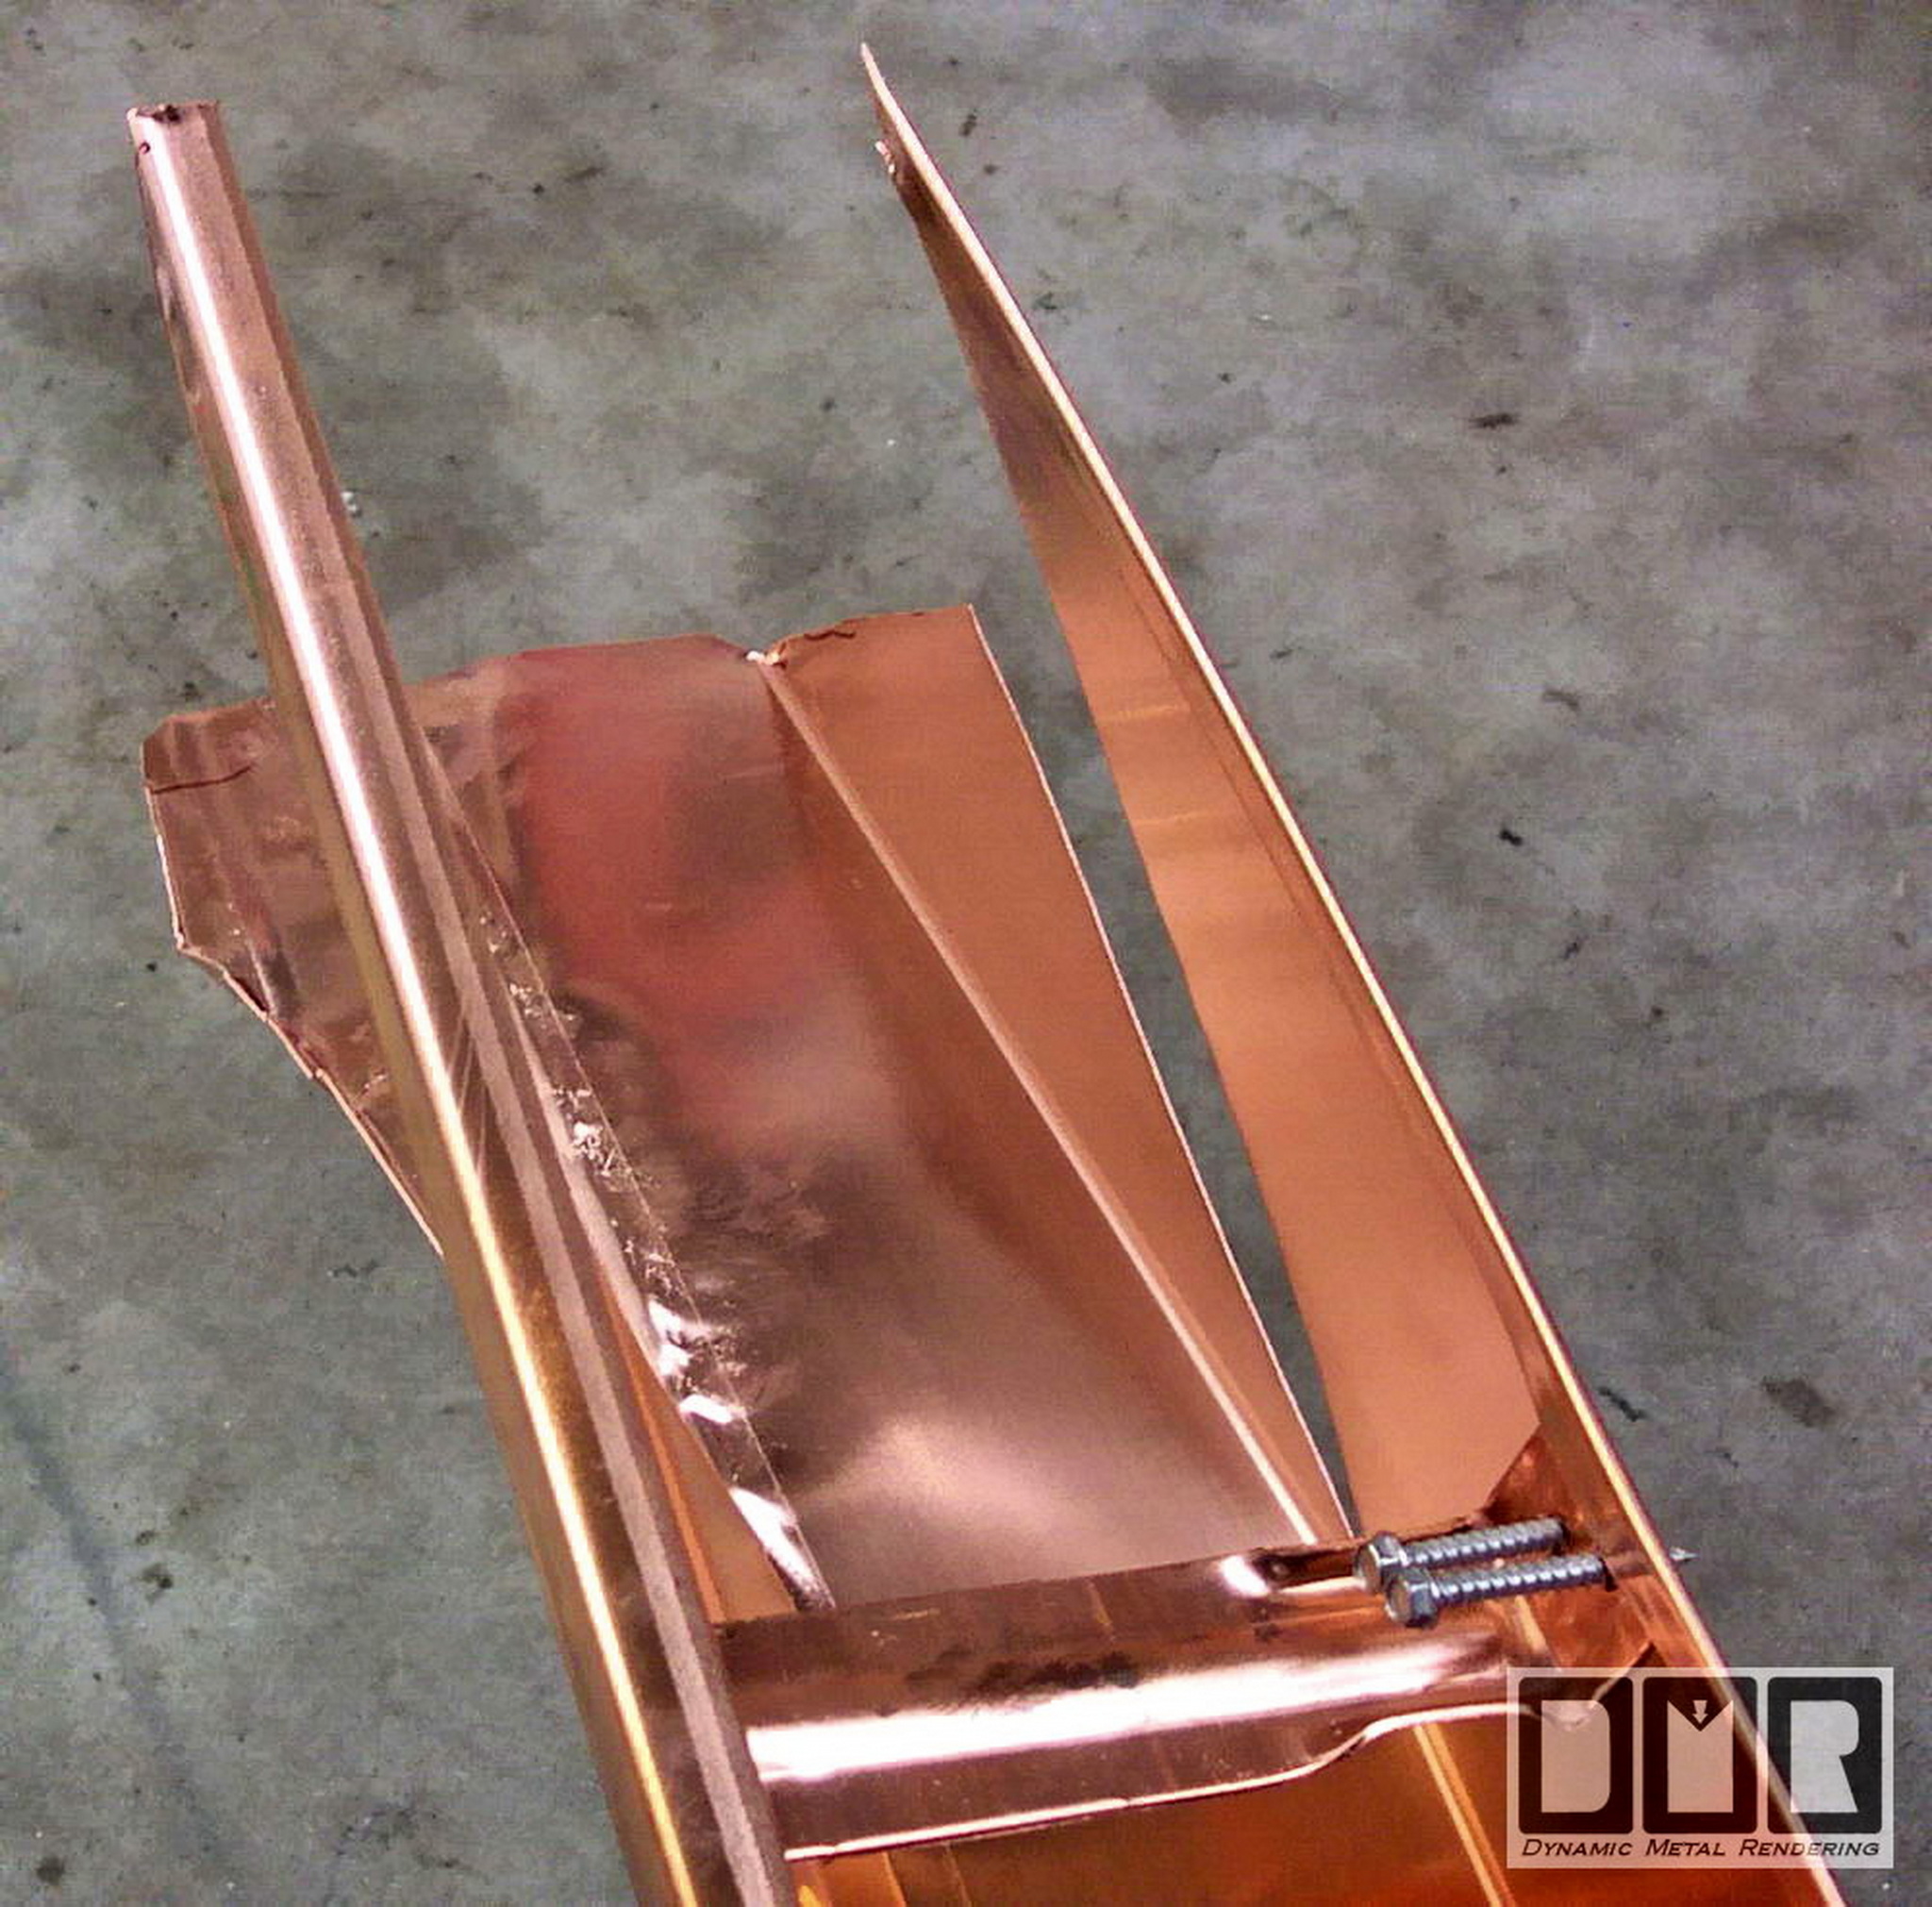
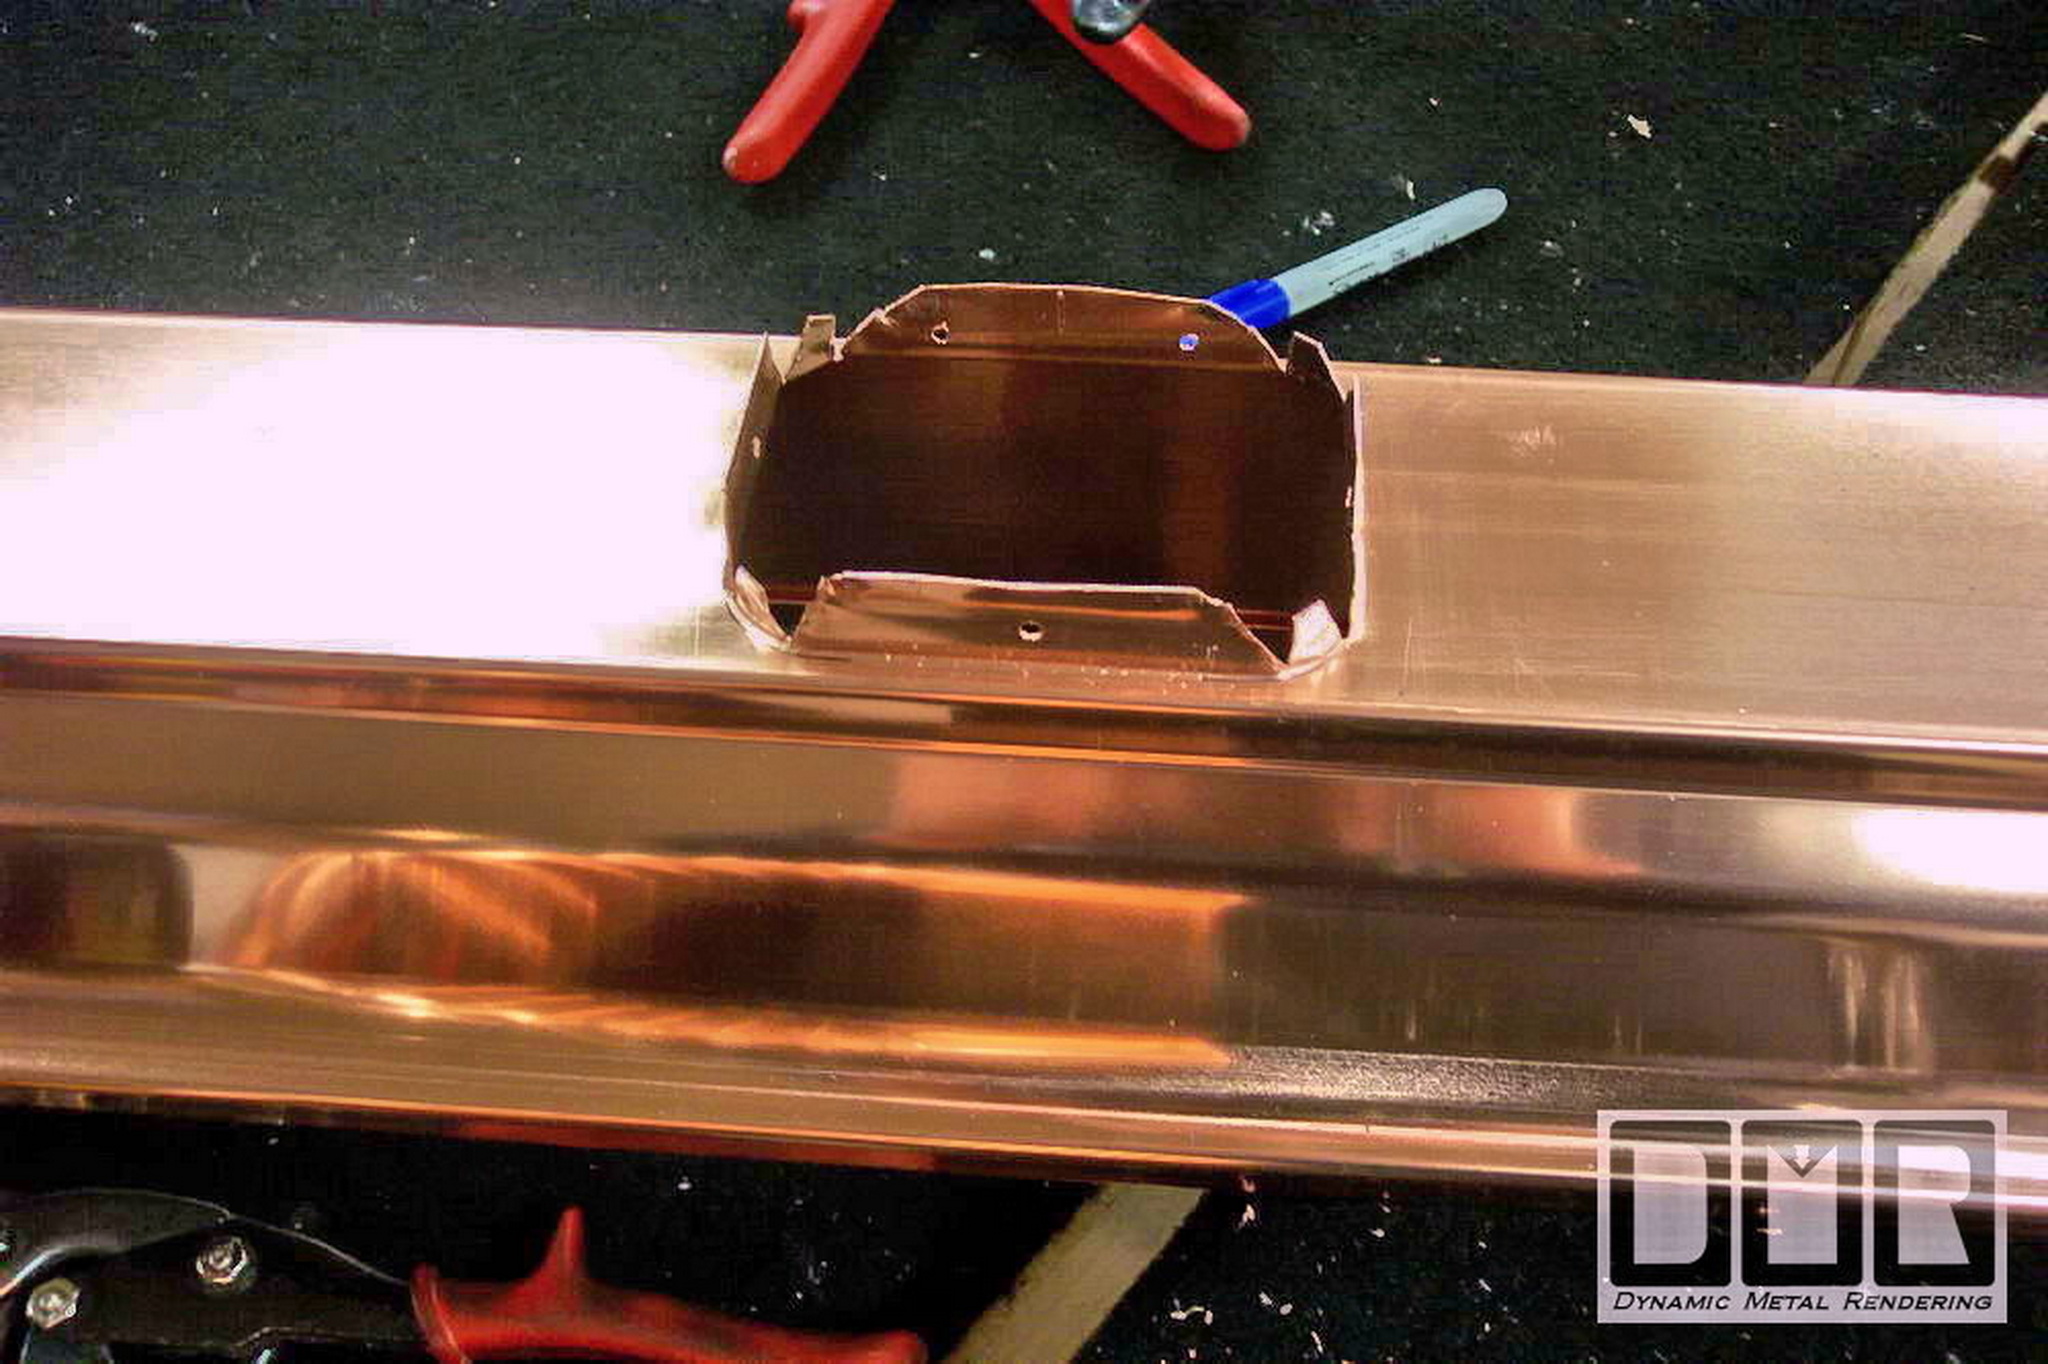
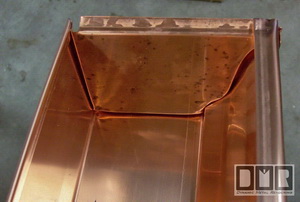
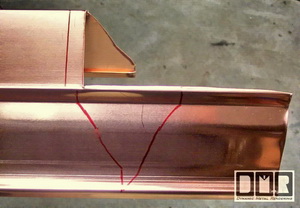
Mark the cut or bend lines on the gutter

Cut the bottom and back side out

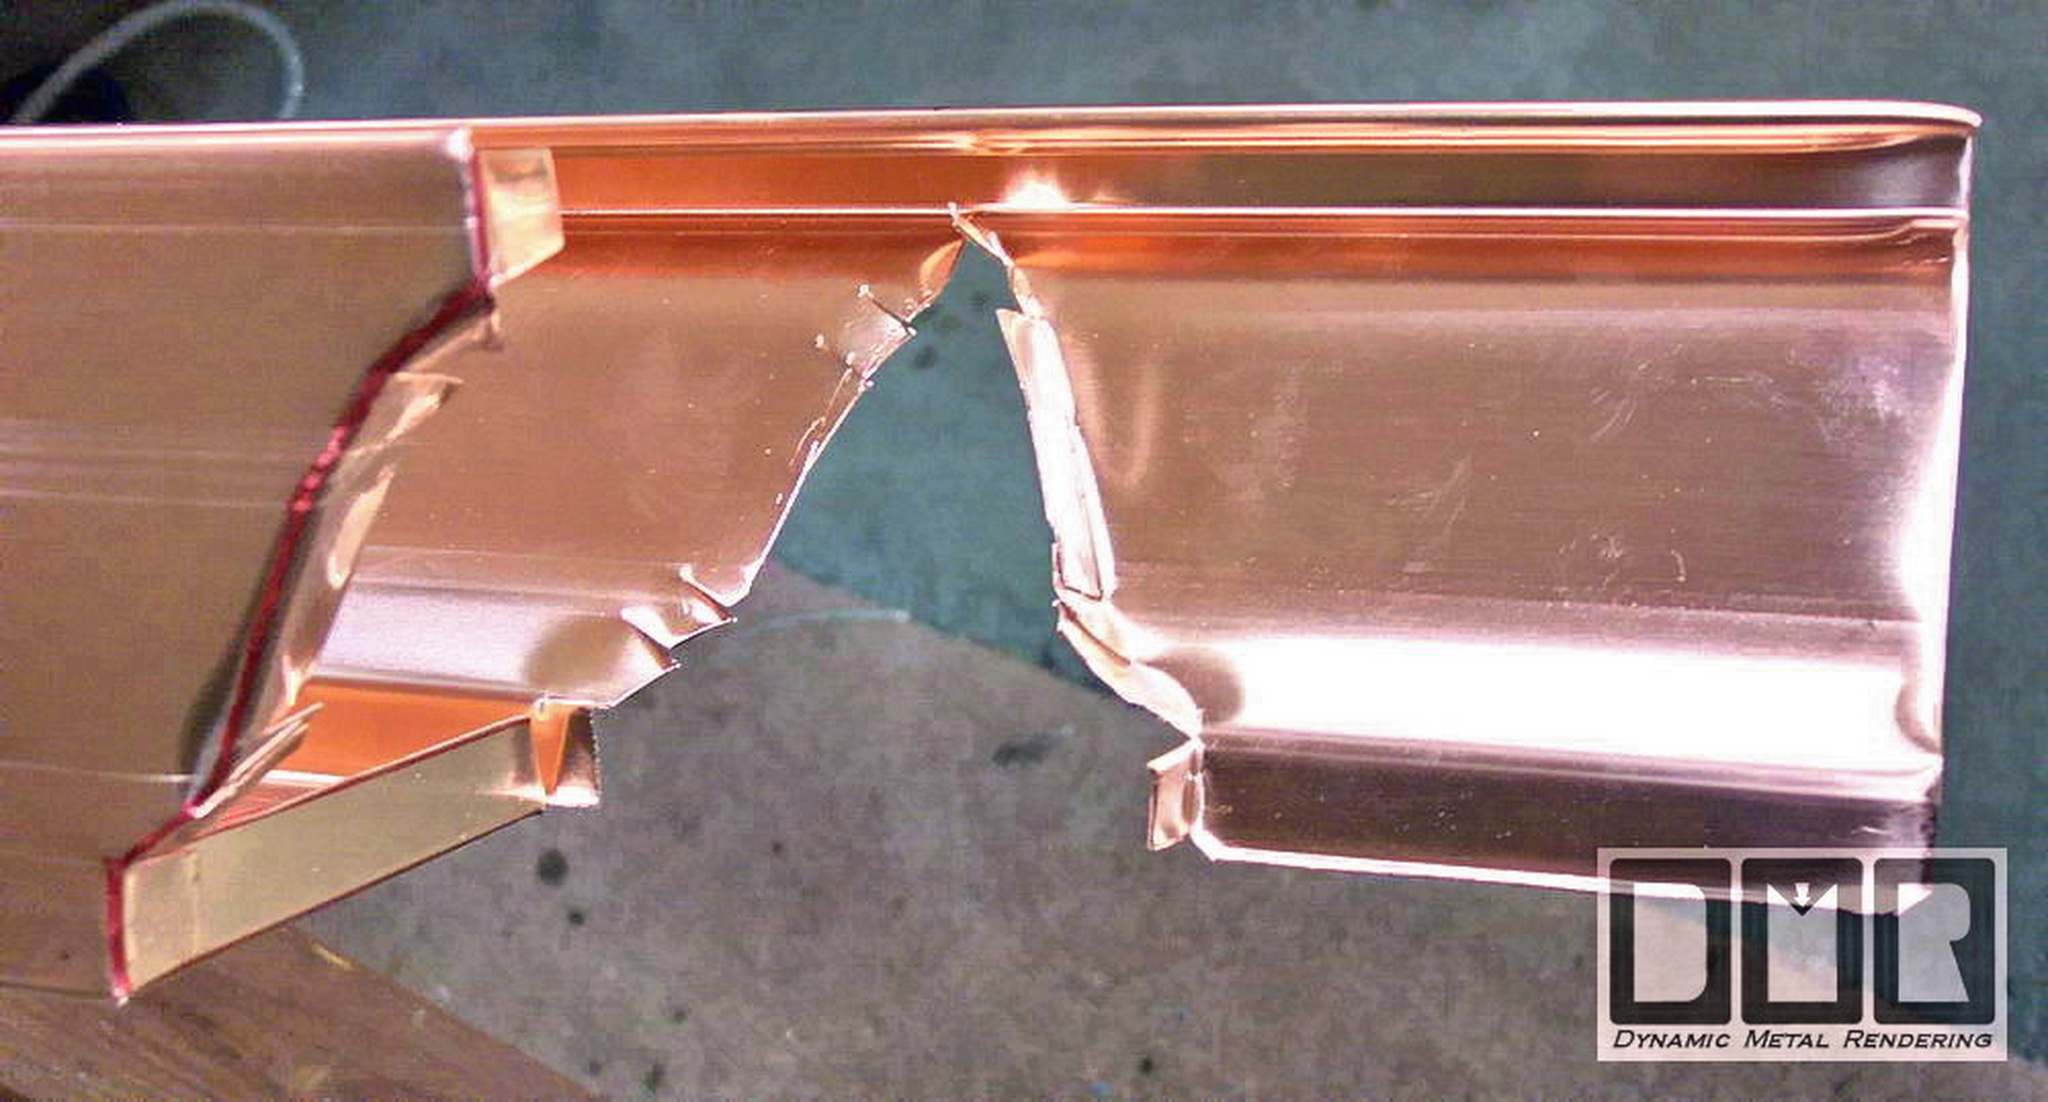
Finish the cuts and bend the tabs in

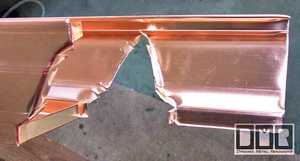
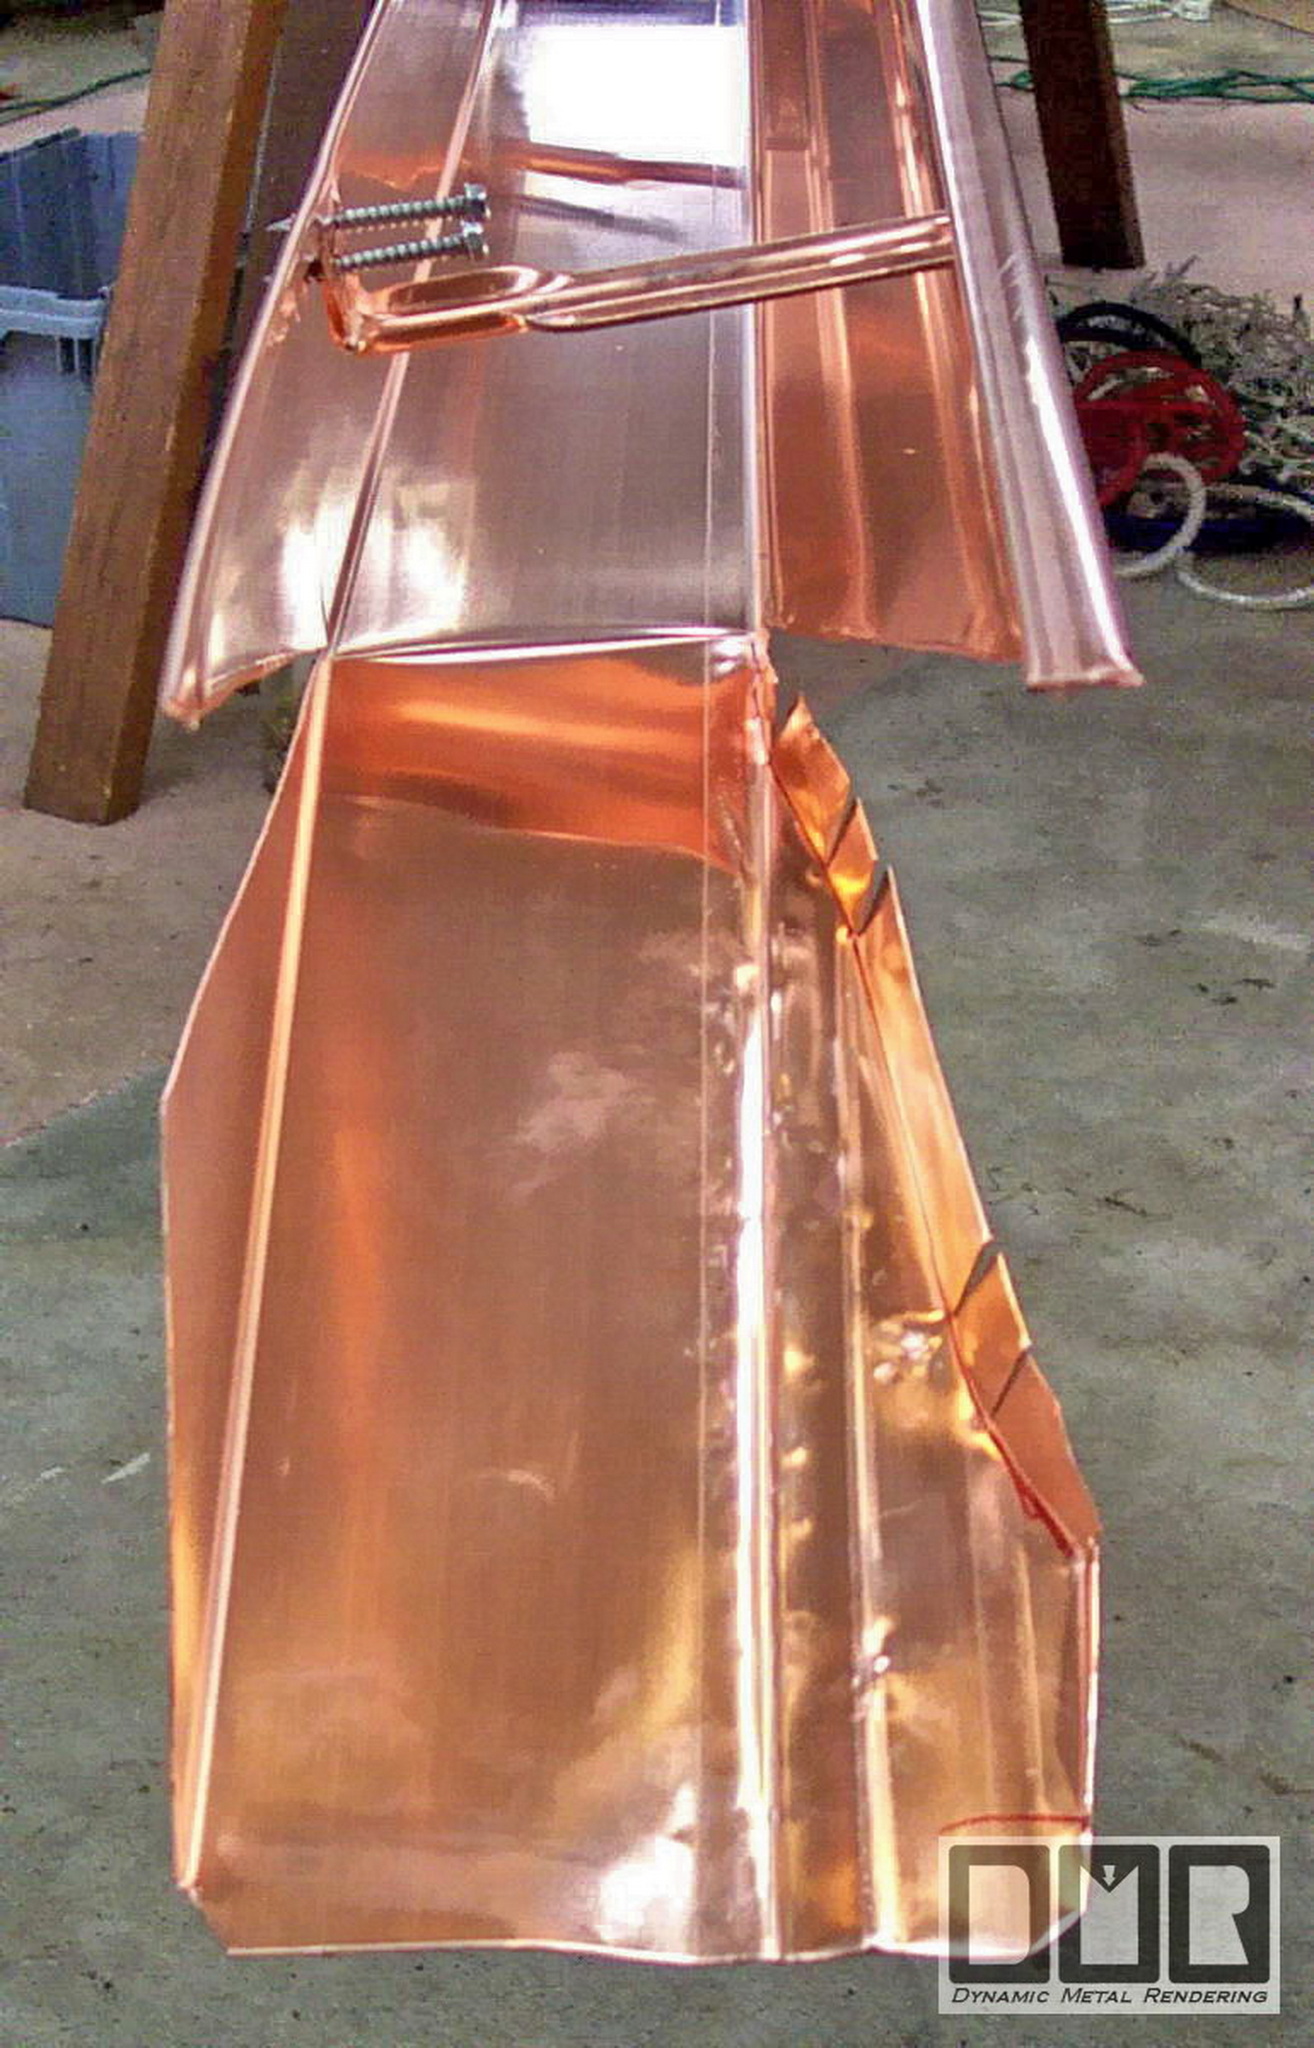
Here it is from the other side
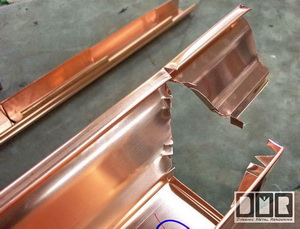
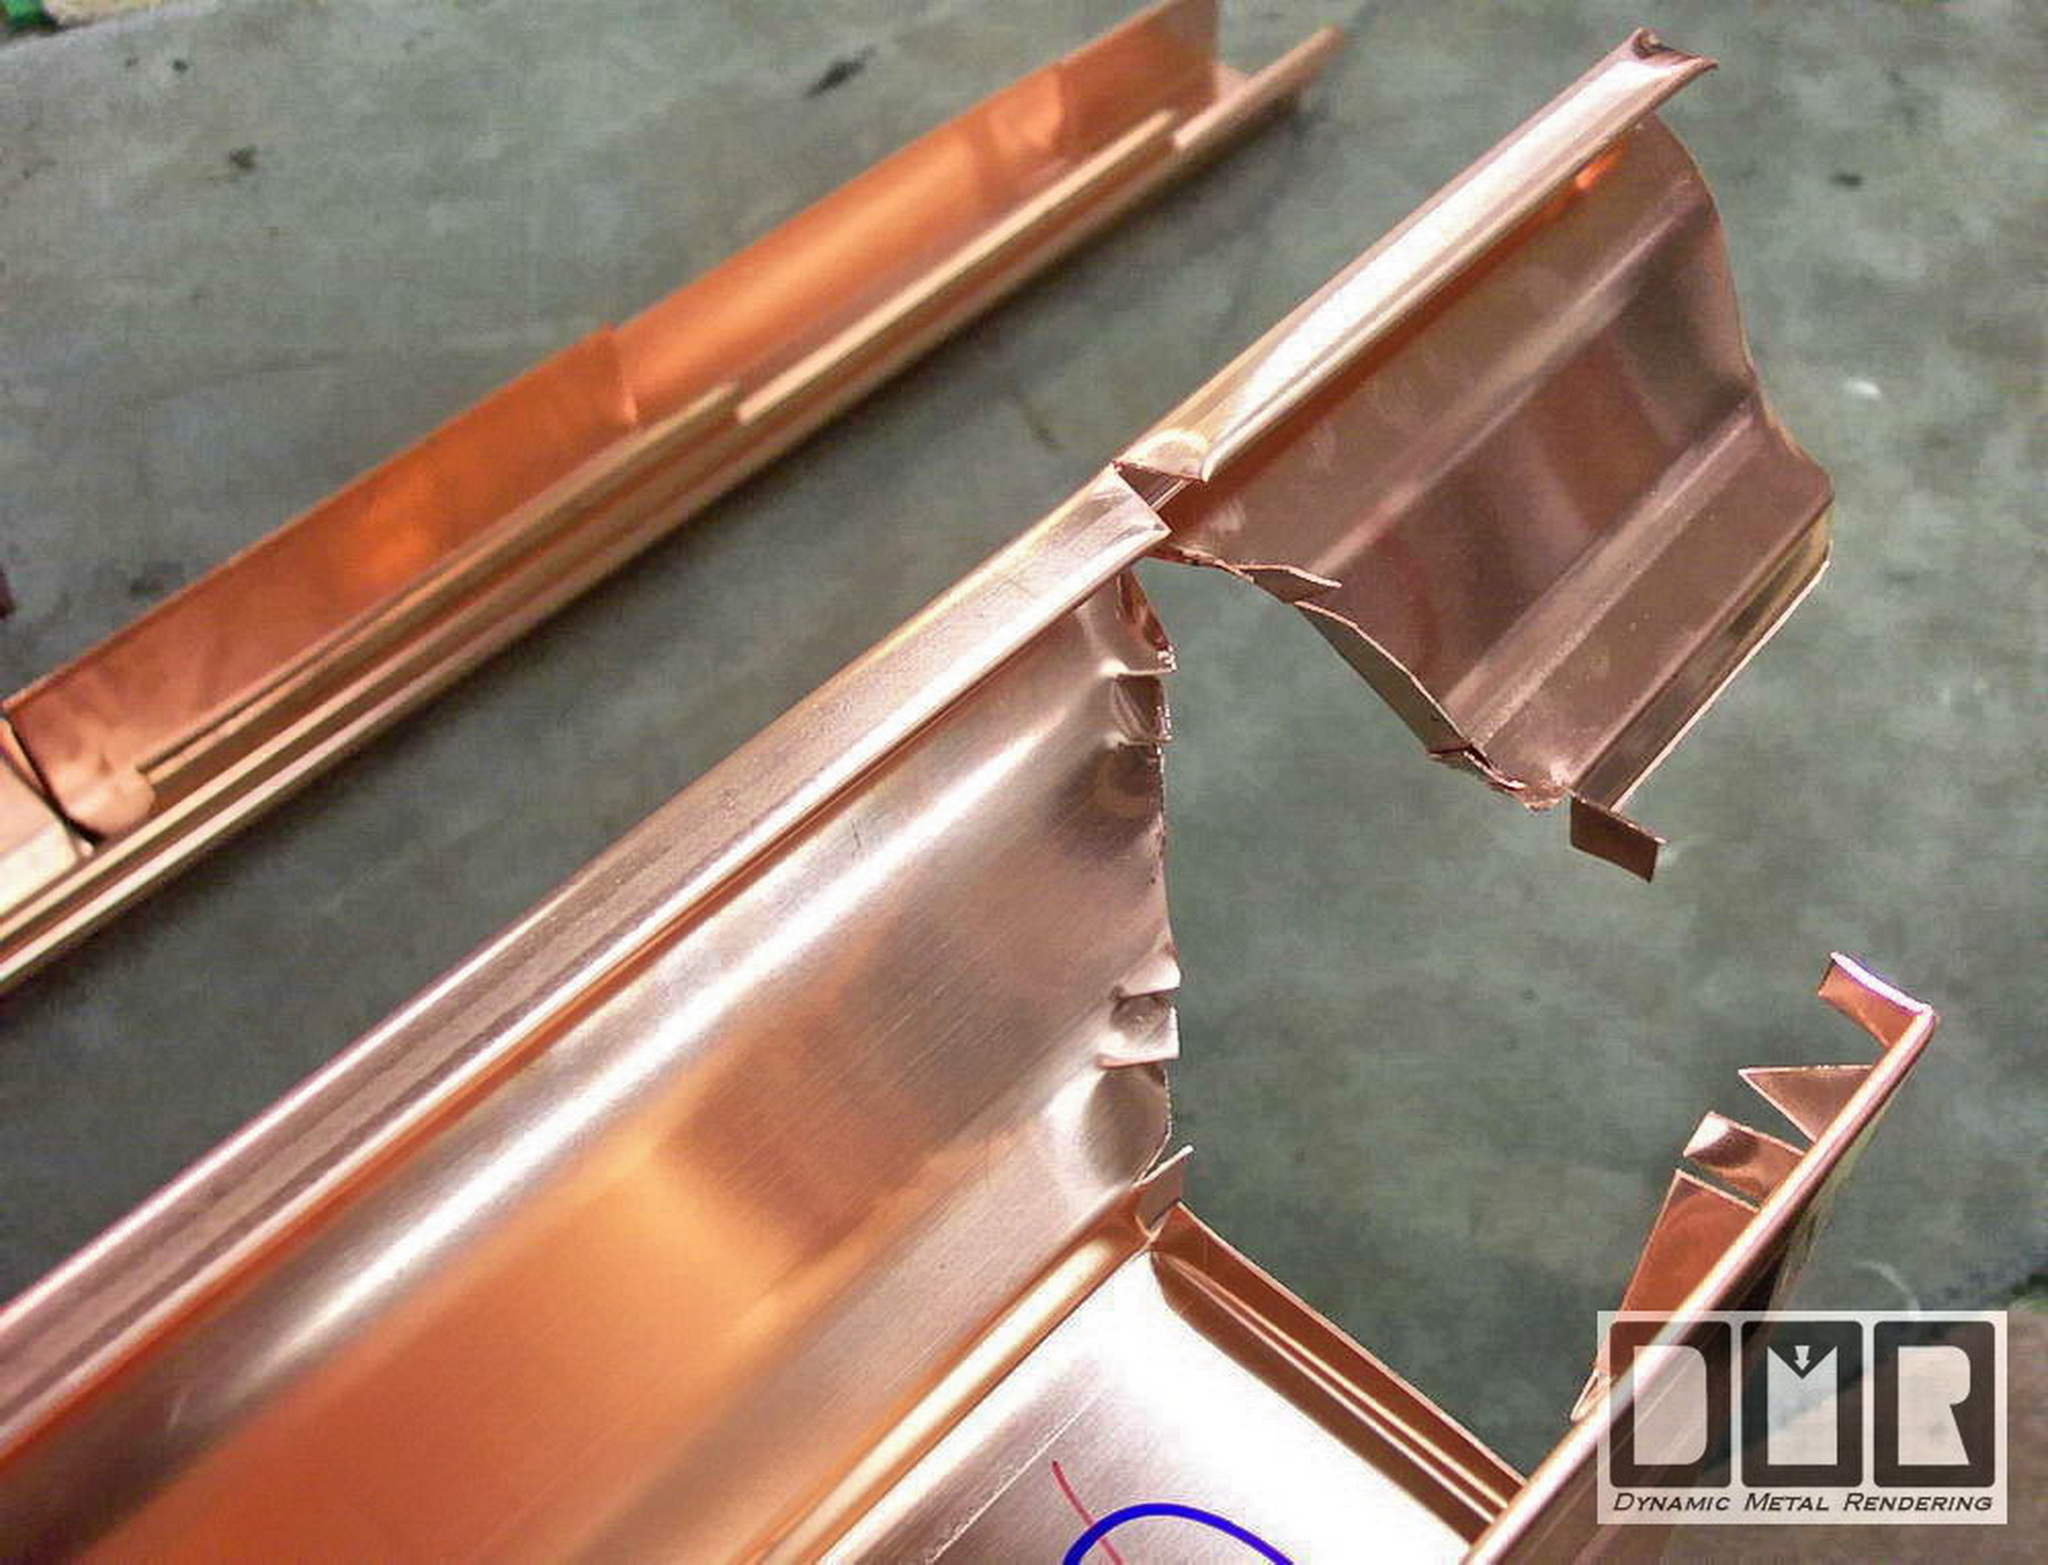
And from the top

Caulk and fold this part over

Here it is closed off but not sealed

Here is the back side

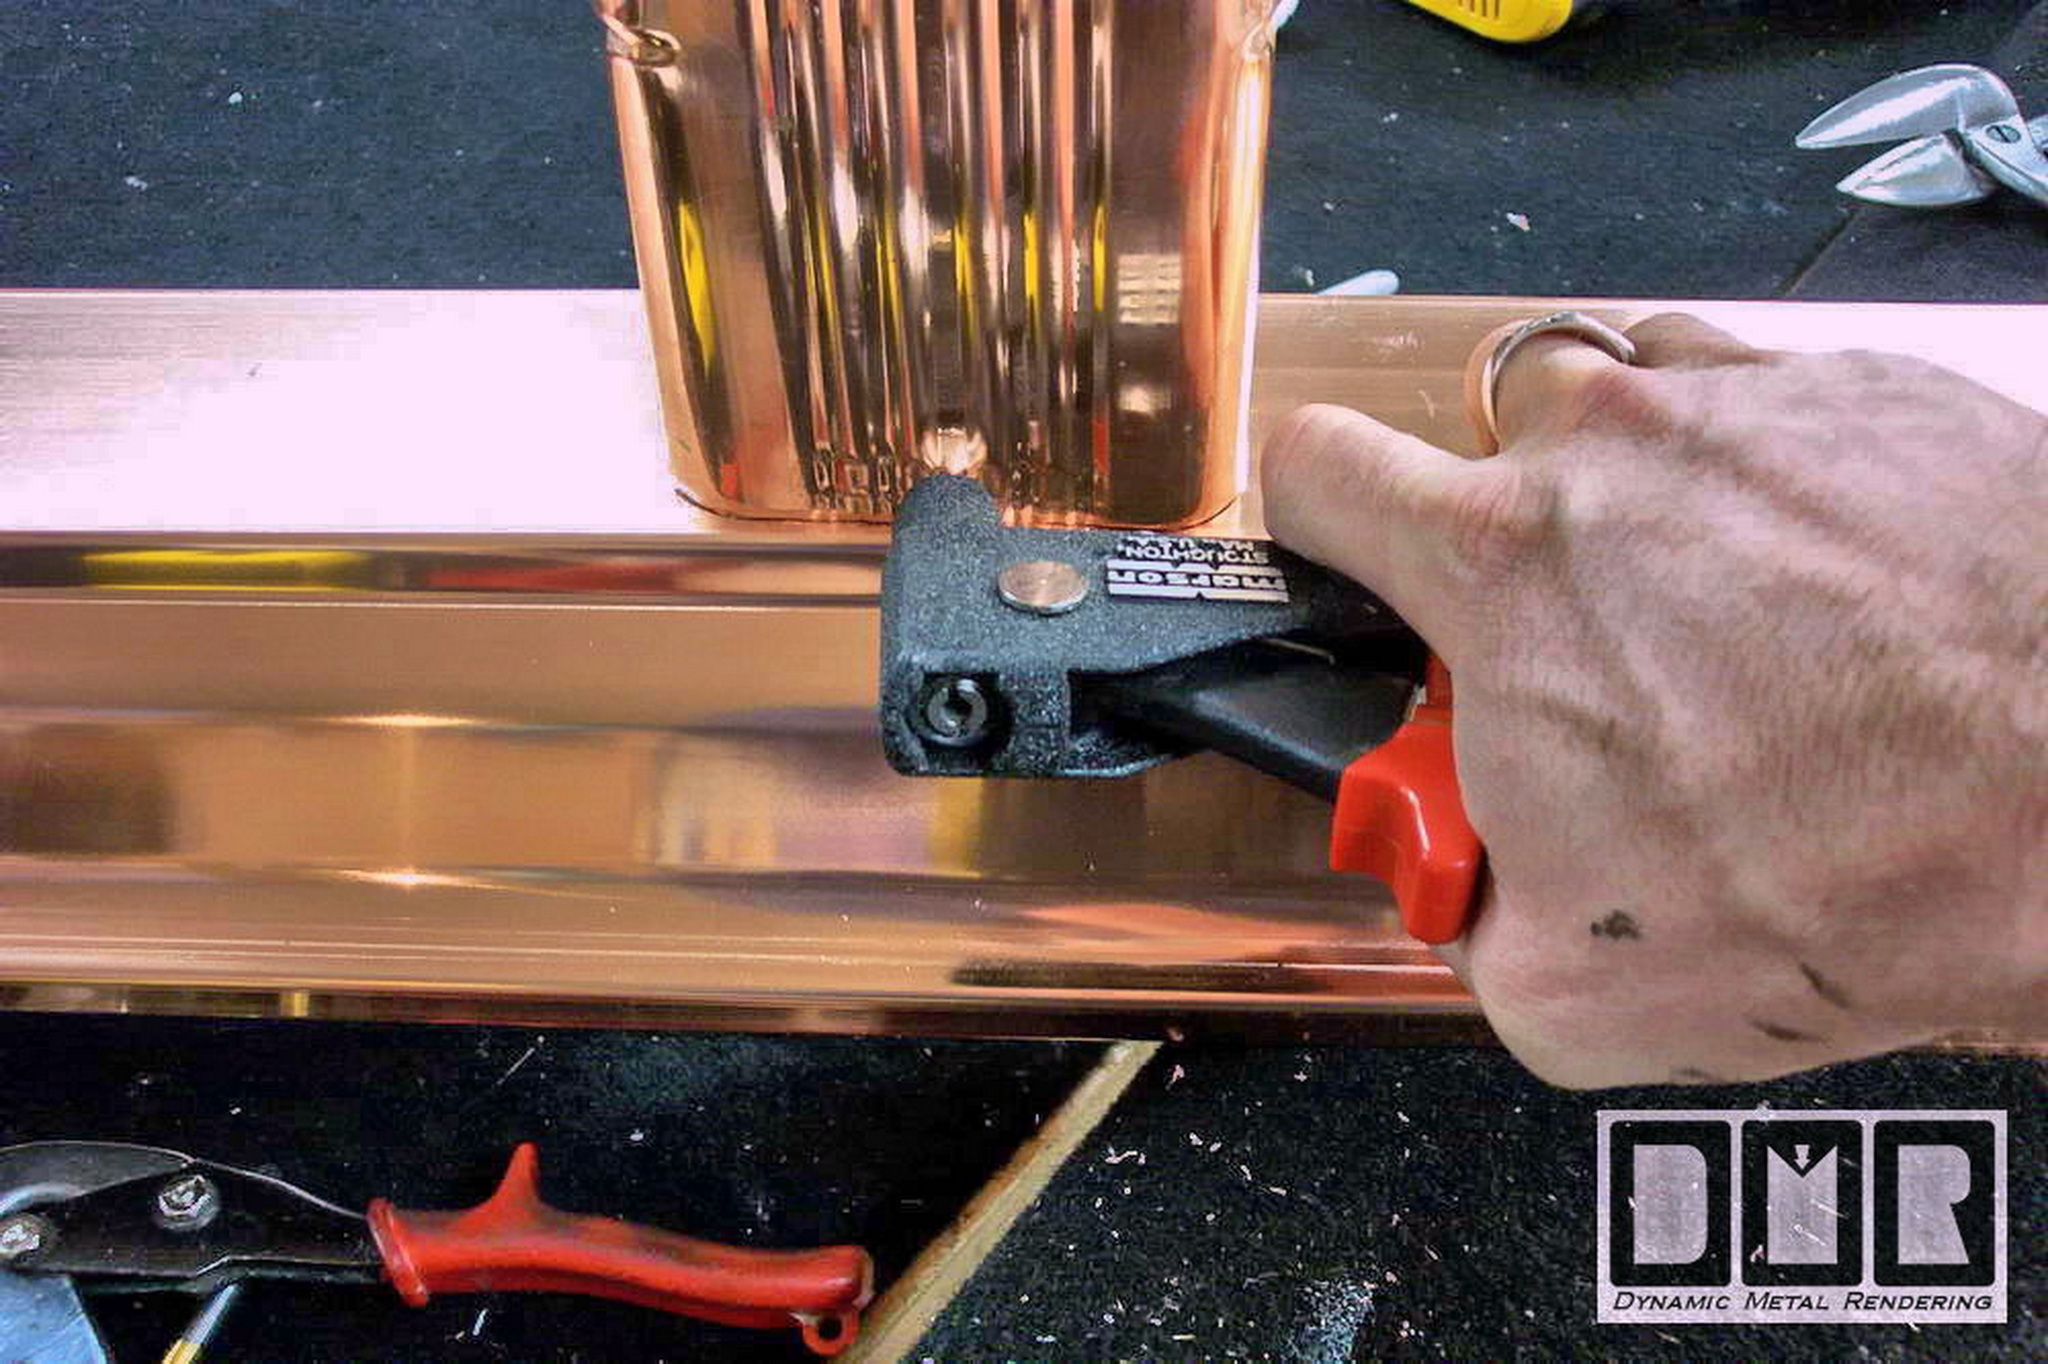
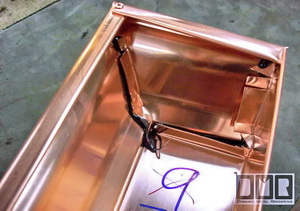
I begin riveting from the top down

Looking inside the gutter

These tabs need hammered over the side

Here the tabs are bent over

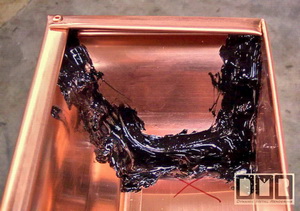
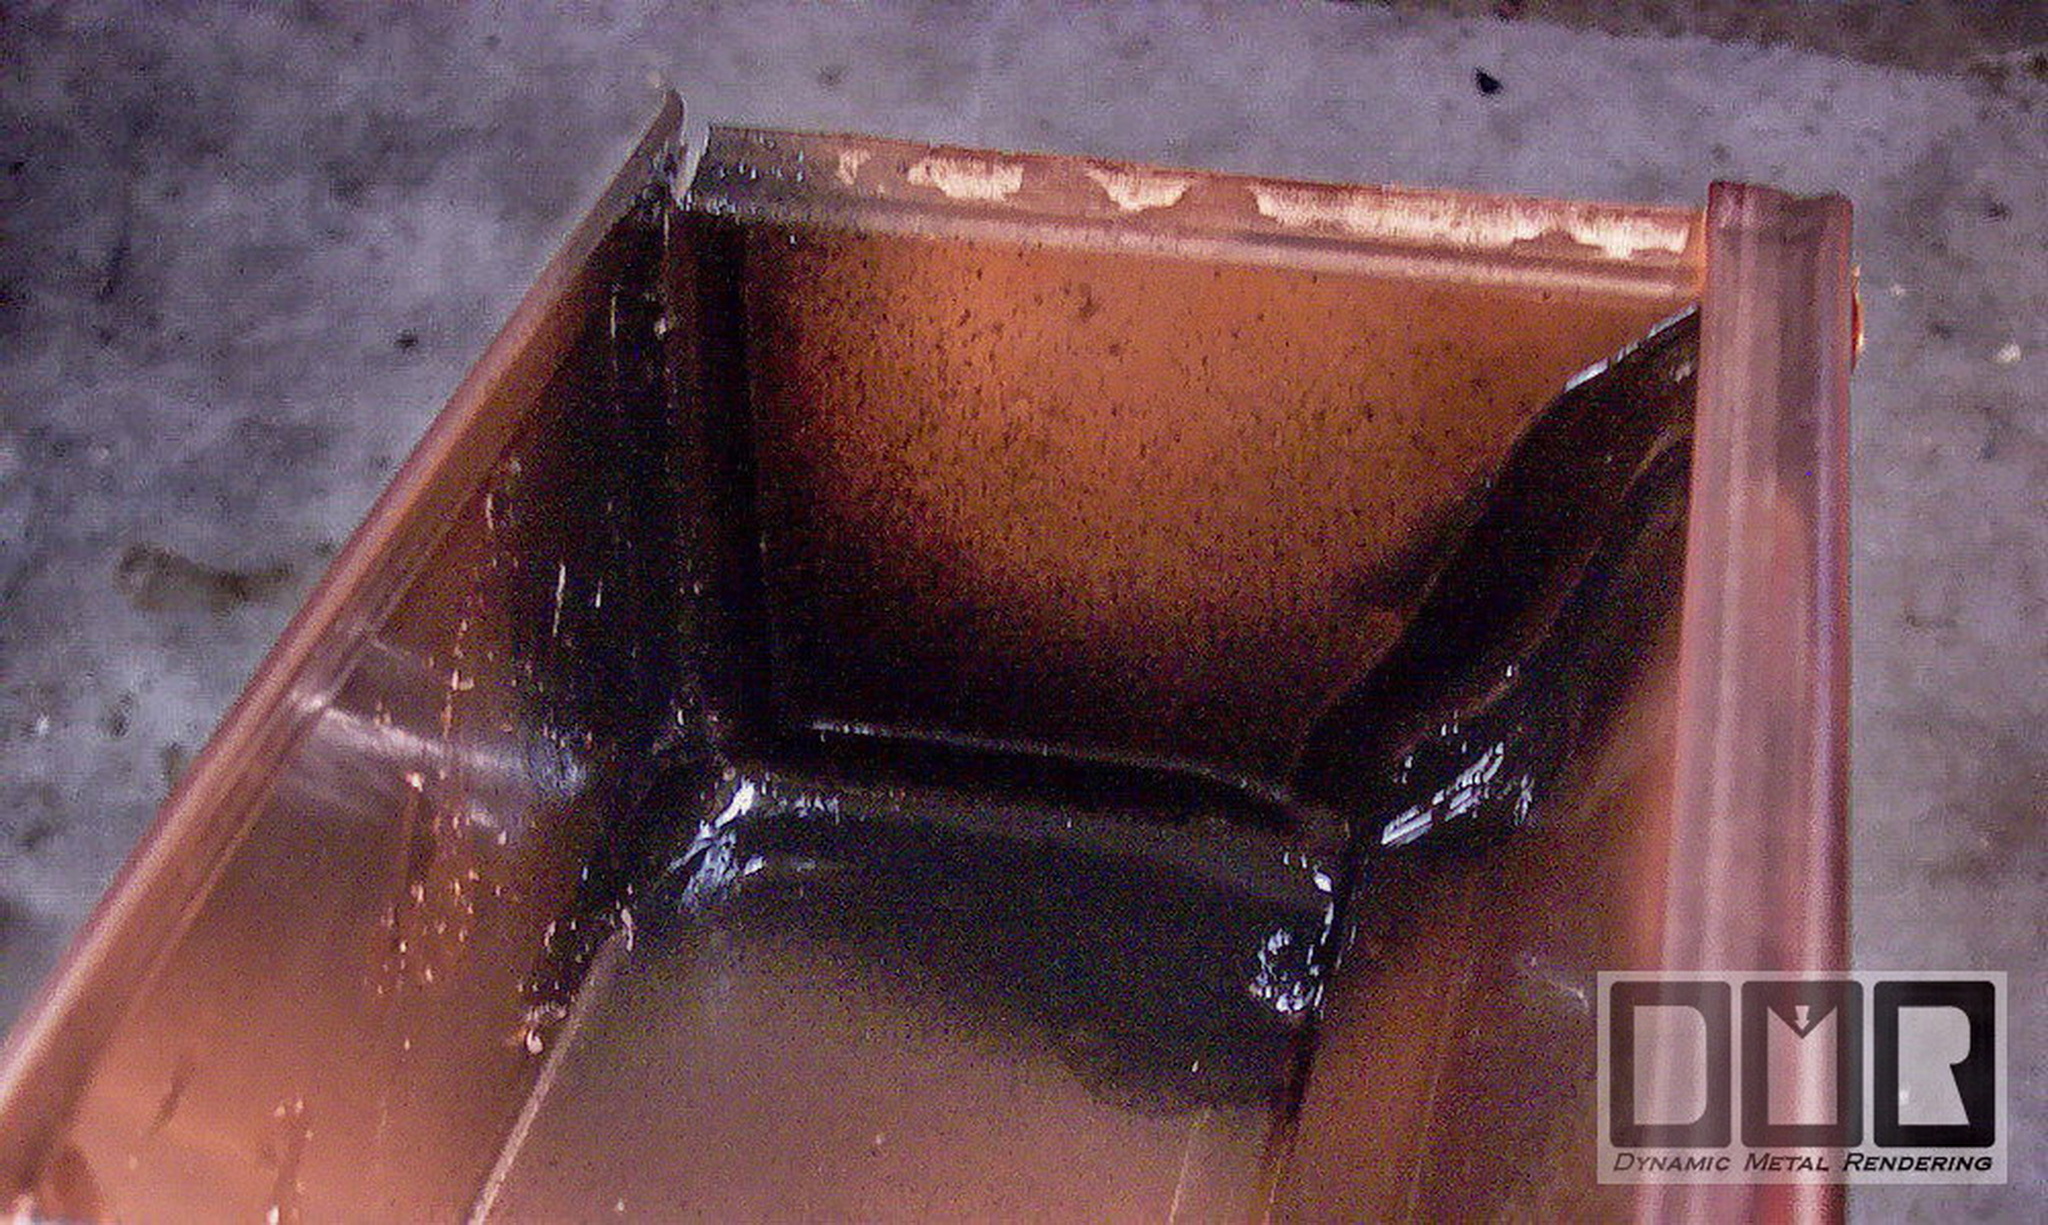
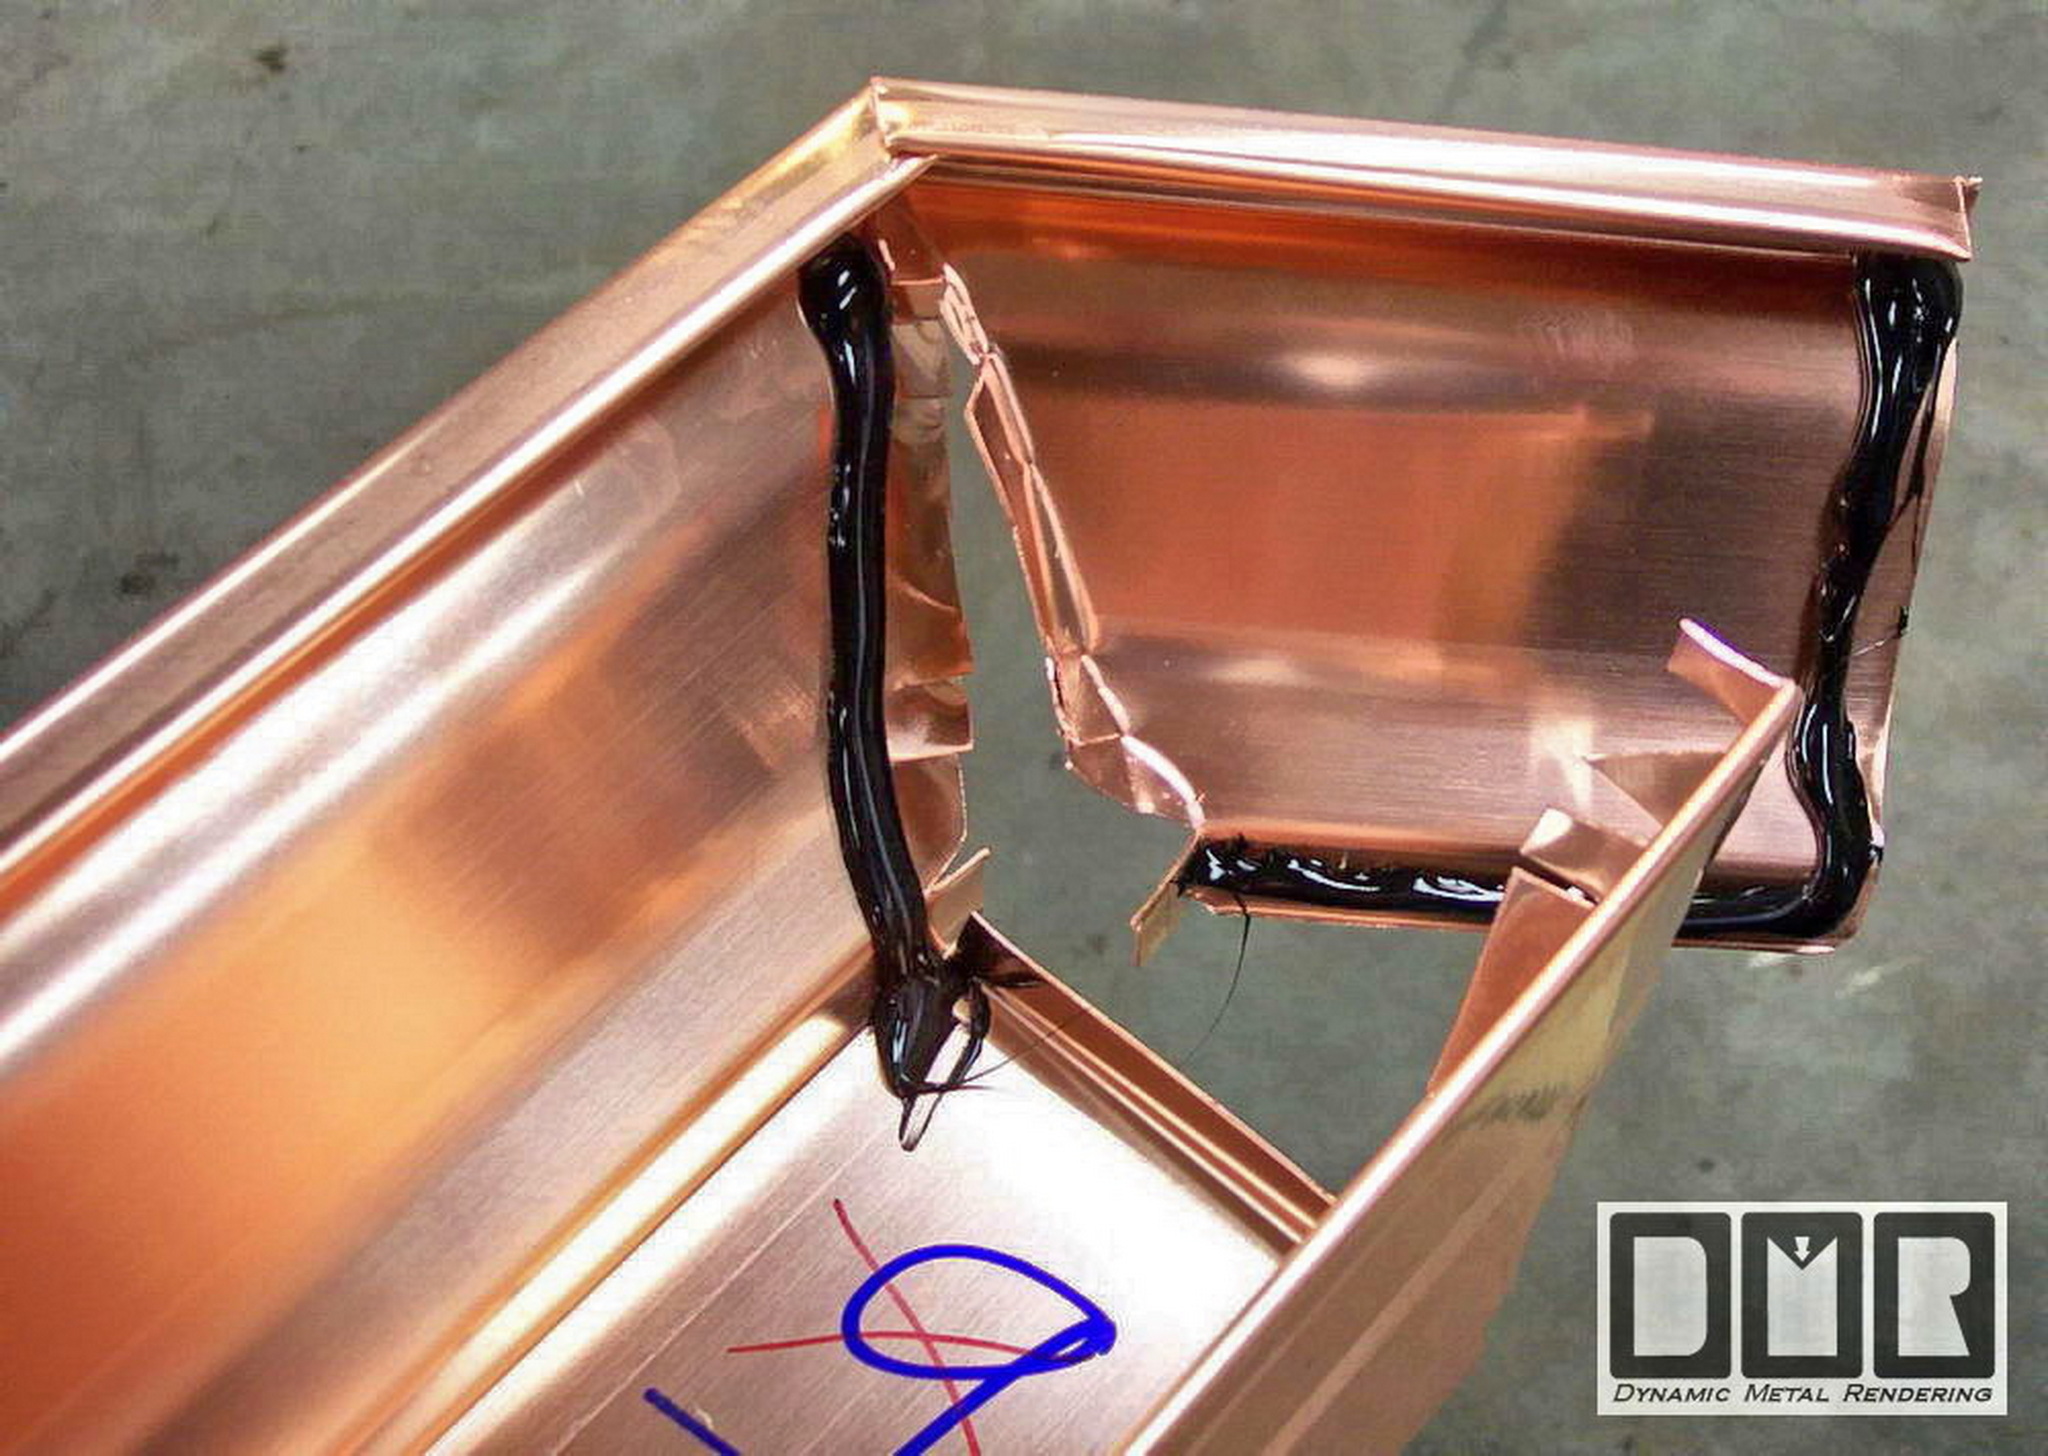
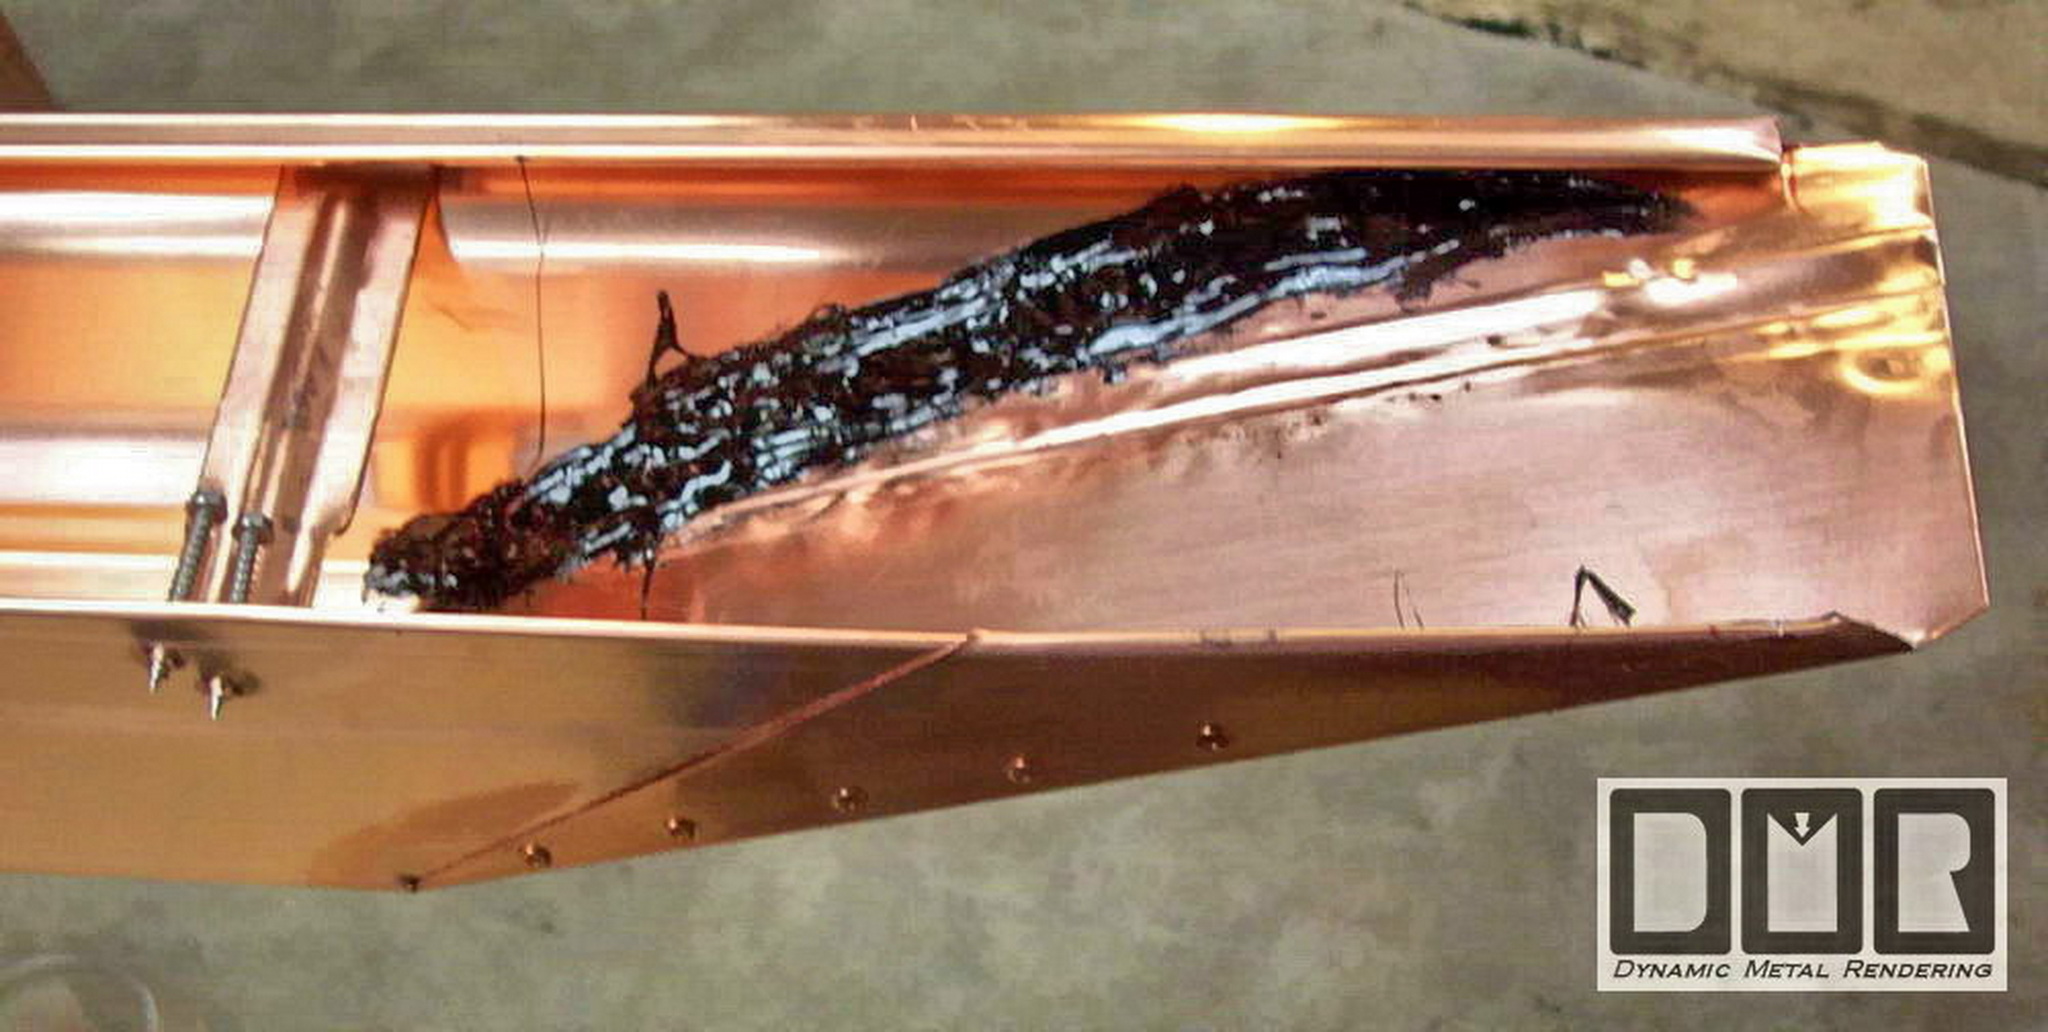
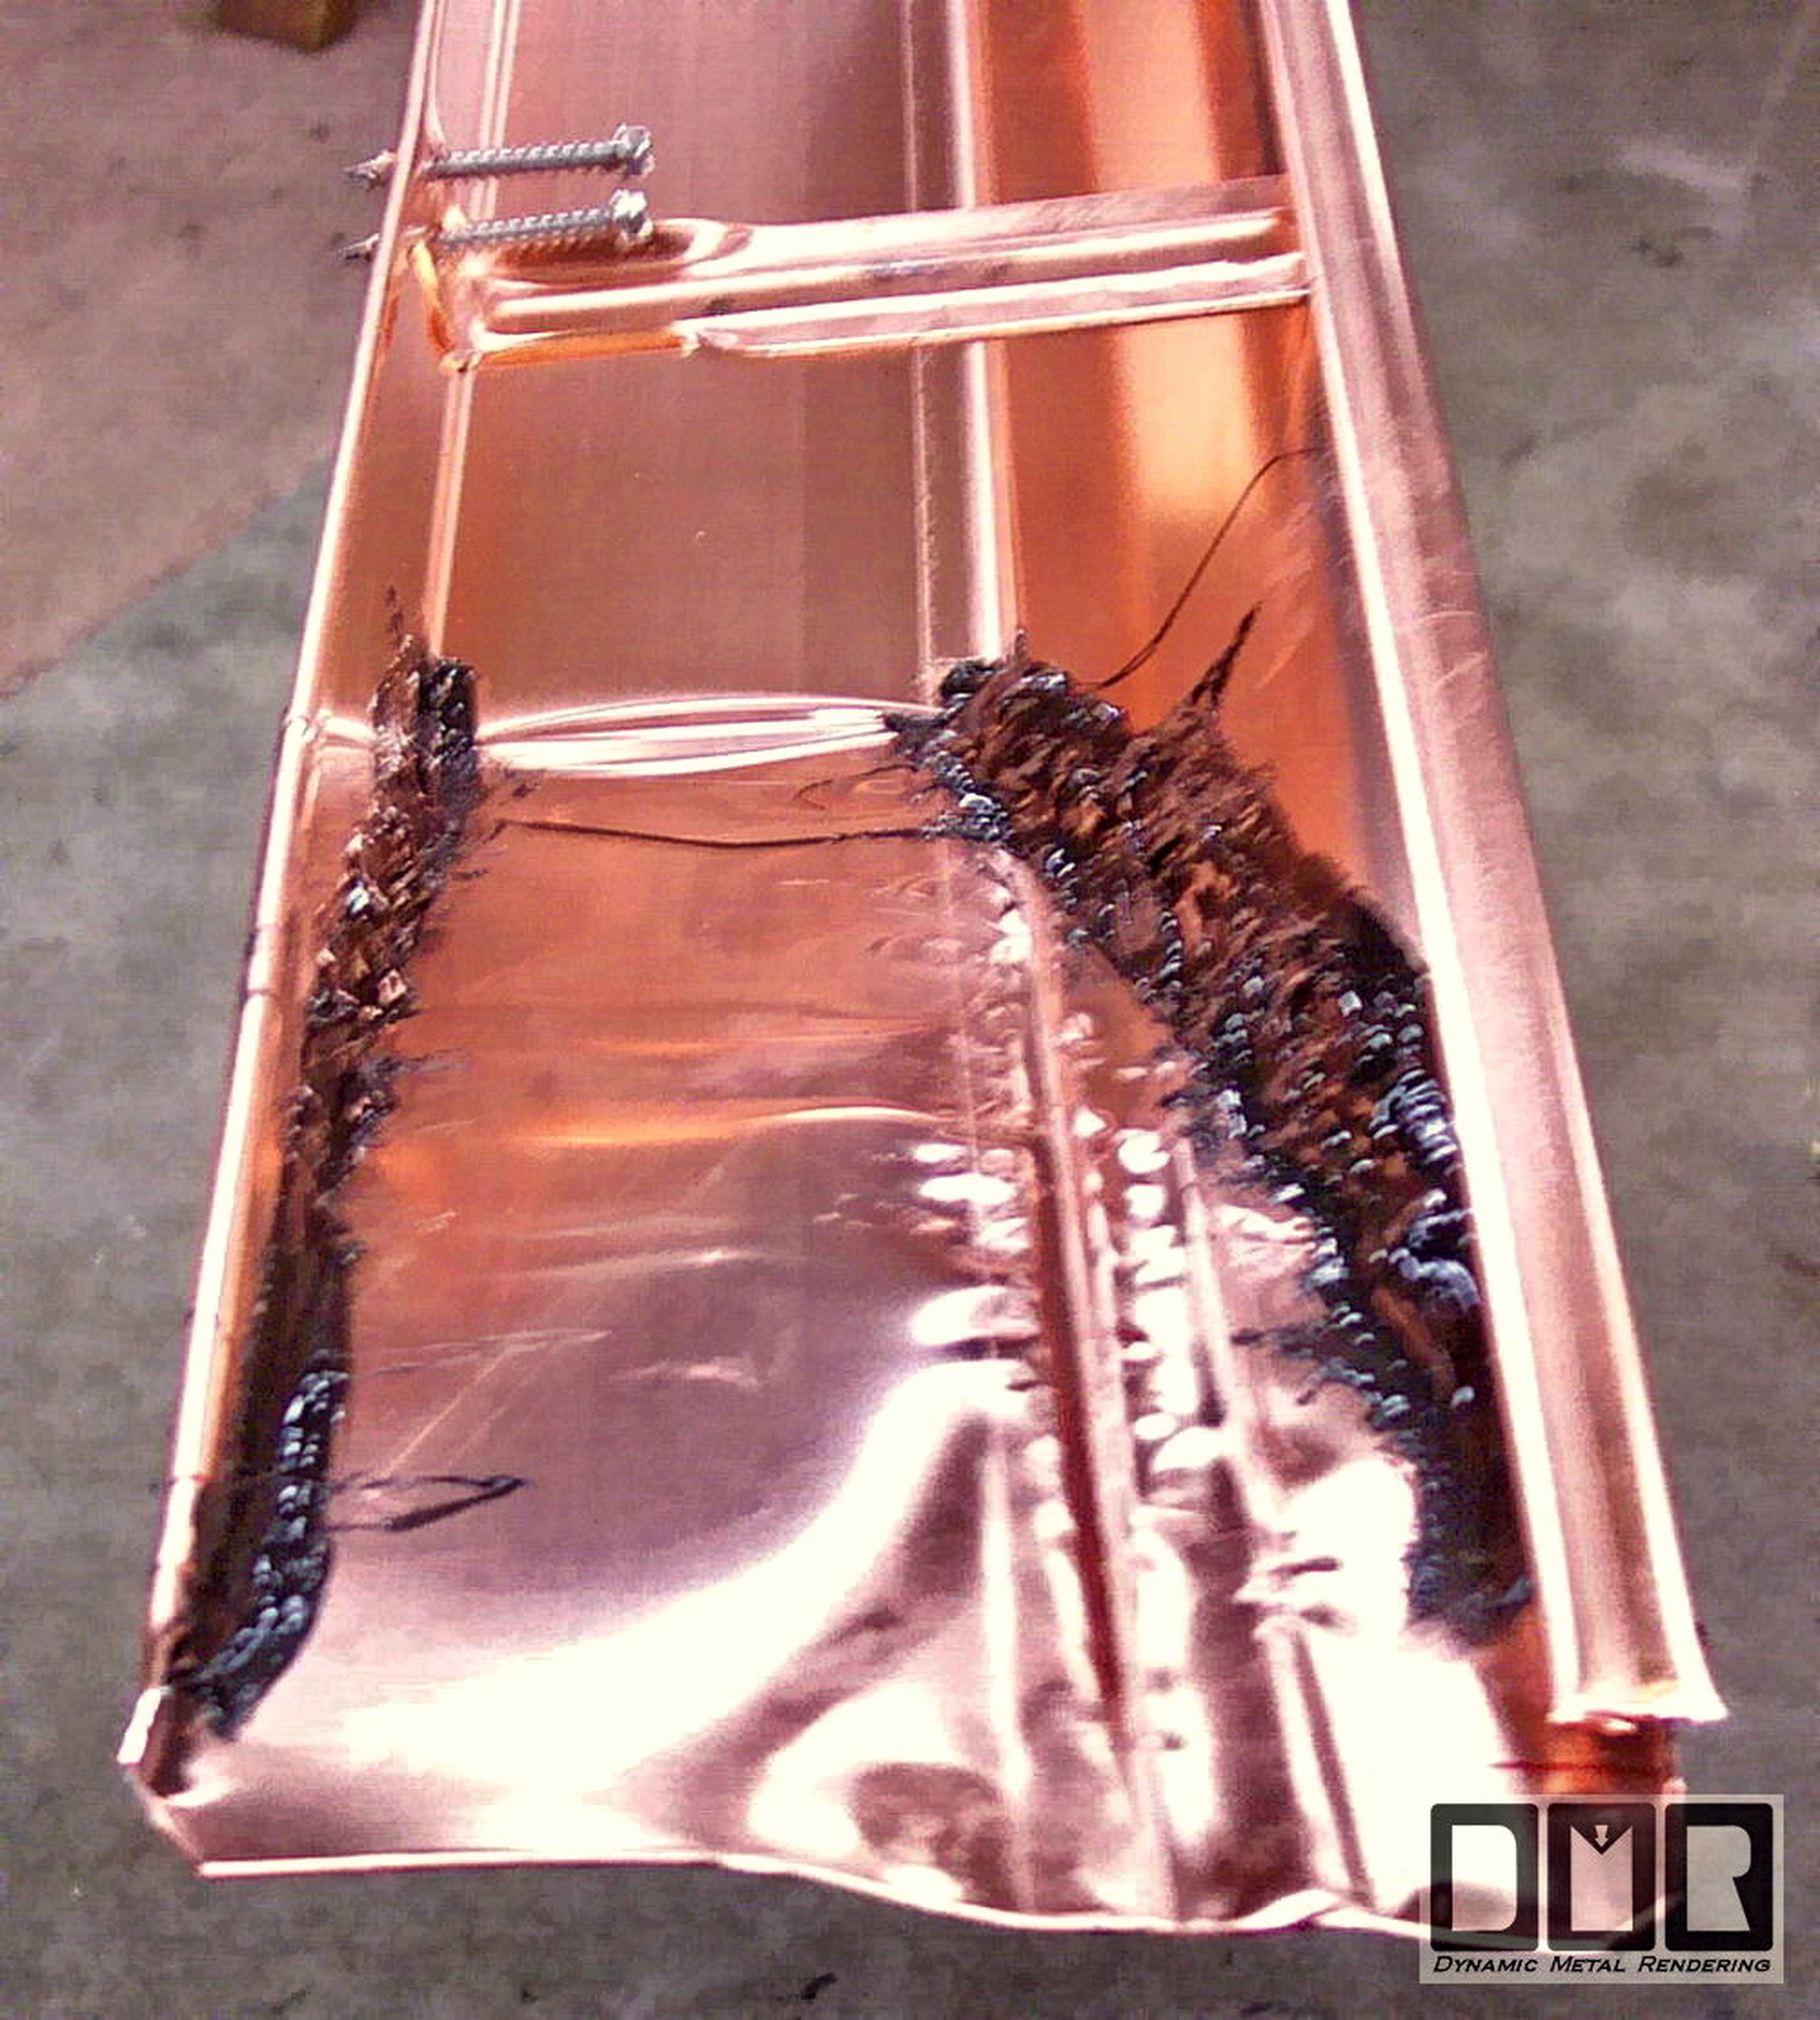
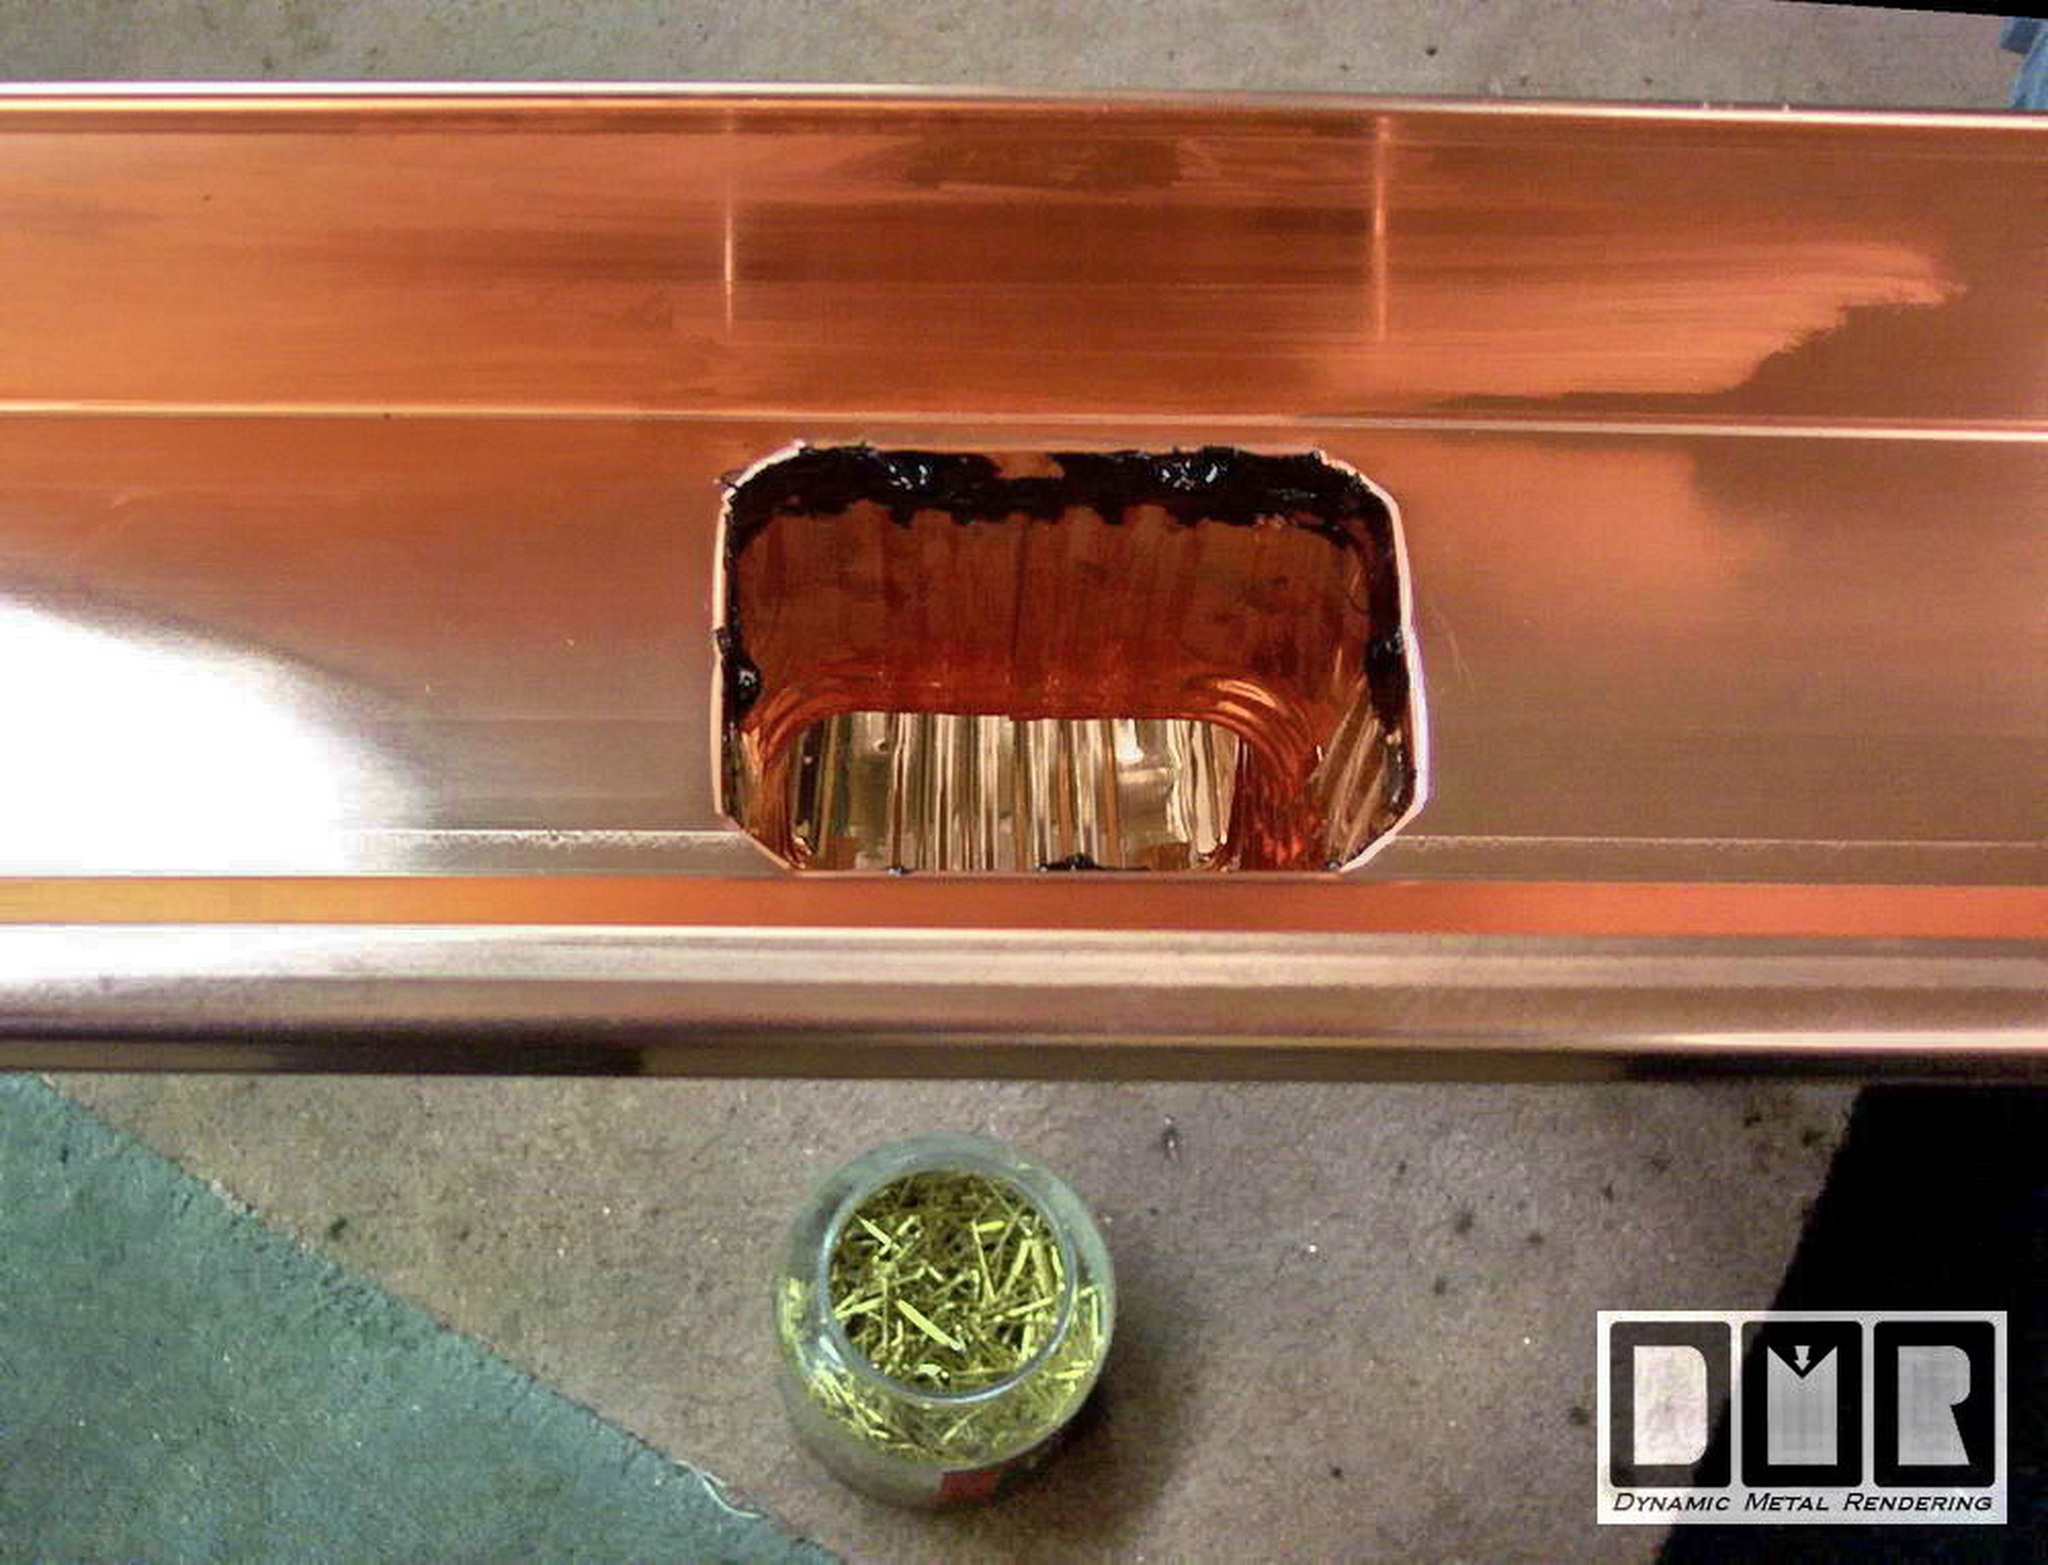
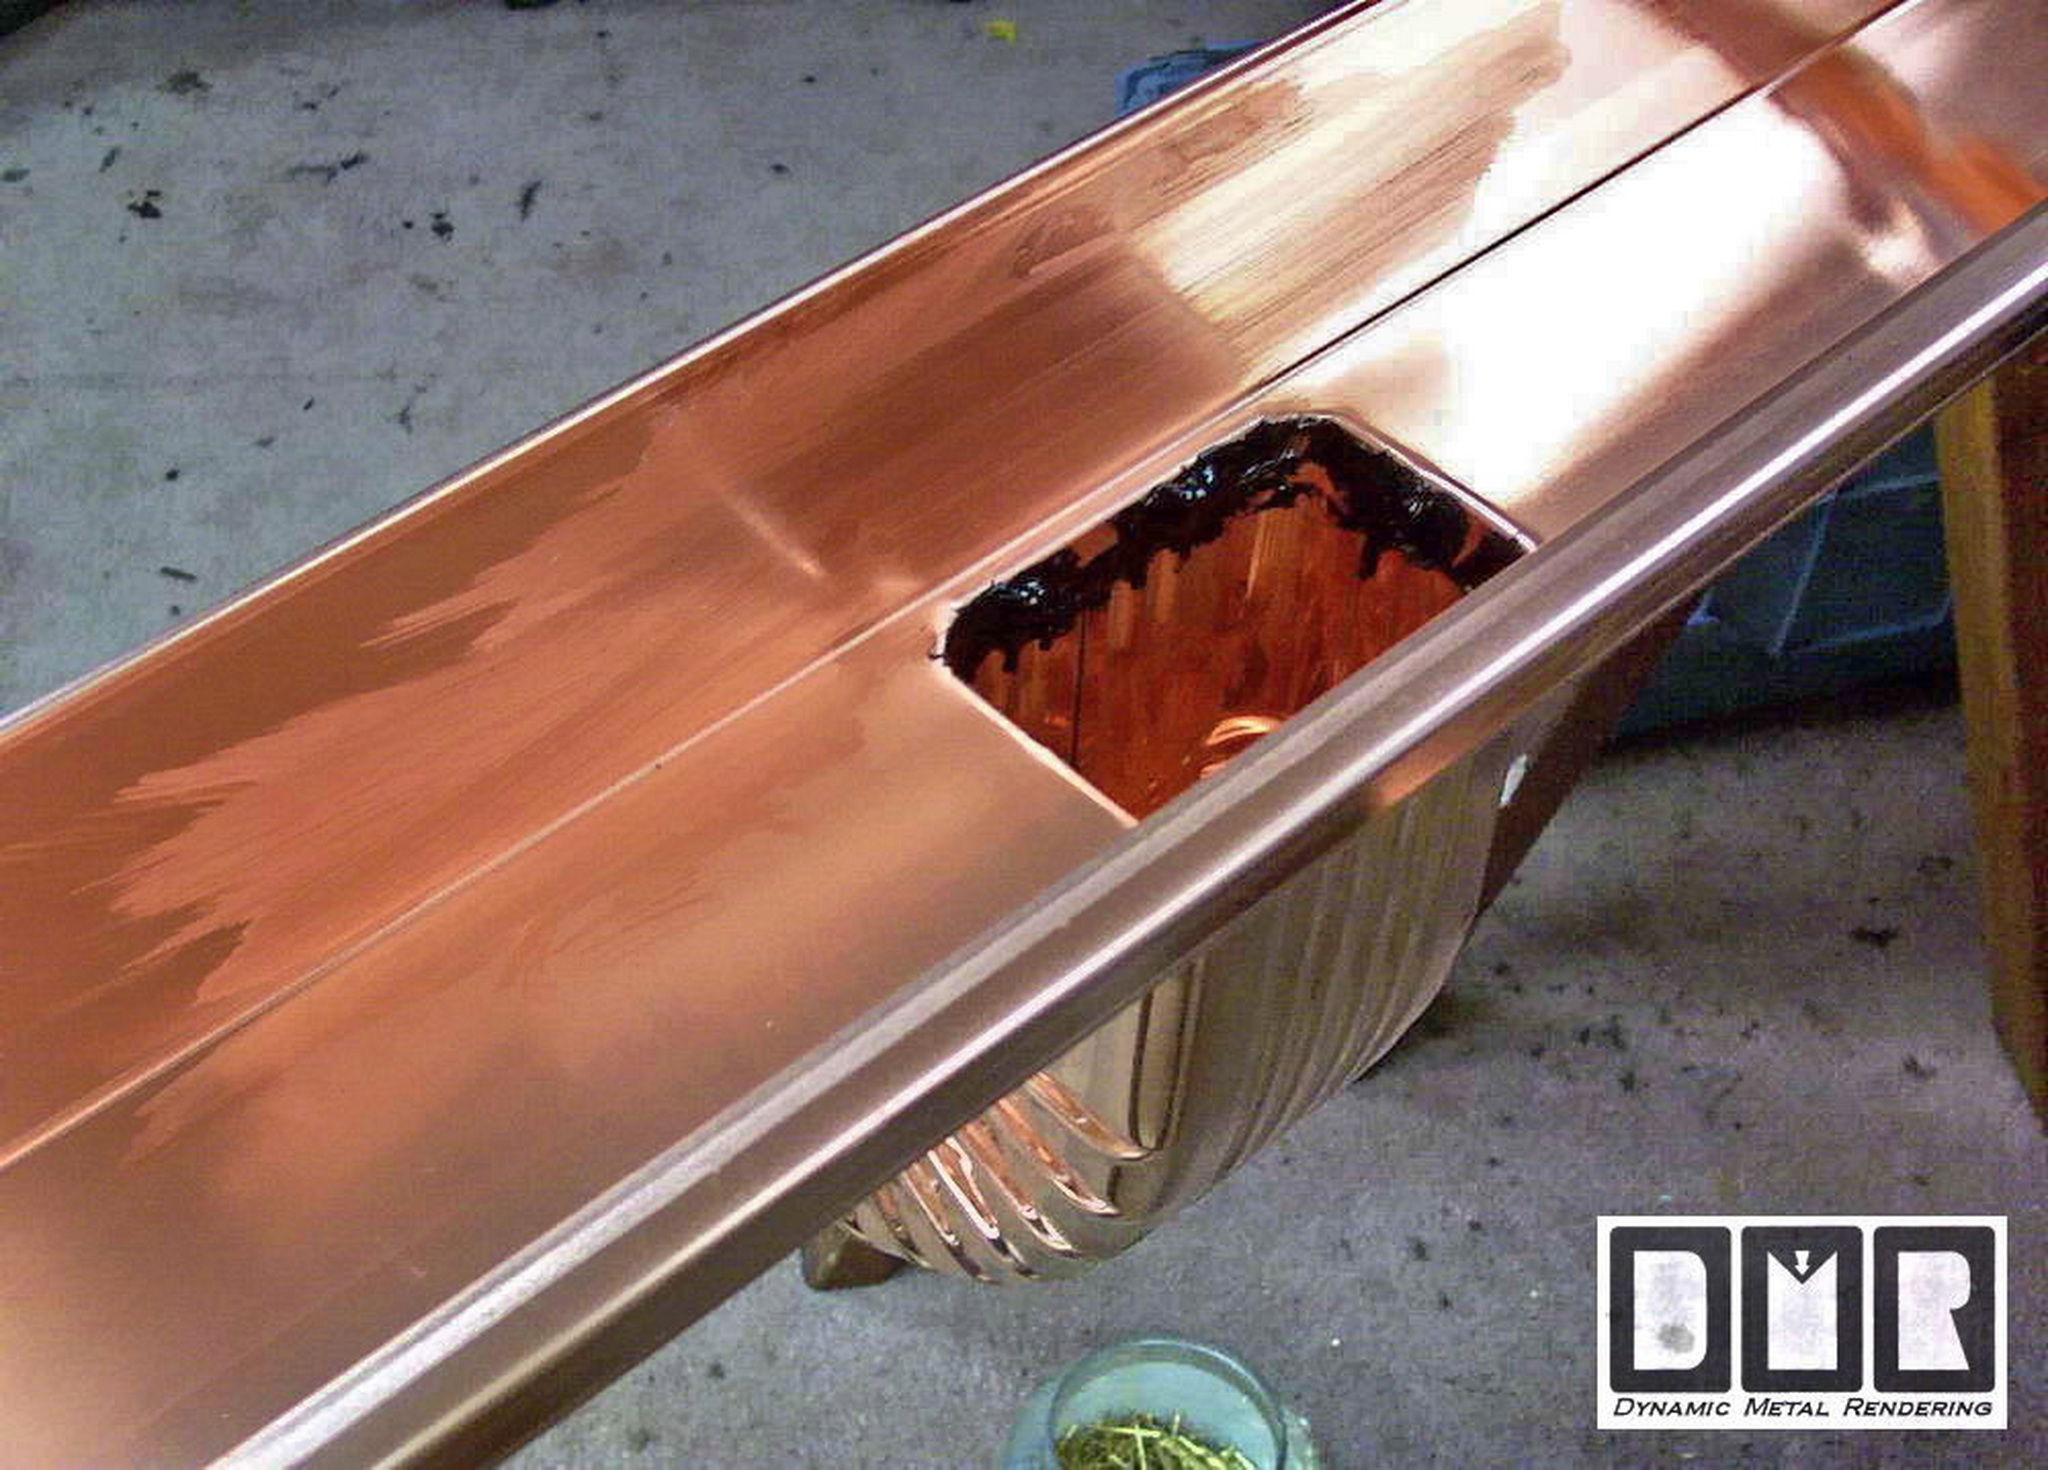
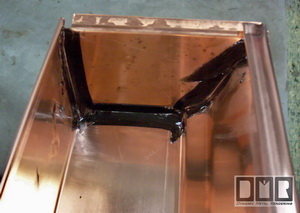
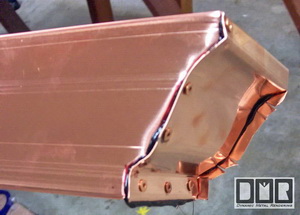
Caulk the inside over all the rivets
and seams, working in with a finger

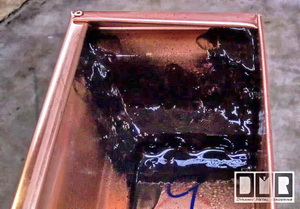
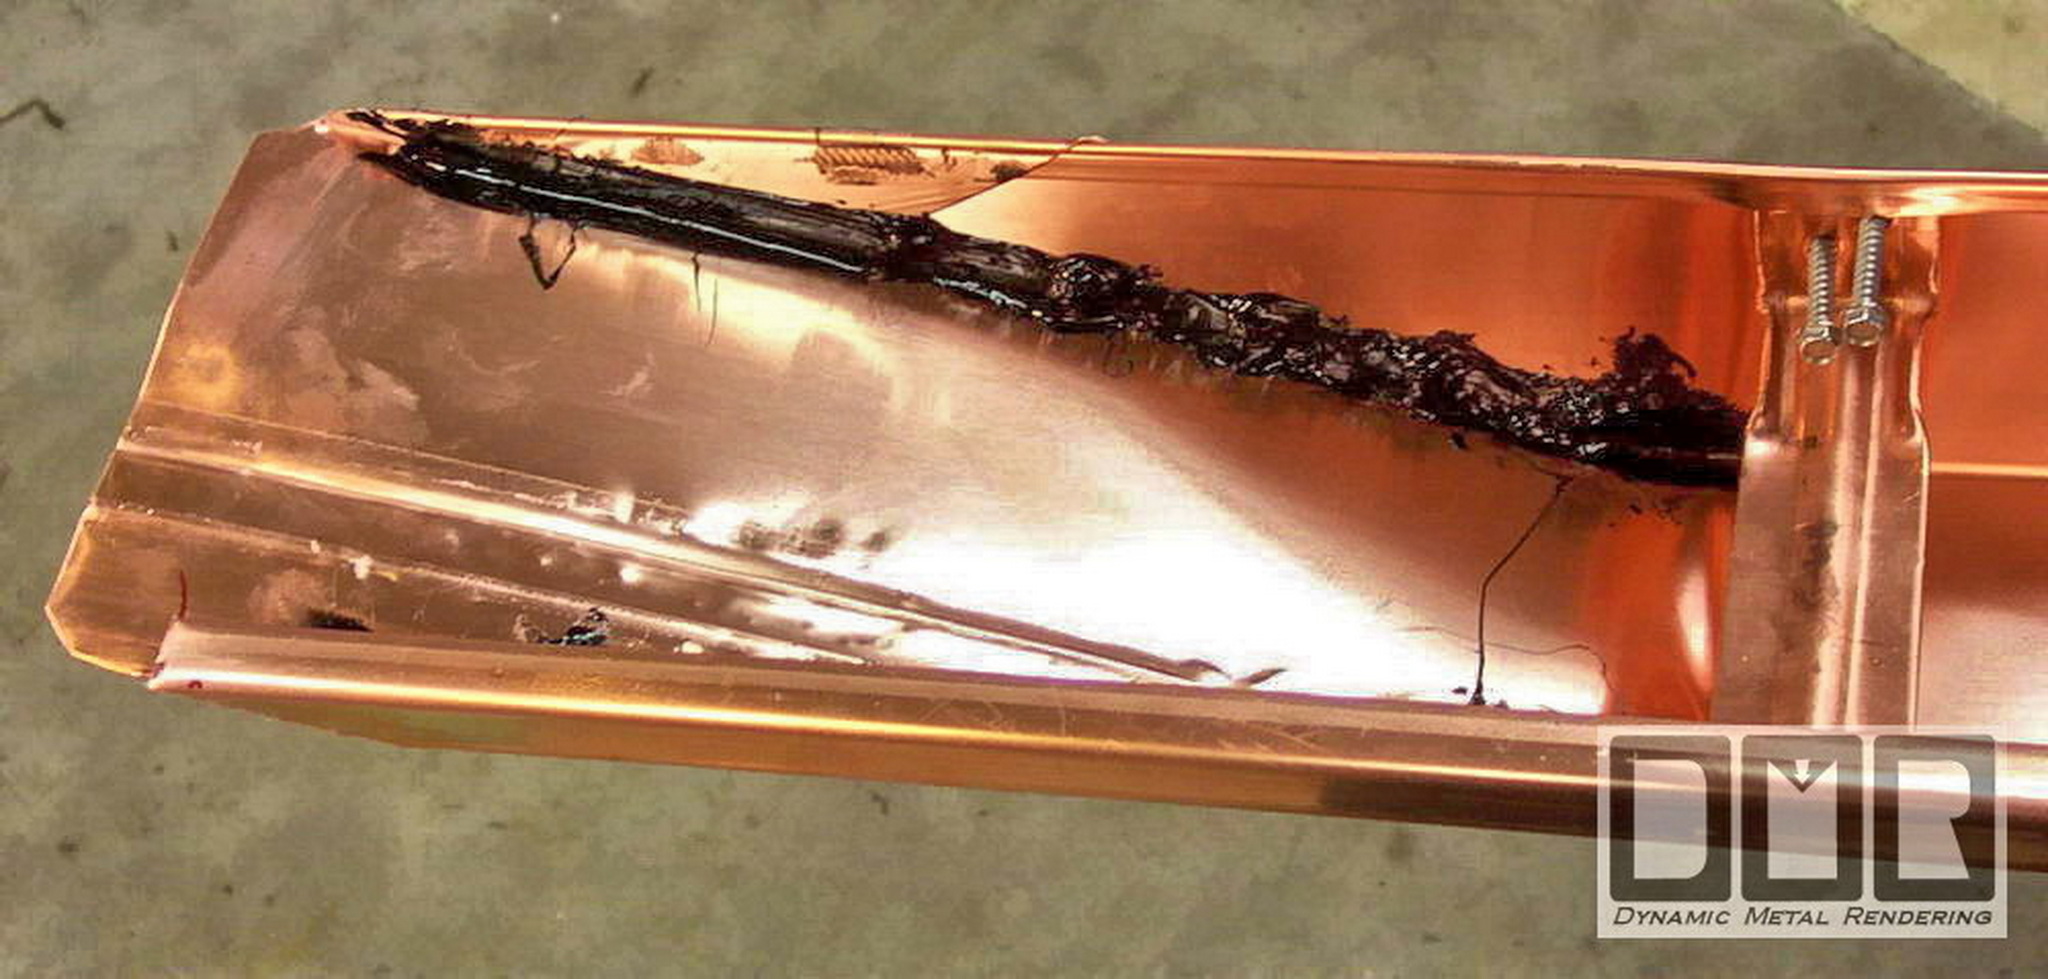
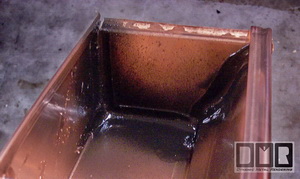
Smoothen the caulk out with some dark
spray pint as a solvent, working it in
again with a finger

.

Other Custom Endcapping

This is where a gutter end will meet with the roof.  Most commonly at the base of a valley.  Most gutter installers will simply cut the bottom of the gutter open here to empty it's mossy contents onto the roofing shingles.  We go to great lengths to never dump the scummy rain water from gutter onto roofing shingles. We cap and seal the gutter where it meets with the roof to catch the water rushing down the valley.  Then we cut an outlet just over where is can shed it's contents into a lower gutter.
This is a tricky process that we again seem to be alone in this sort of detail.  we have to carefully determine the angle of the roof and where it will end the gutter for a nice tight fit to look like it was meant to be this way.  Below shows this end folded upwards to close the end of the gutter, with the caulk between the two layers of over-lapping metal.  We then add more inside the gutter and press it into the seam with our finger.
Here is this end riveted closed.

.

 Click on the pictures for a better view

The 3"x 4" Outlets

This is an example of a 3"x 4" No-clog outlet we do for our clients.  It is twice as large as the standard 2"x 3" outlets, and about 3 times the size of most outlets in the fascia gutters installed.  In a debris free situation, those small outlets are just fine, but here in the Northwest we are famous for our trees that grow wild.  Besides the good aesthetics of trees, it is very expensive or dangerous to cut them back, so we here need a good workable solution the the ever clogging gutters that are so common.  It is funny how in area that this sort of debris is not such an issue, building code does not place a requirement to have gutters, so all gutters should be better designed around dealing with this terrible debris issue.

We start with punching a standard 2"x 3" hole in the floor of the gutter.  We trace around the 3"x 4" 'A' style elbow shown here to mark where to cut out to the edges of the hole.  They make a pre-formed outlet coupling, but to maximize the size of this hole, we choose not to use them.  We then cut out to the corners of the line we drew and bend the copper to form down into the elbow in this semi-oval shape.  We trim any excess metal, leaving about 1/2" flap.

We re-position the elbow and drill the 1/8" holes for the rivets to go through the metal of the elbow and the metal flap bent down into the elbow.  This has the rivet fasteners not interfere with the floor of the gutter, as is common with most installations, adding to the debris getting jammed in the gutter.  There is one on each side, two in the outer face, and two on the back to hold the elbow securely to the gutter.  Again, most installer use a preformed outlet coupling and do not attach the elbow to the gutter like we do.  We have seen too many of these installations separate from the gutter, so for the last decade we have installed the first elbow under the gutter before installation of the gutter.

We then remove the elbow and run a bead of caulk inside the top edge of the elbow and reposition the elbow on the outlet flanges of the gutter. Again, we use a better caulk than all the other gutter installers do.  One that cost about three times the cost.  We rivet the elbow in place and flip the gutter right side up to then seal the junction from the inside as well.  We use our finger to work the caulk up into the seams and smear it over the rivets on the inside.  We then use spray paint as a solvent to smooth out this caulk and work it again into the seams and over the rivets.  We then spray again over this to help seal the caulk from the sun's UV rays that tend to be the most harmful.  If nothing else, it offers shade to the caulk.

These photos do not show it, but the later picture of the inside corner do.  We also use the downspout crimper to crimp the back side of the gutter over the outlet, so the gutter will have slight dip at the outlet. This makes it so there is not standing water on the short end of the gutter that is past the outlet. We install all of our gutters to have a slight grade downwards to the outlets, but it is rare that the outlet is cut to be on the very end of the gutter, so the length that is on the other side would continue to drop in elevation if we did not crimp it the way we do.  We have yet to see another installer who does this.  Heck it is rare to find a gutter installer who will even attempt to install gutter level.  They will set it straight on the roof edge and call it good, without even checking it for angle.  No joke.

.

.

.

On to page #6
"Copper Gutter installation"
Just click on the gutter below to move on deeper into these fabrication web pages.


Back to the Kistler Gutters Job Page #1 "Before & After Pics"


Below is a photo of our
Better Business Bureau's
NW Business Integrity Award
for the year 1998

1999 Better Business Award

We were also a 1997 finalist for this same award. See our referral web page to see how we managed to be honored with this special award

.


Back to homepage
Homepage

Site Map


Company
Profile
Aluminum
Gutters
Copper
Gutters
Custom
Work
Award &
Referrals
Personal
Ethics

Our Contact
Information
.

.

.

.

.

.

.

.

.

.

.

 copper-by-design.com