Gutter Corner Fabrication
The Kistler Copper Gutter Project
Photo & Description Page #4
2325 A St., Forest Grove, Oregon
(11/04)

 Updated 11-23-2007

Company
Profile
Aluminum
Gutters
Copper
Gutters
Custom
Work
Award &
Referrals
Personal
Ethics

Our Contact
Information

Remember you can click on each pictures below for a better view

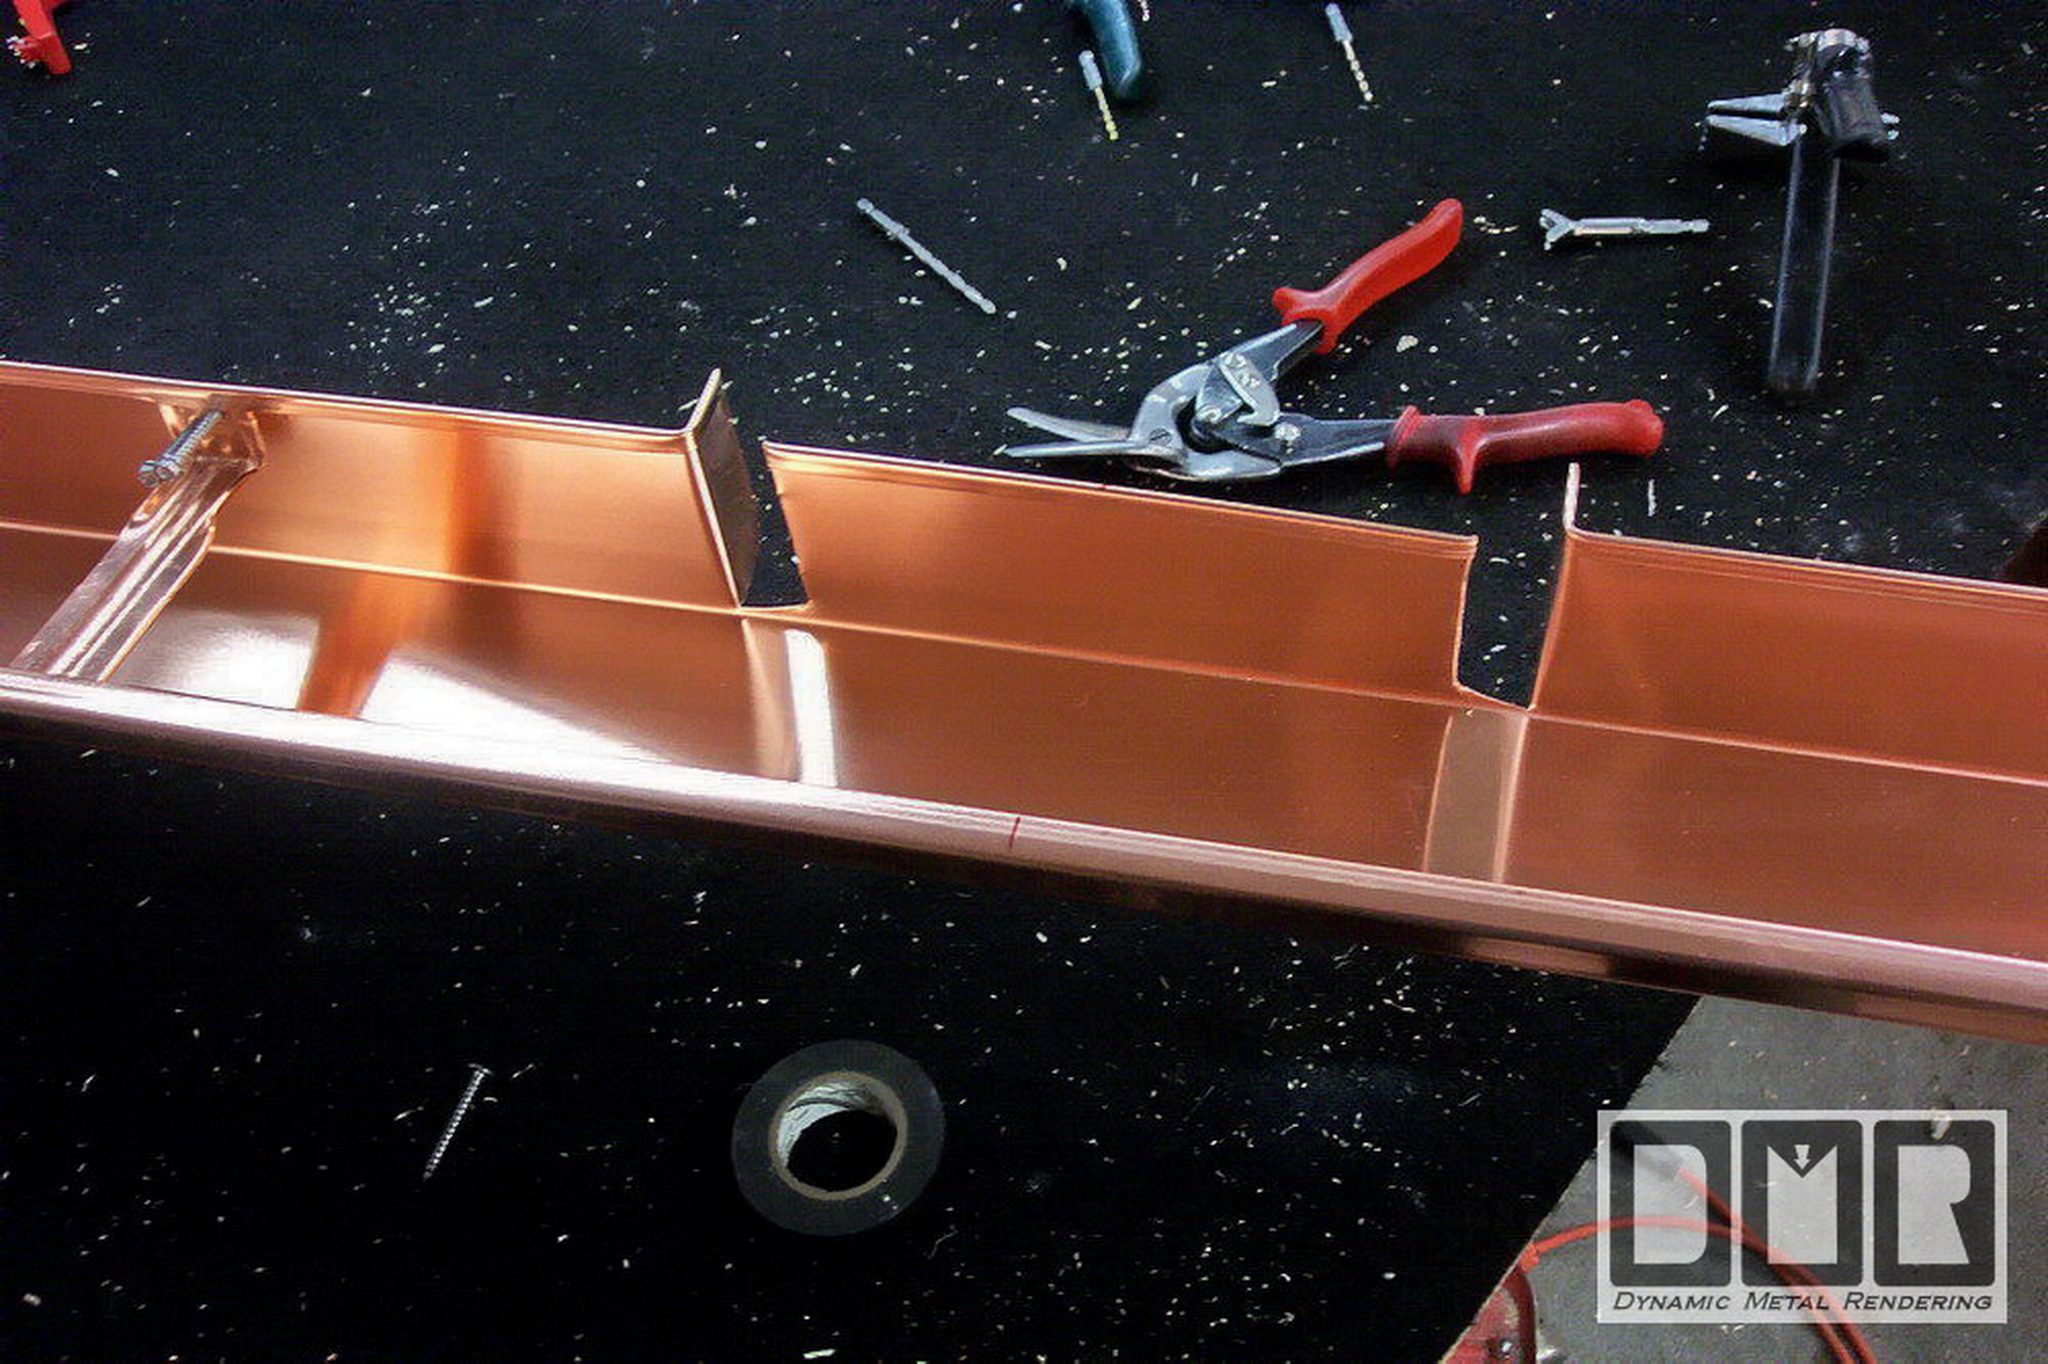
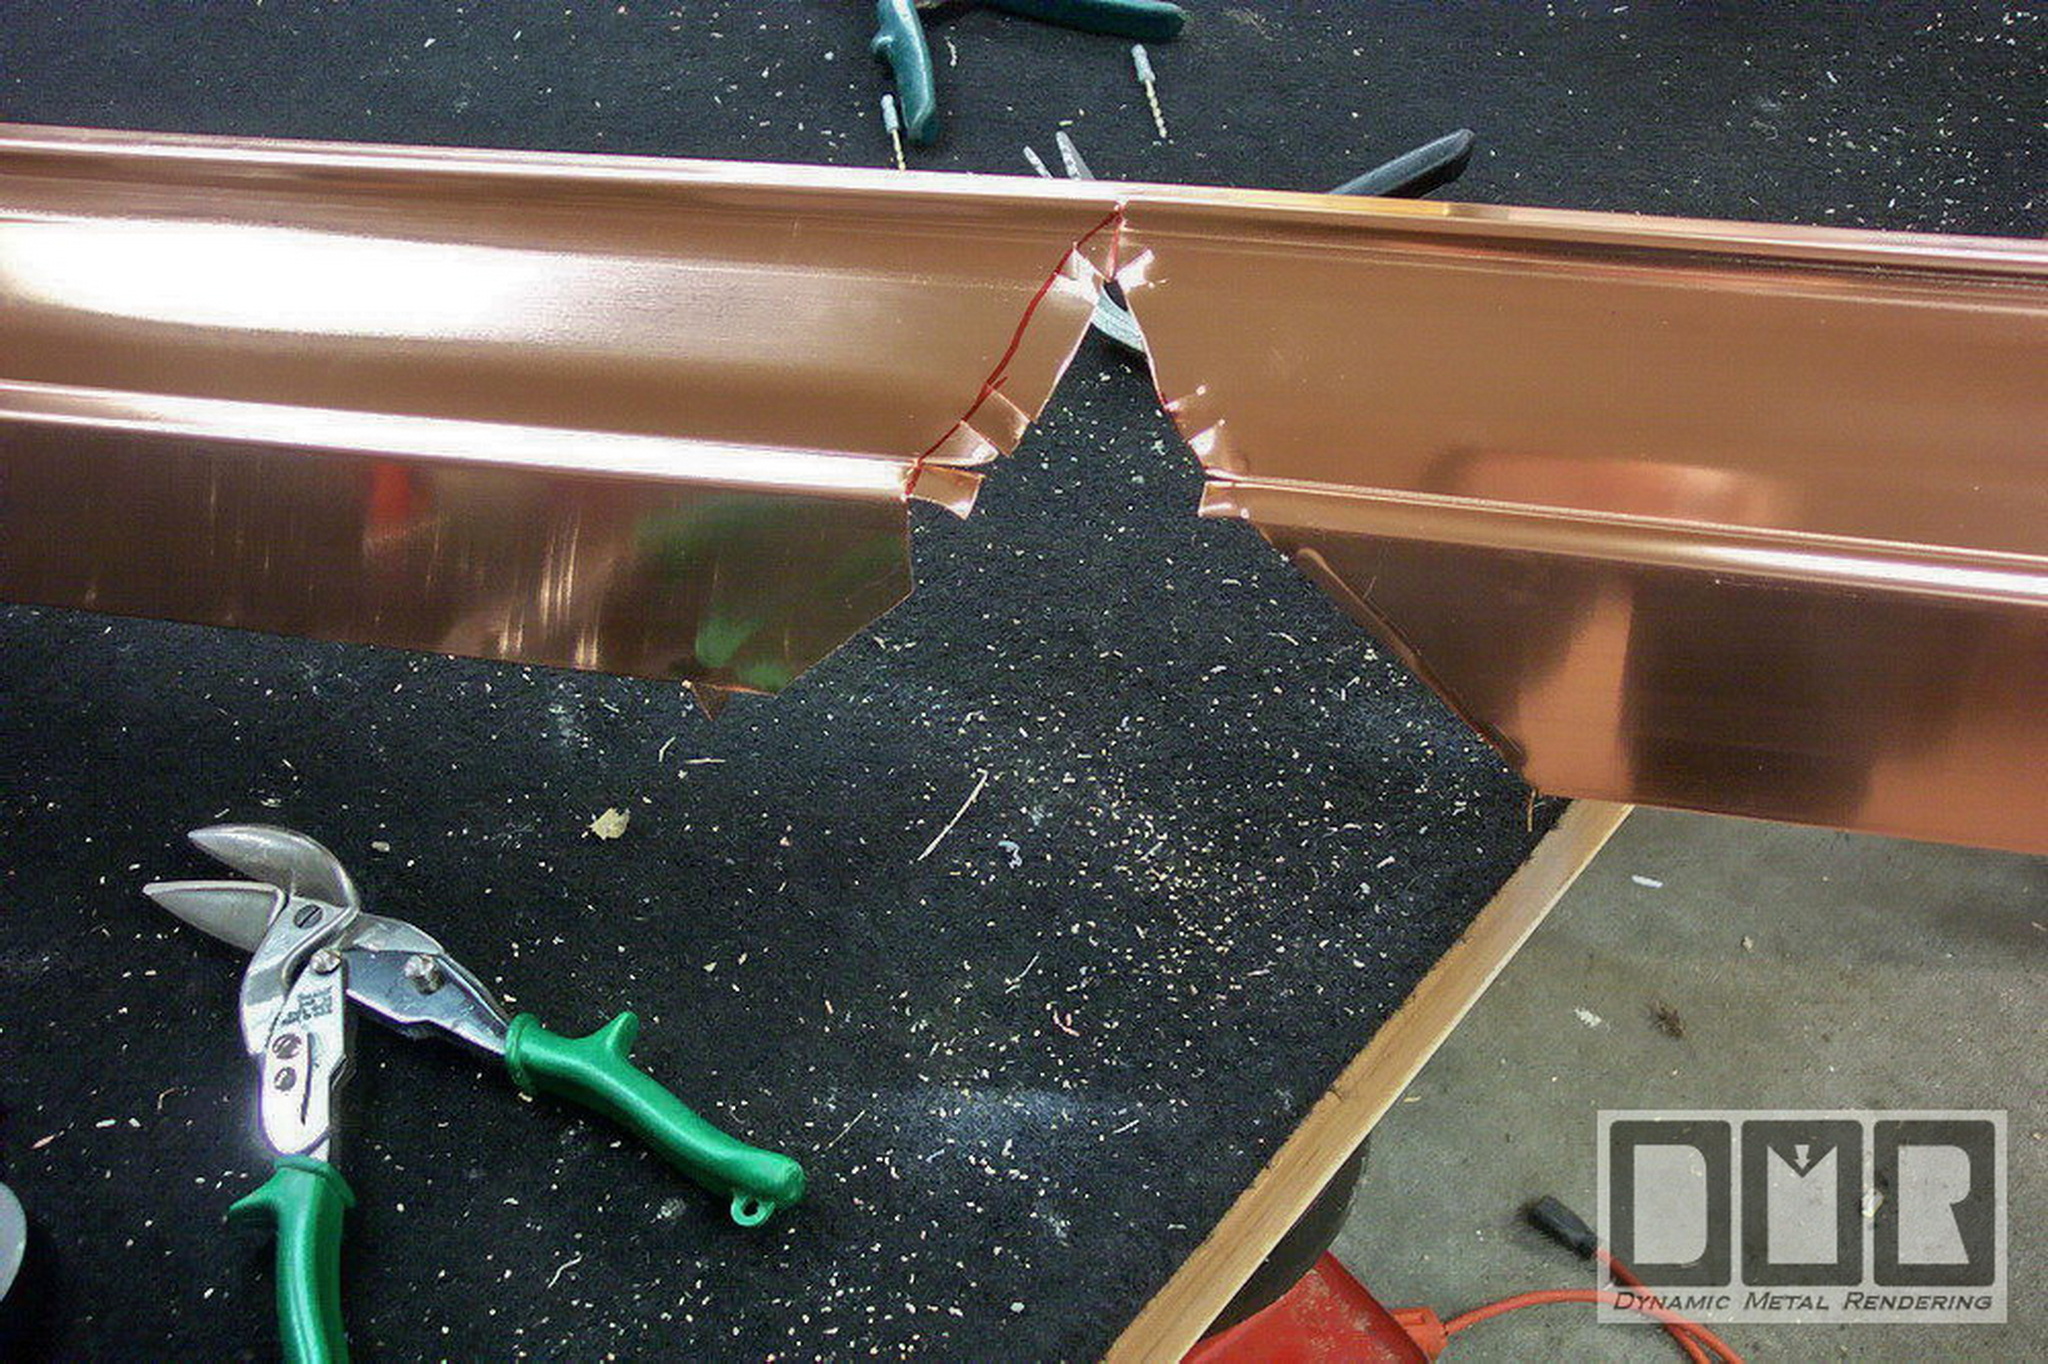
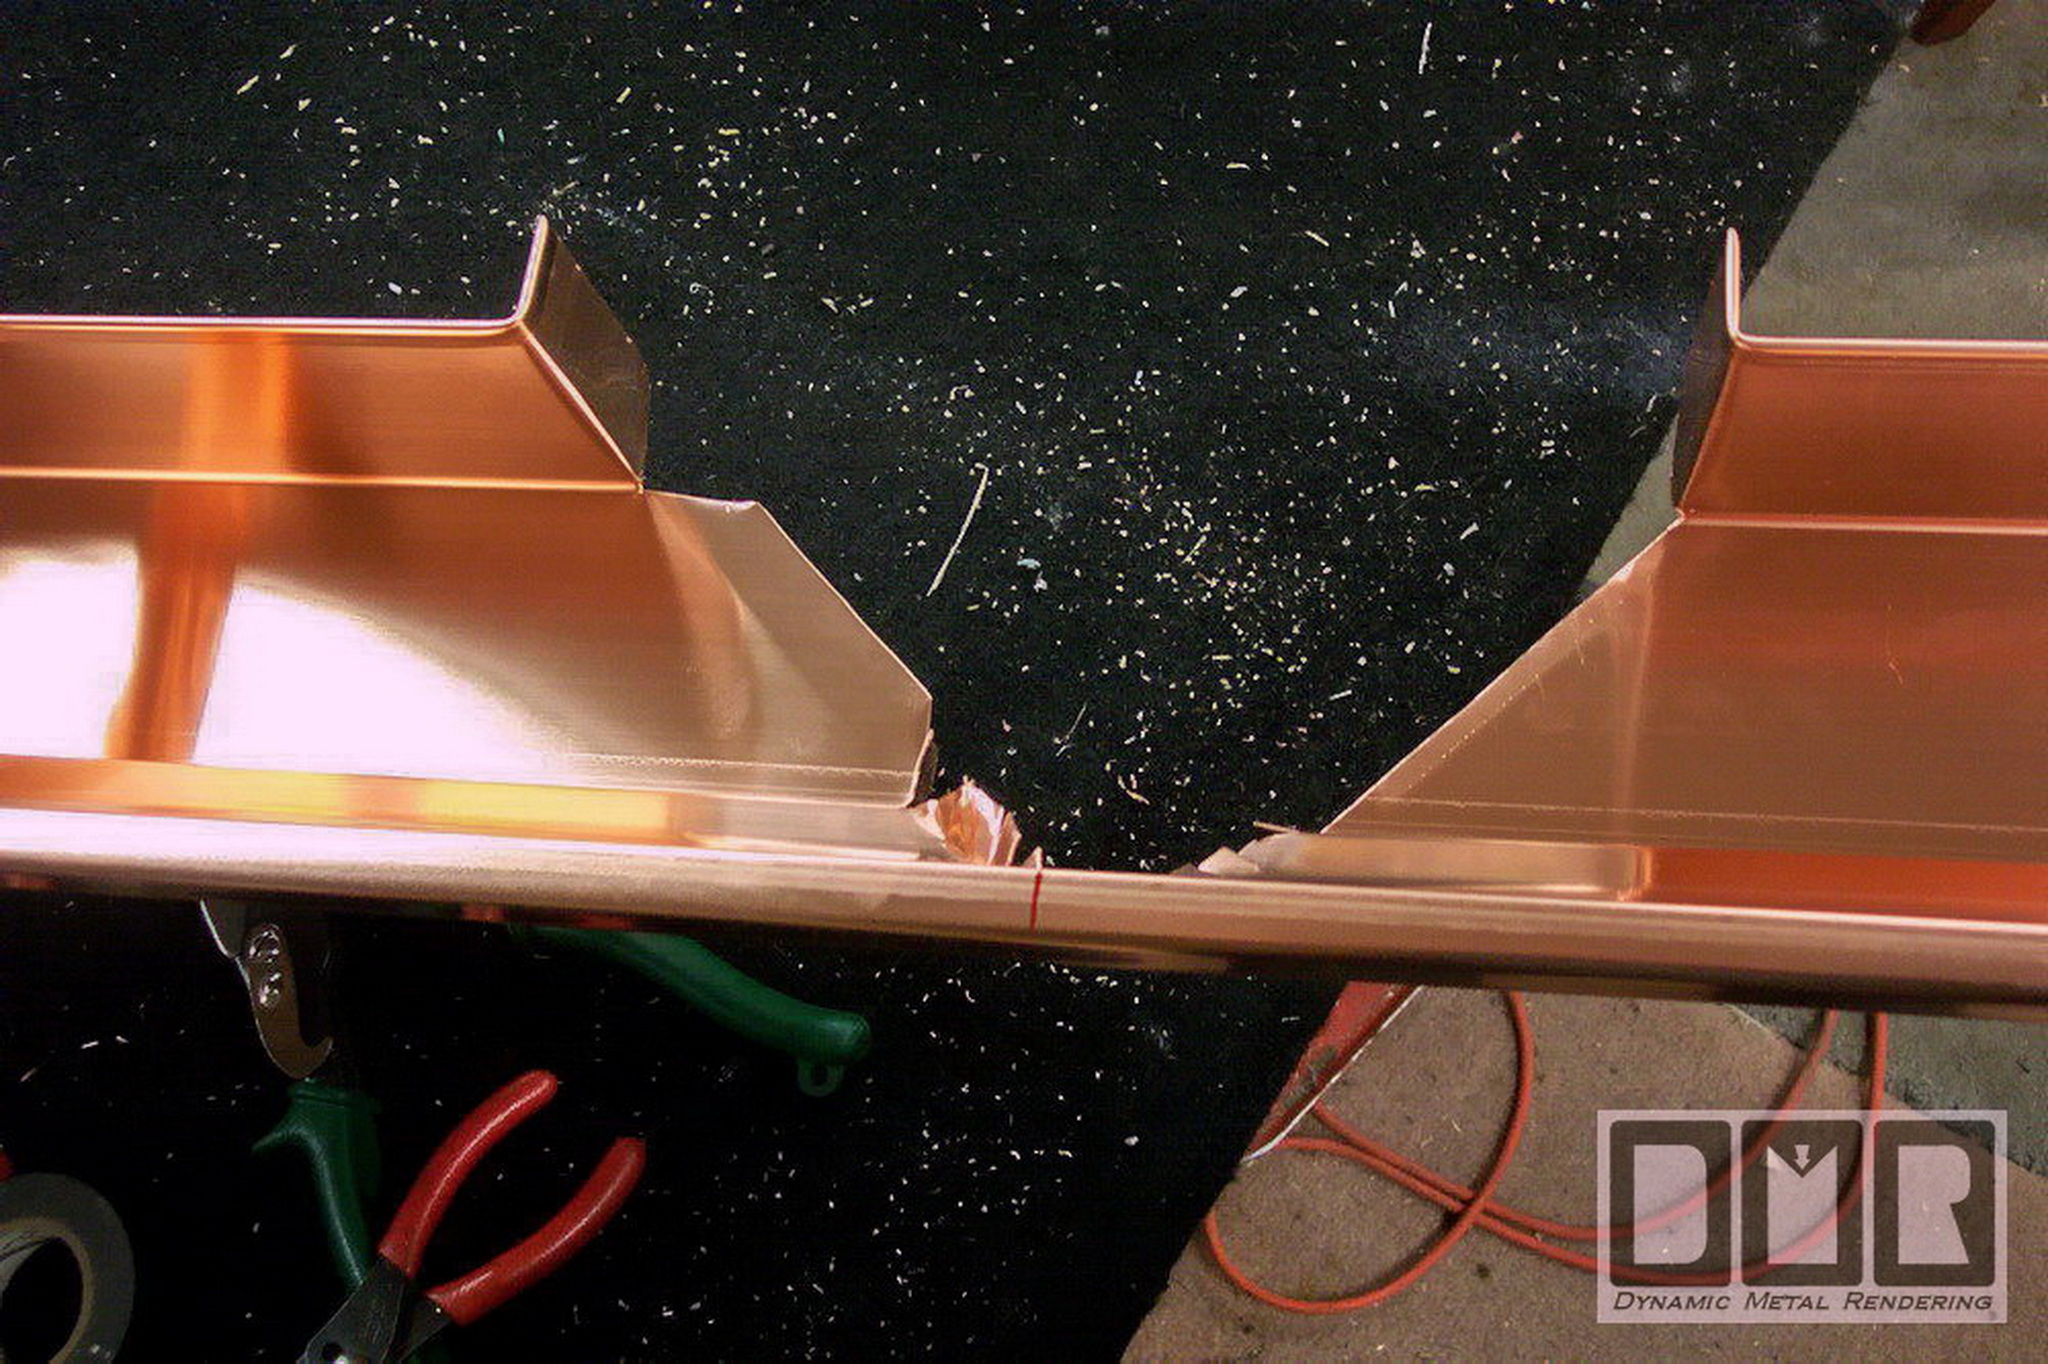
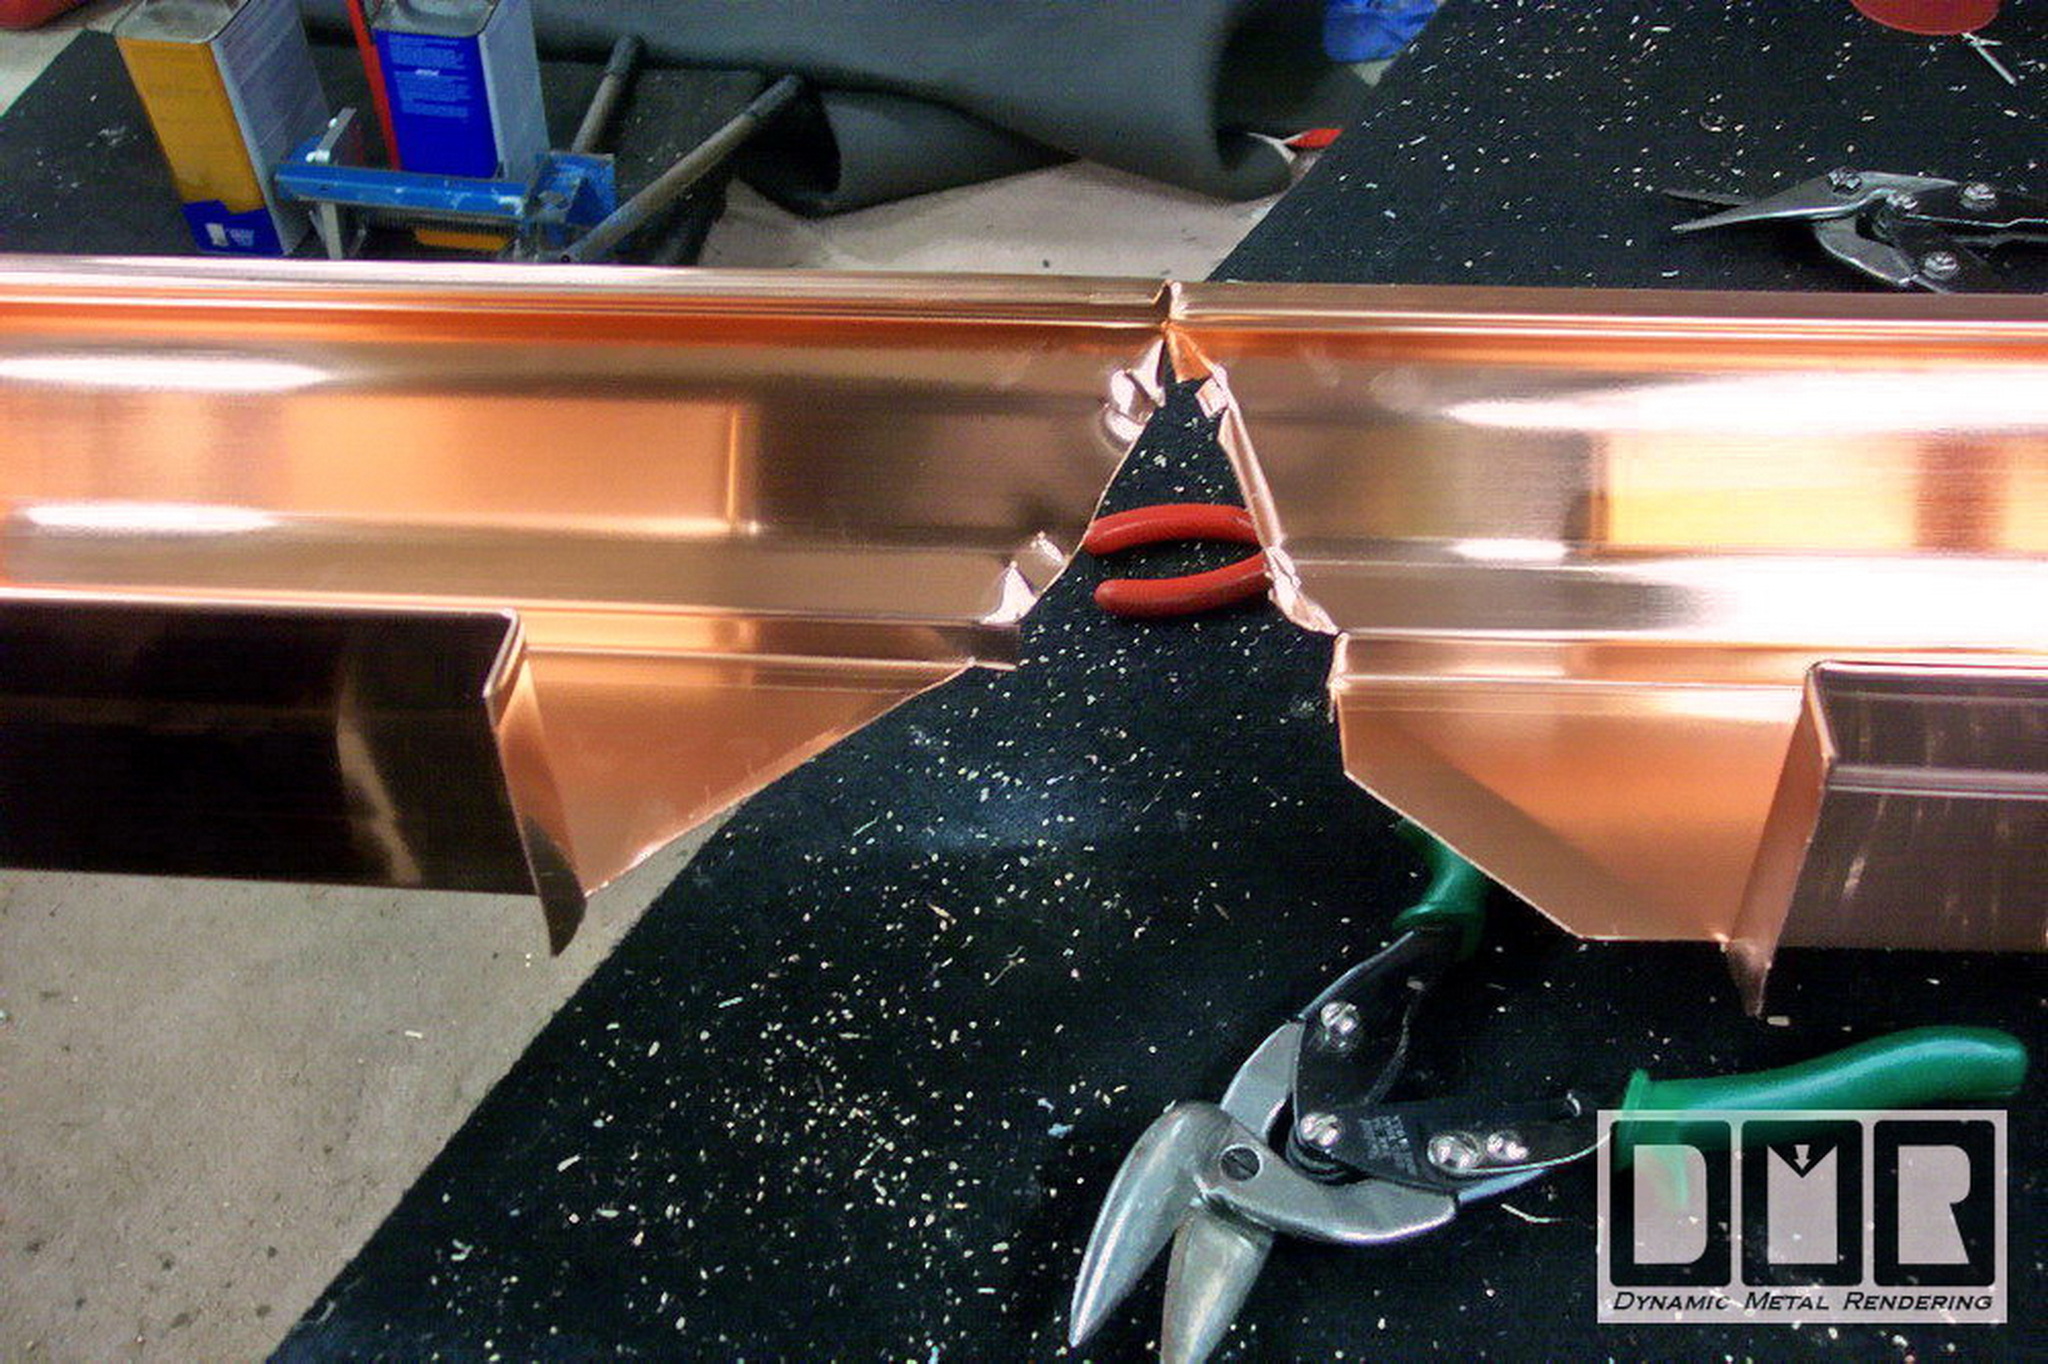
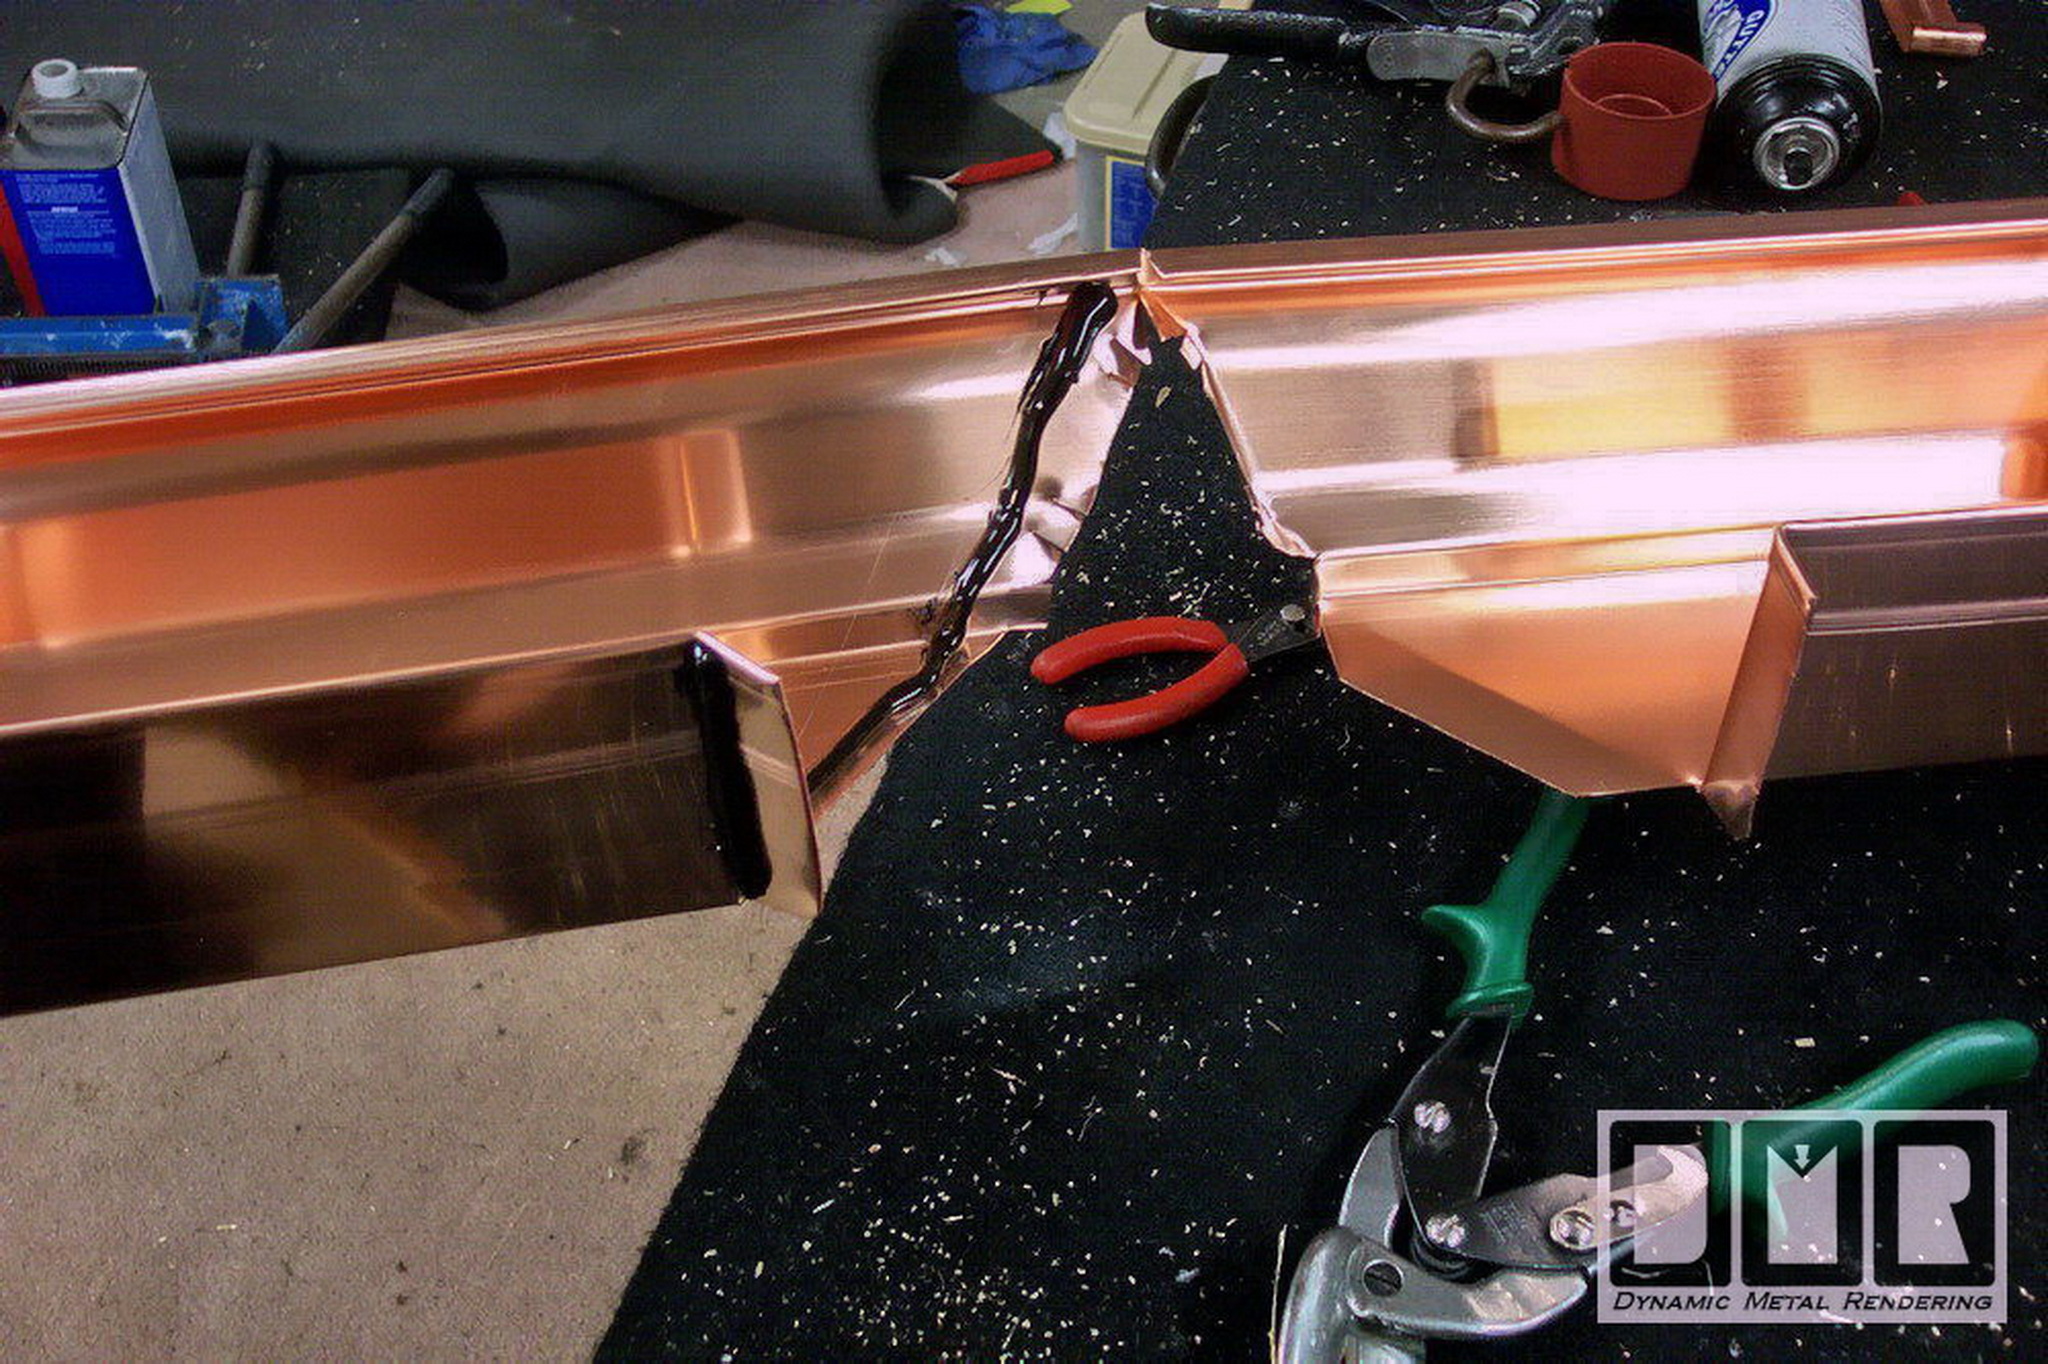
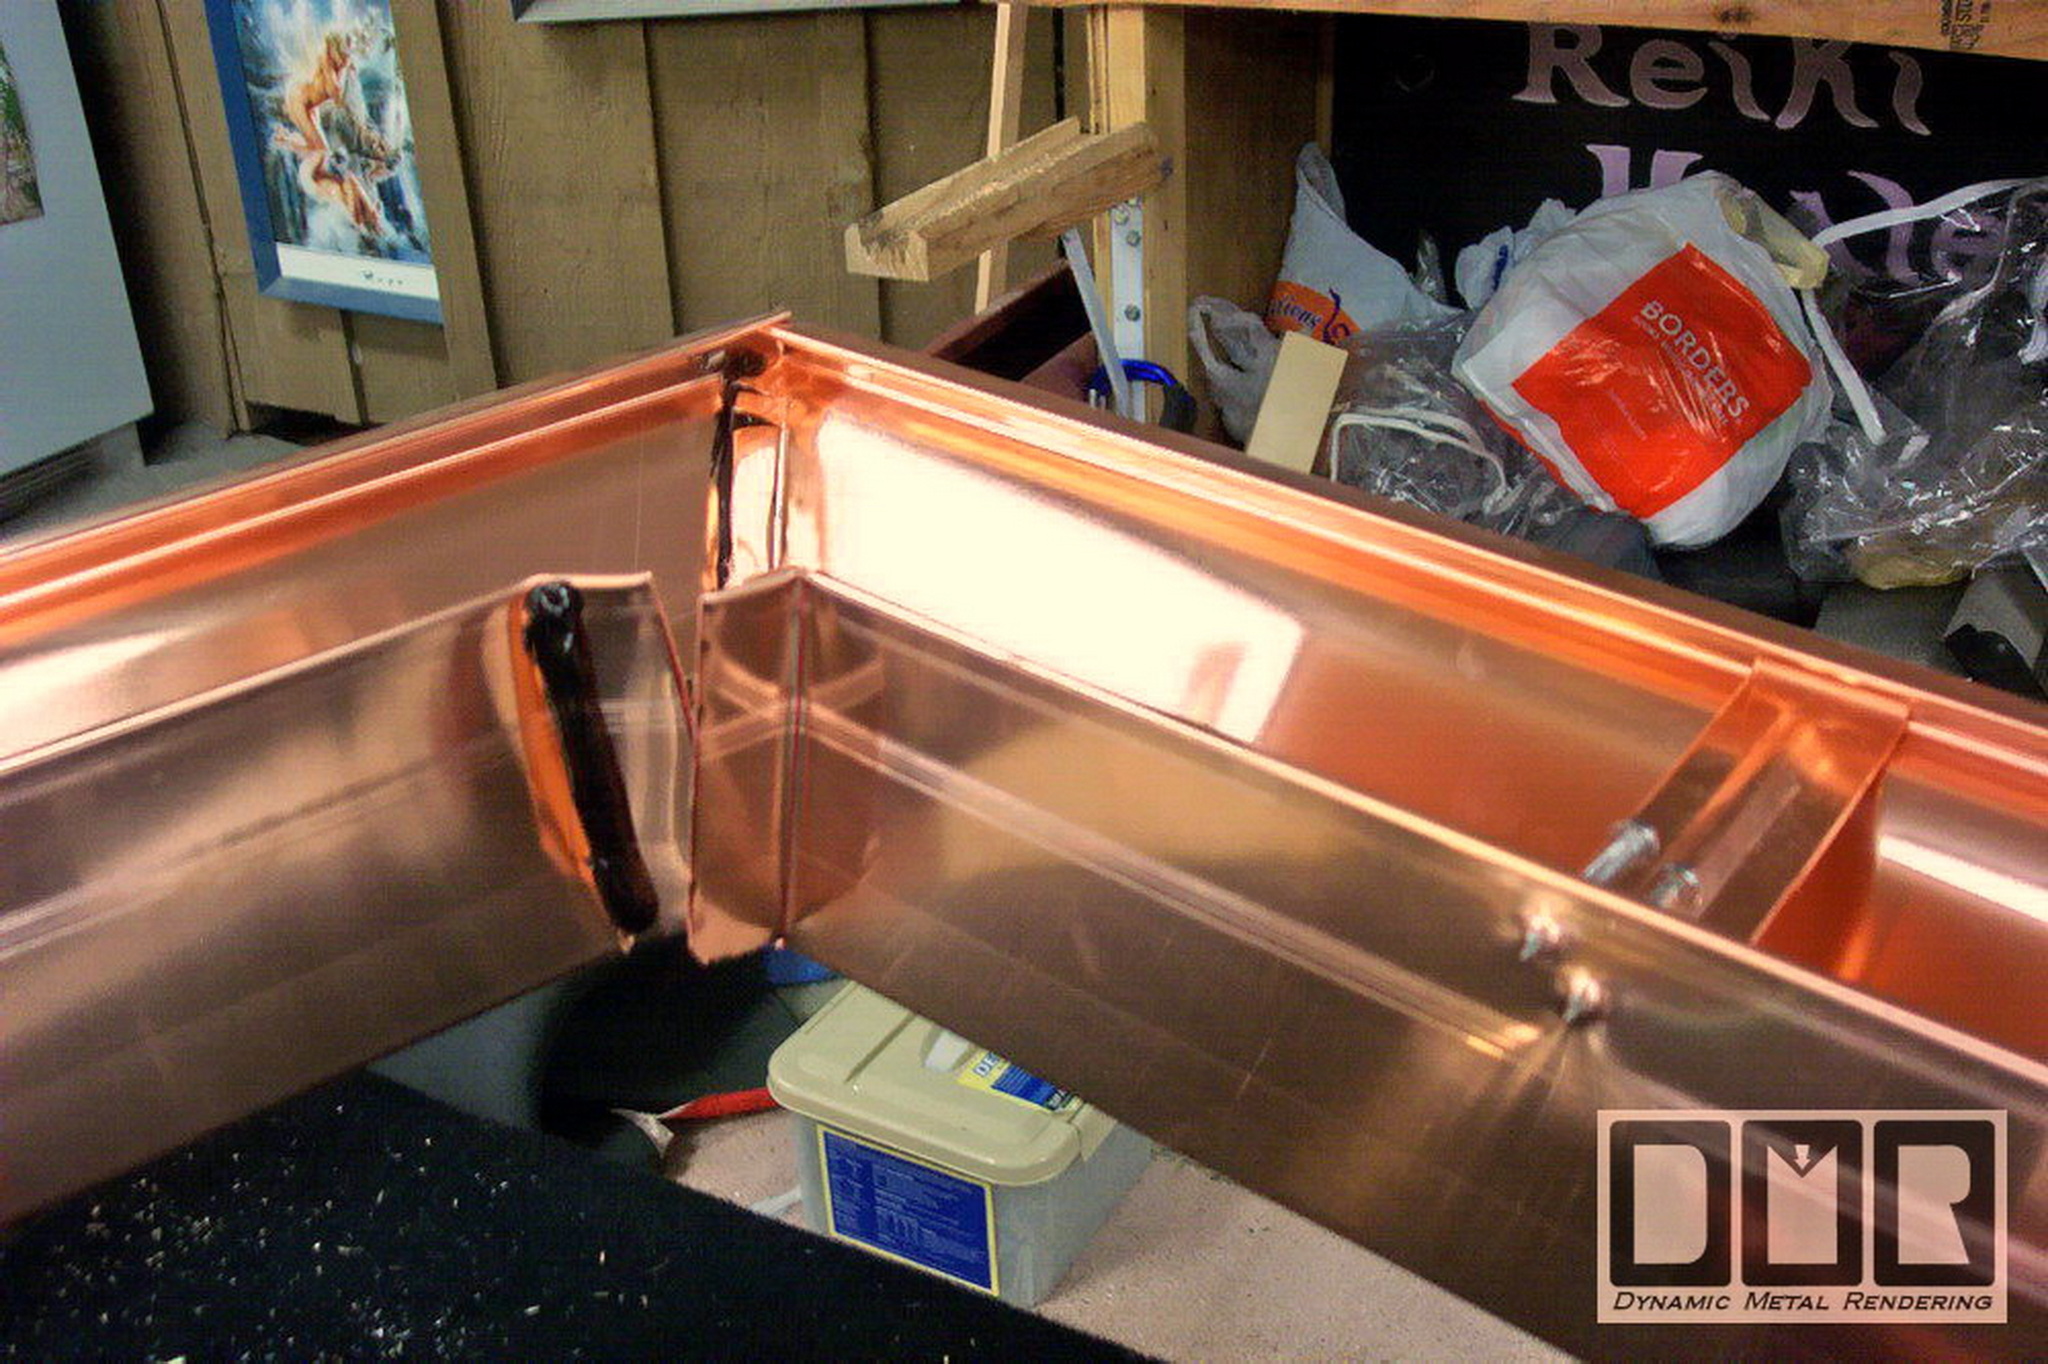
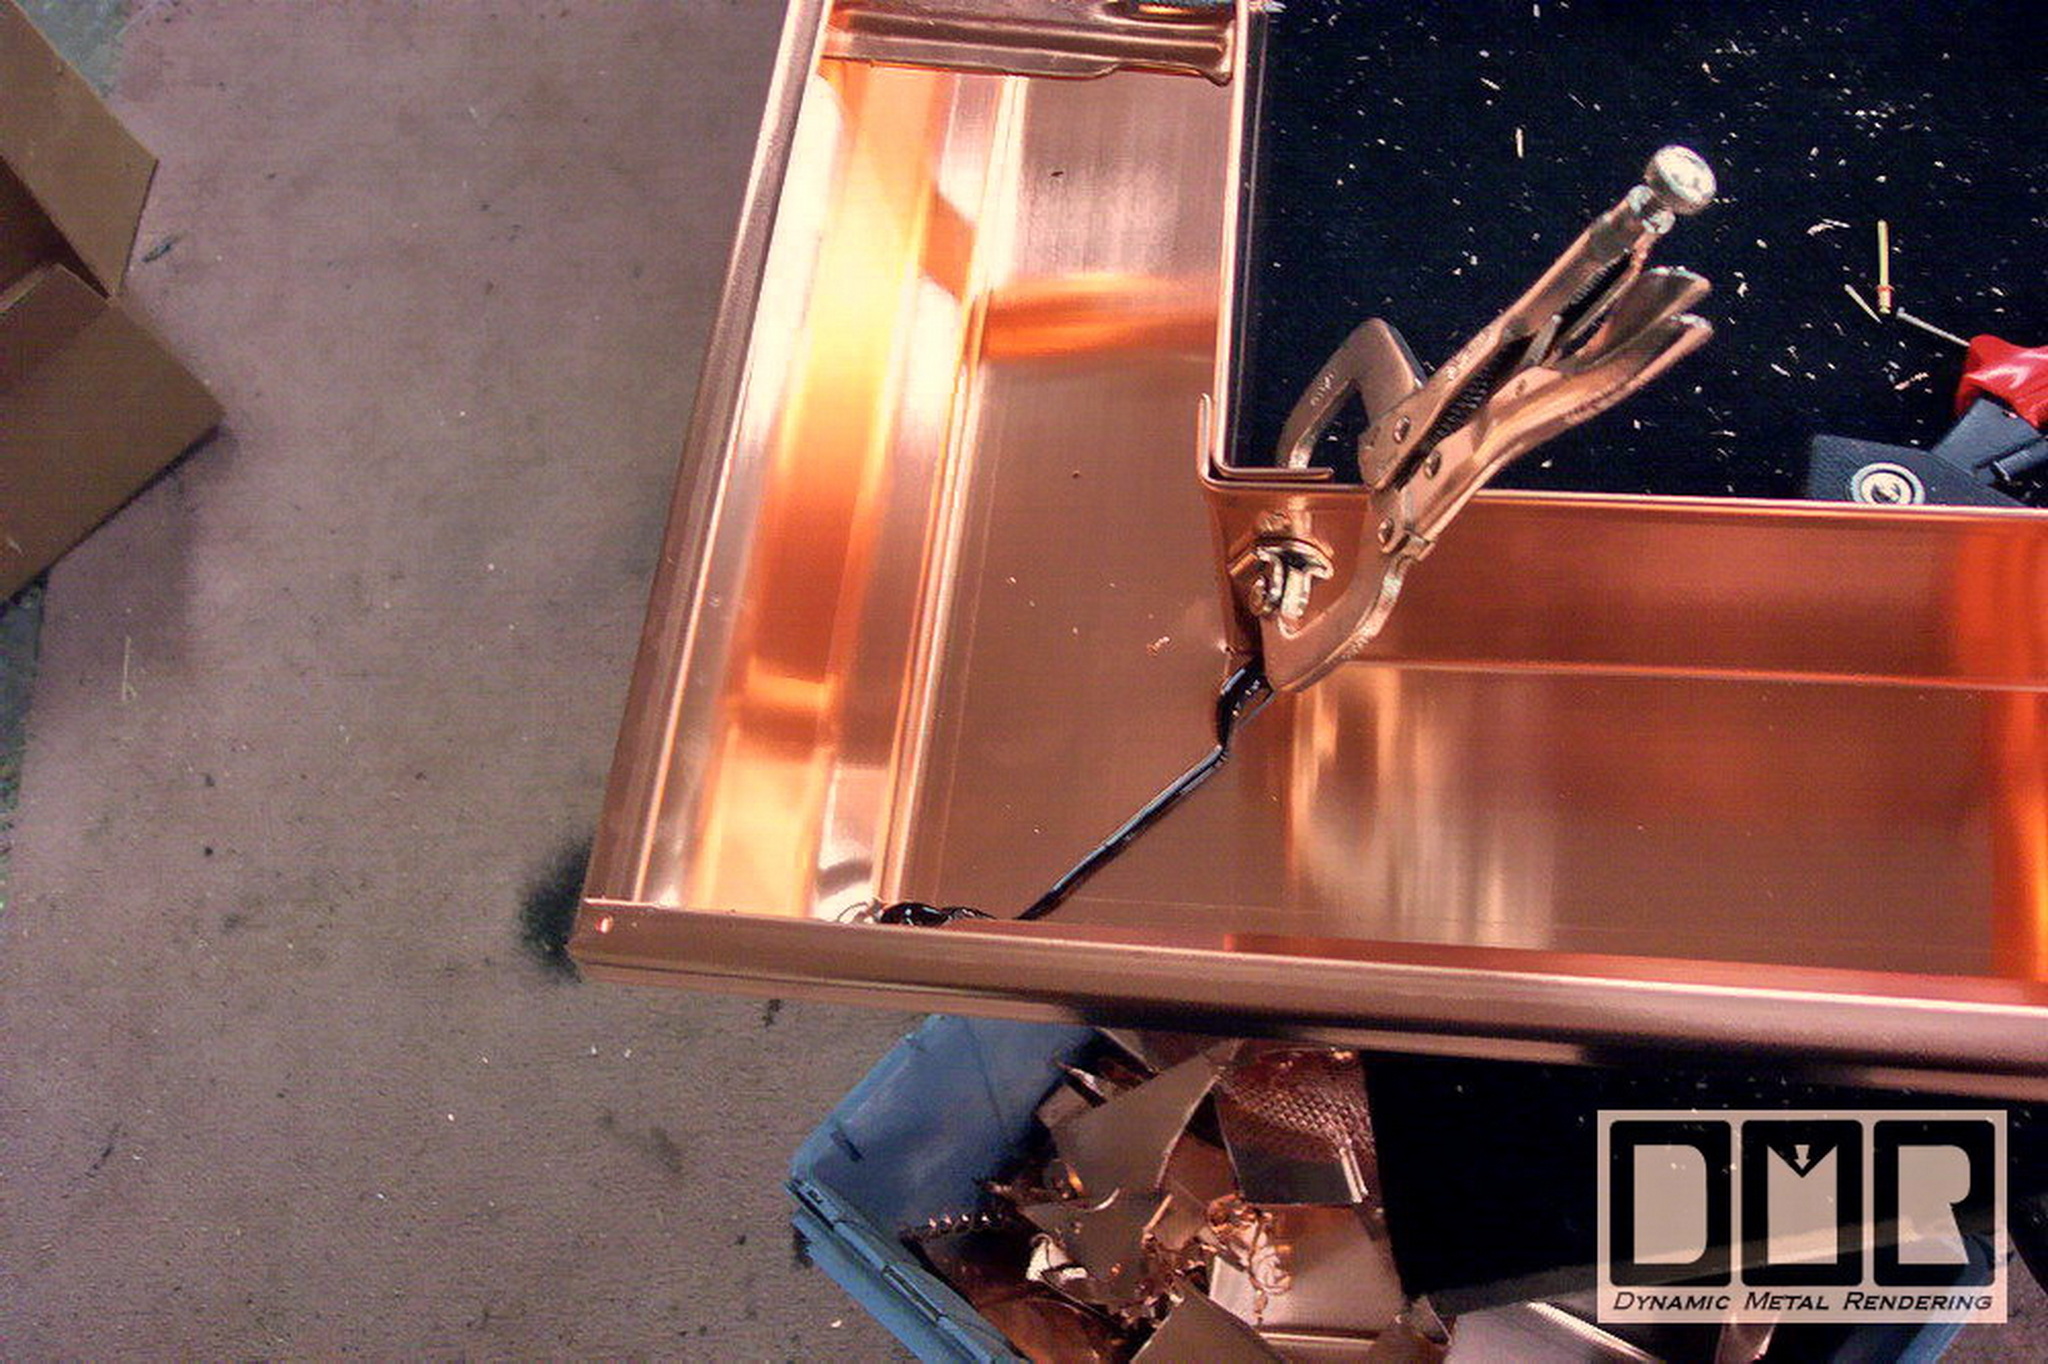
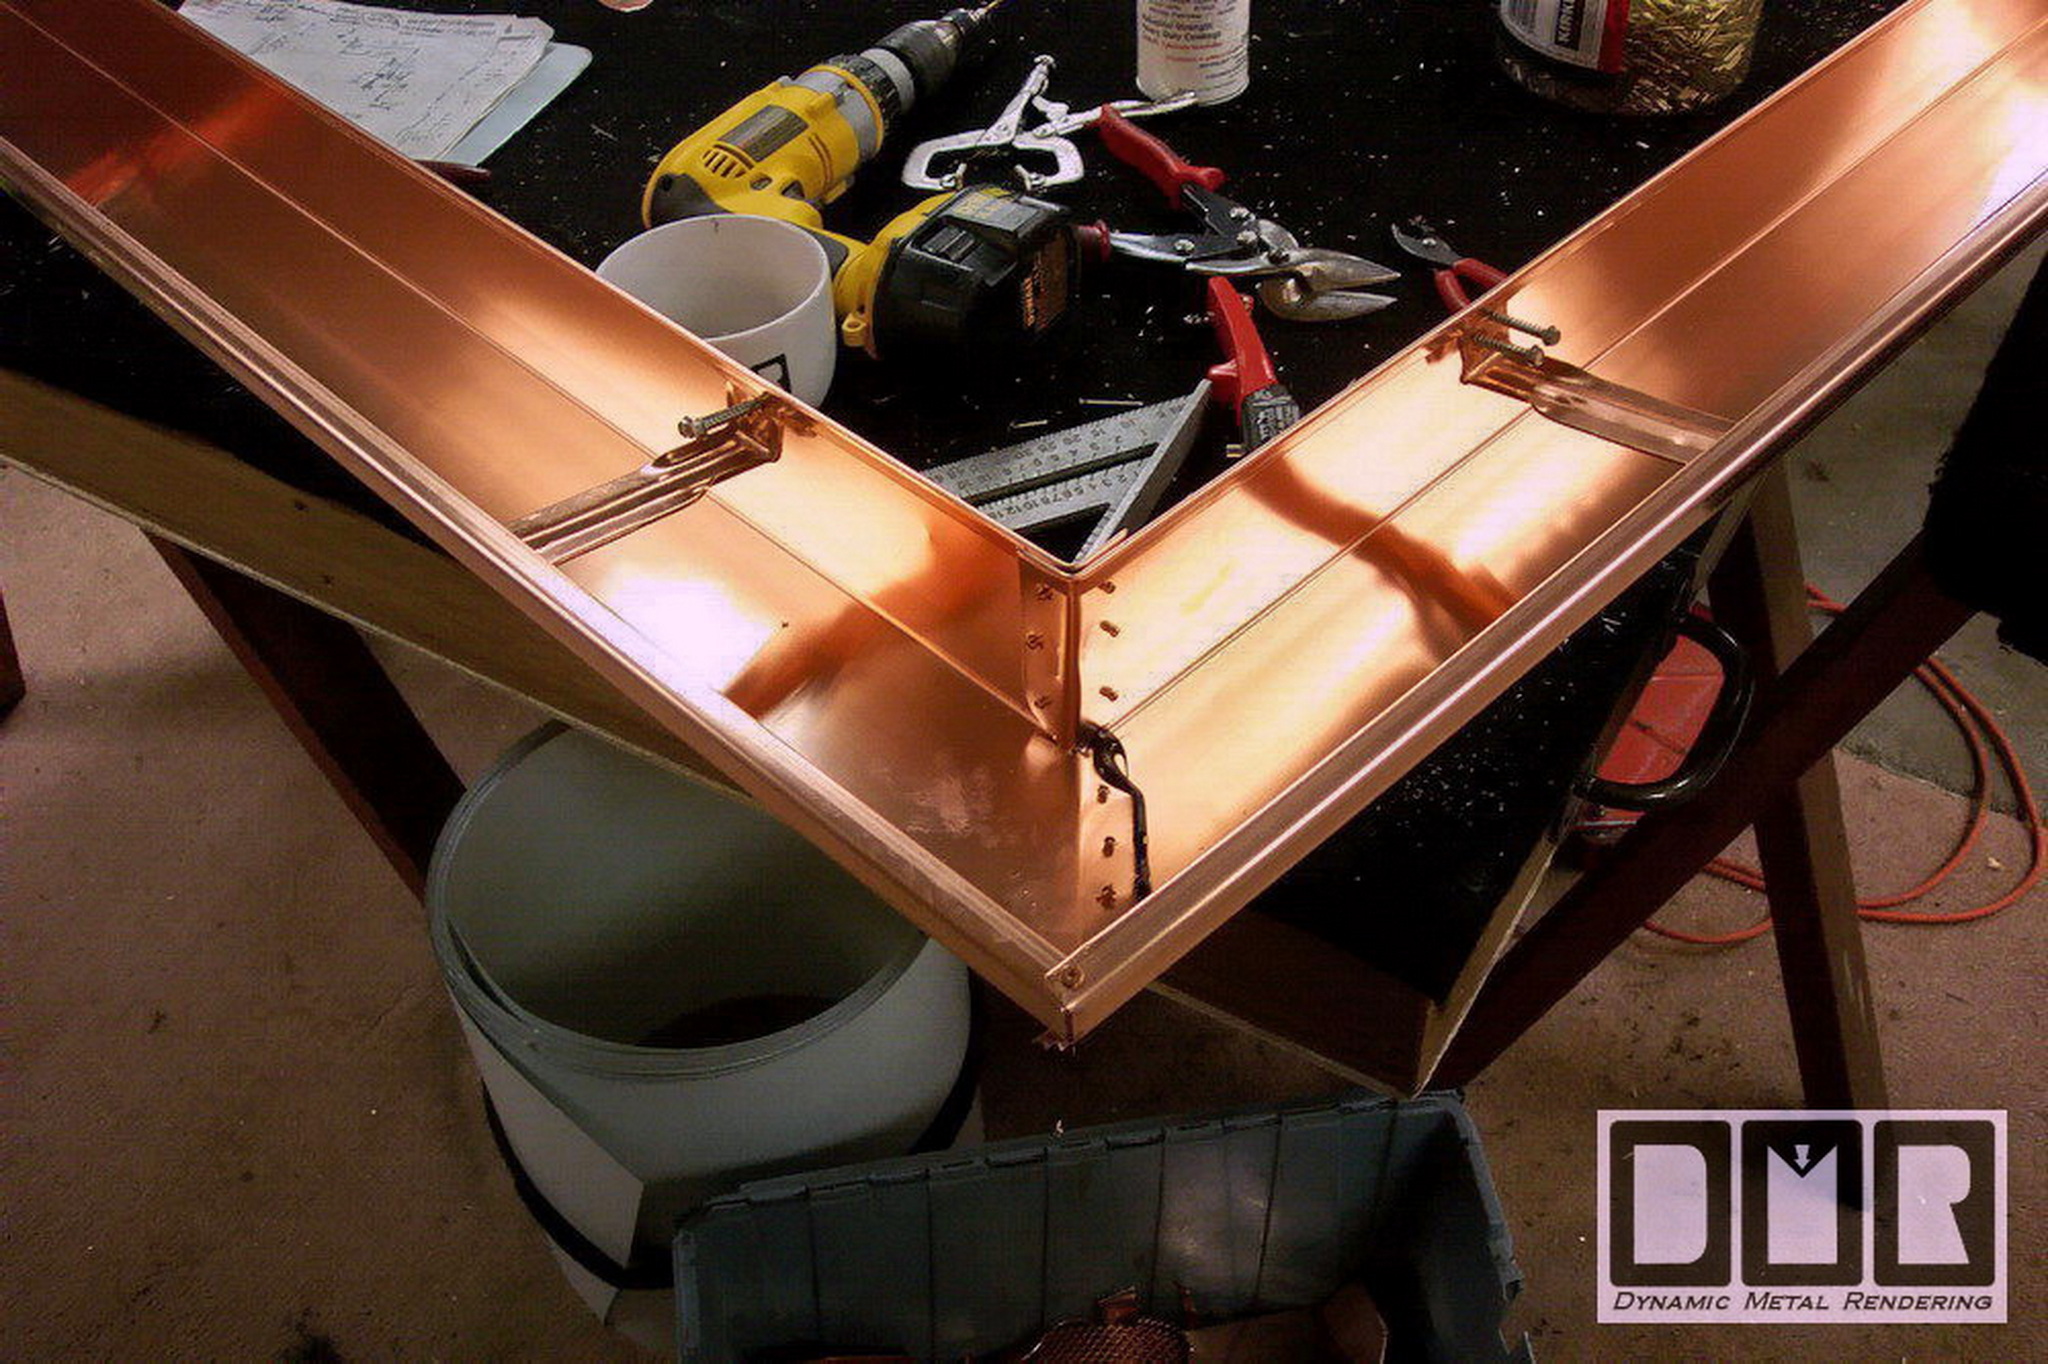
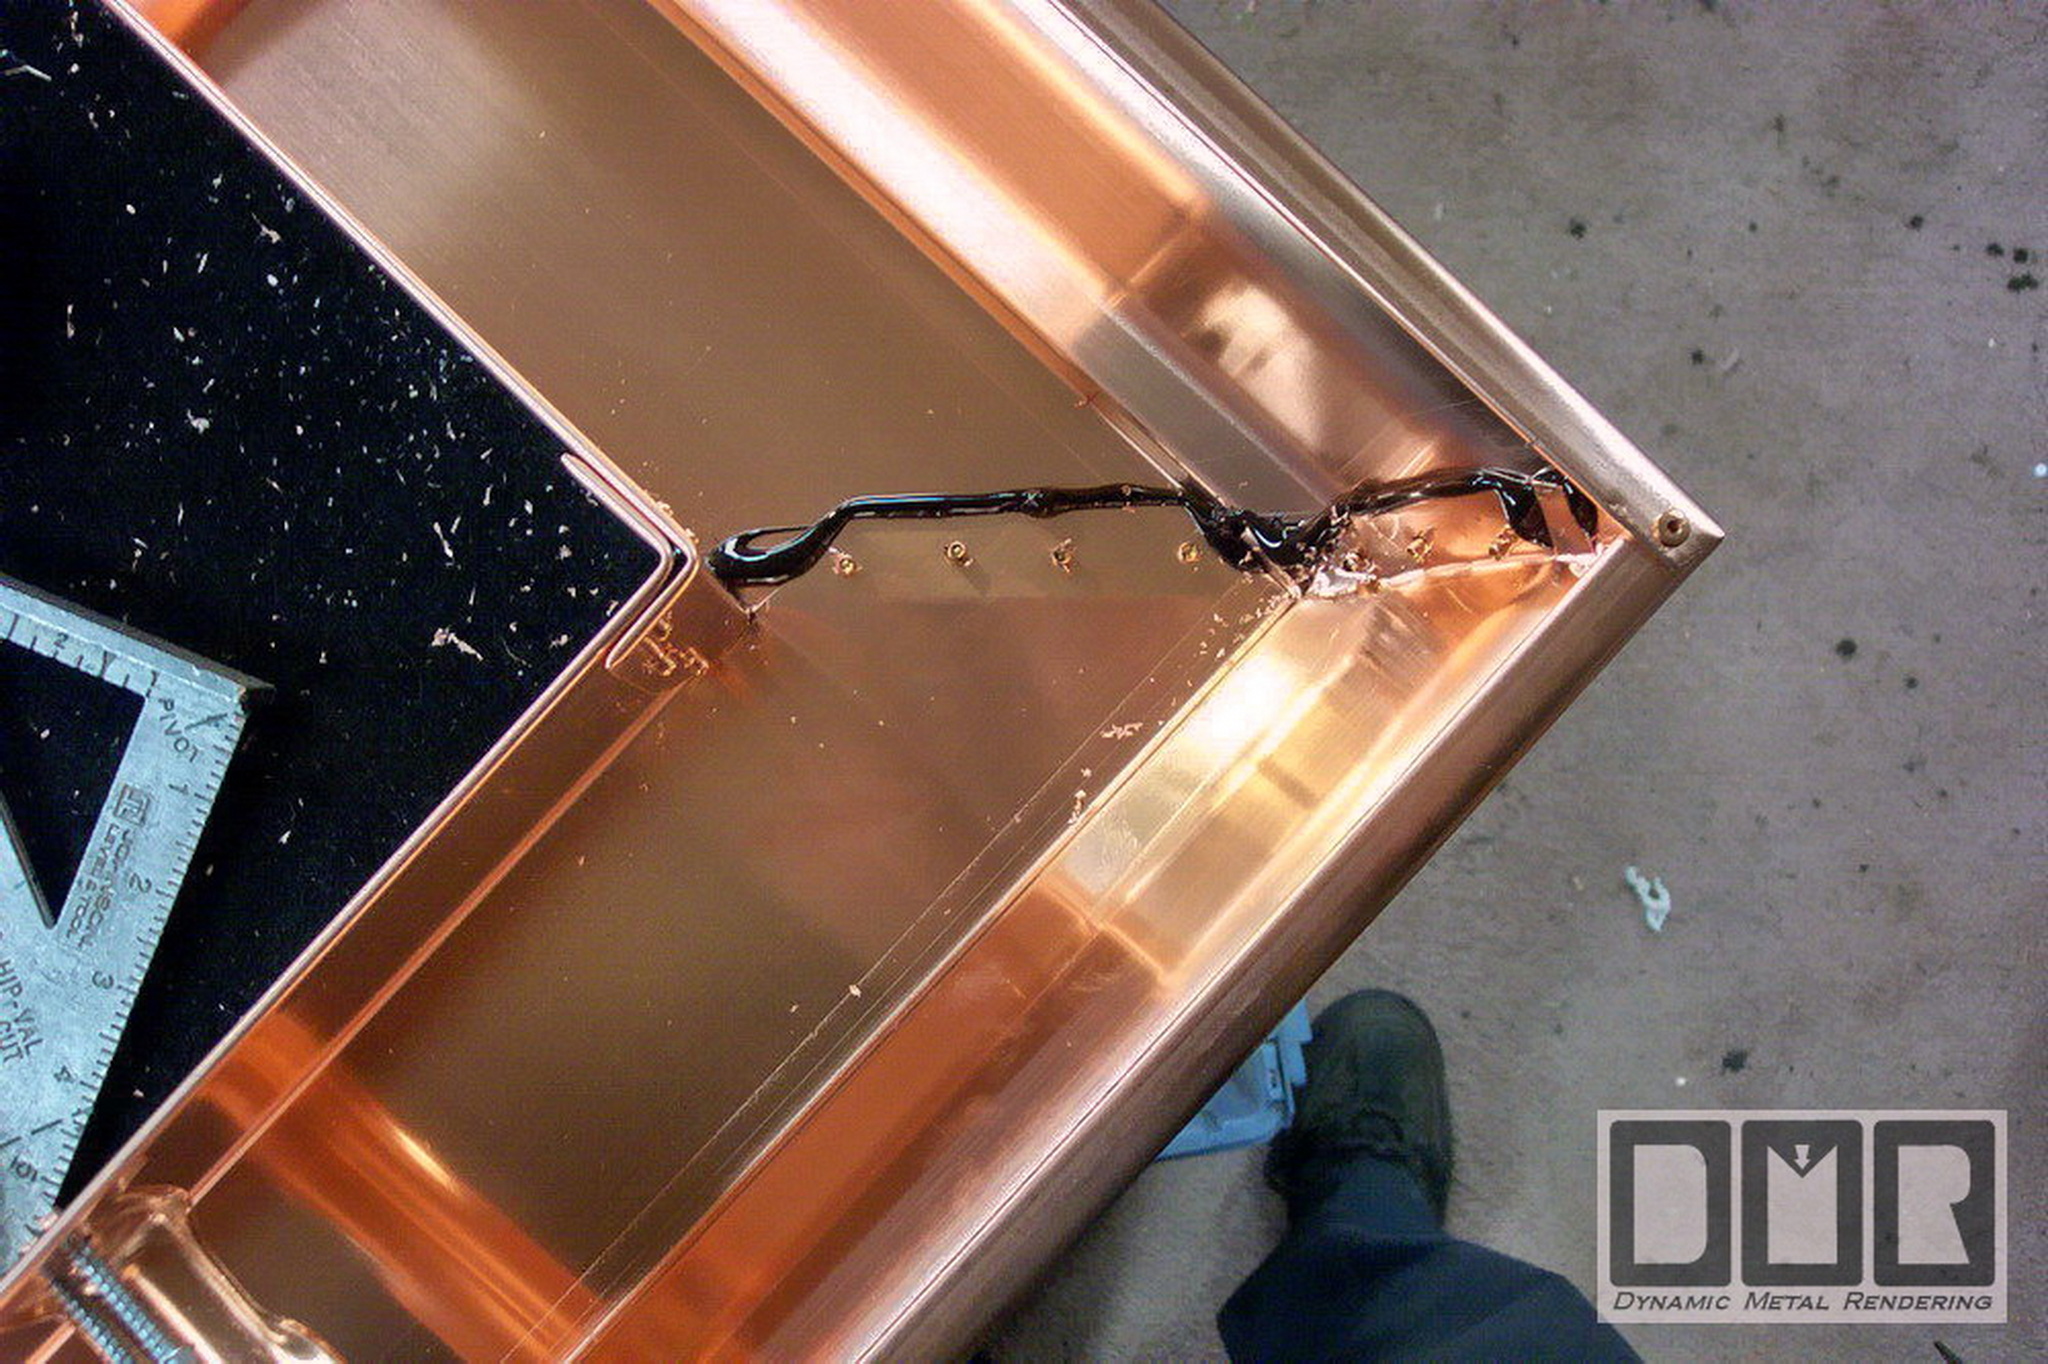
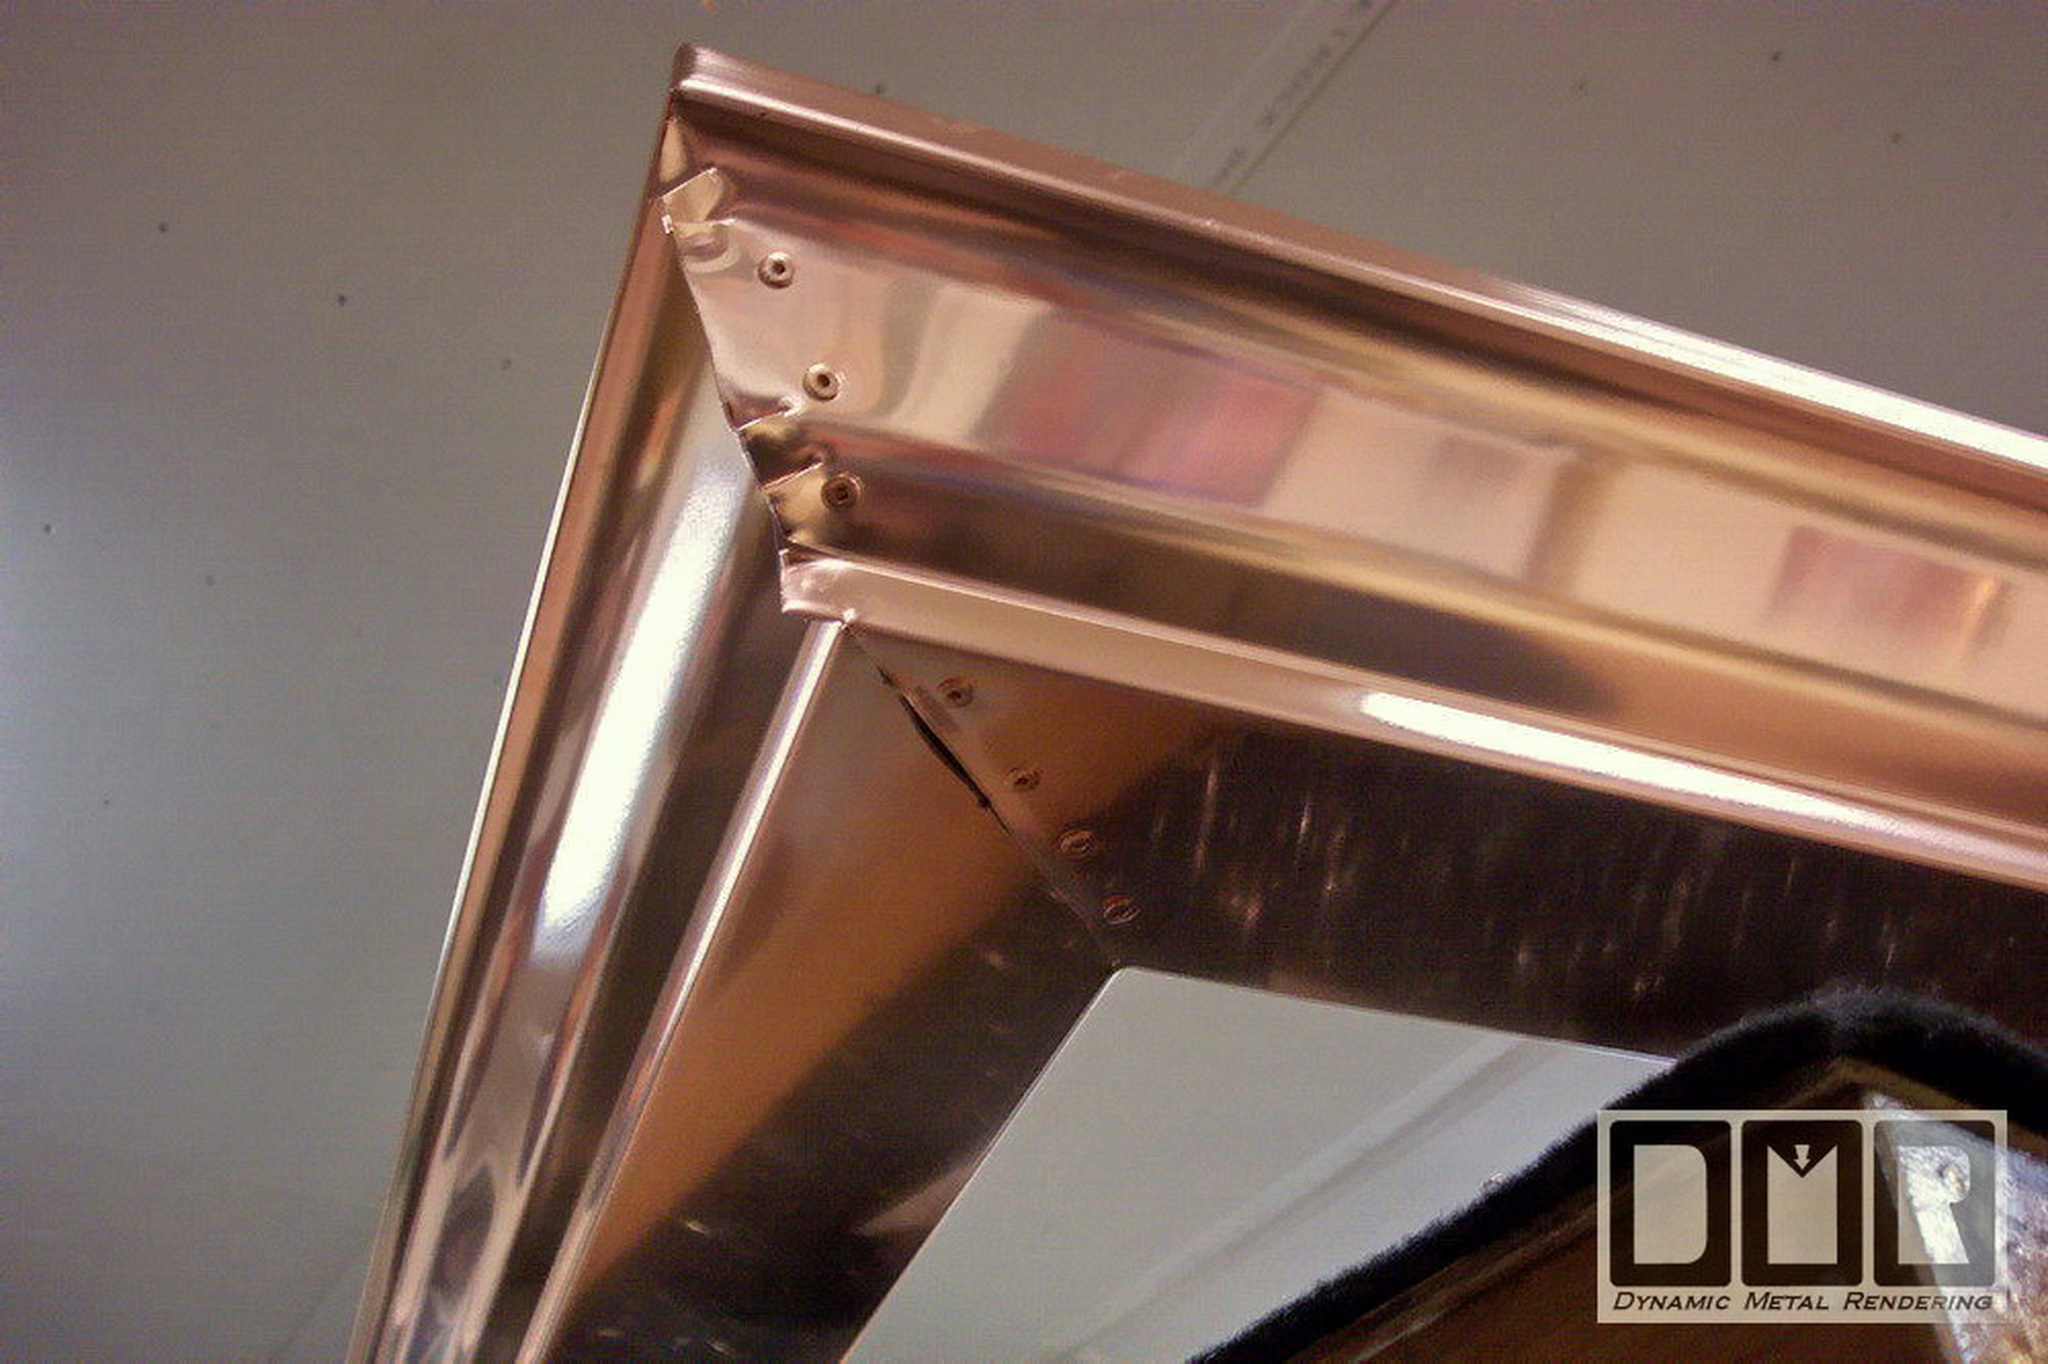
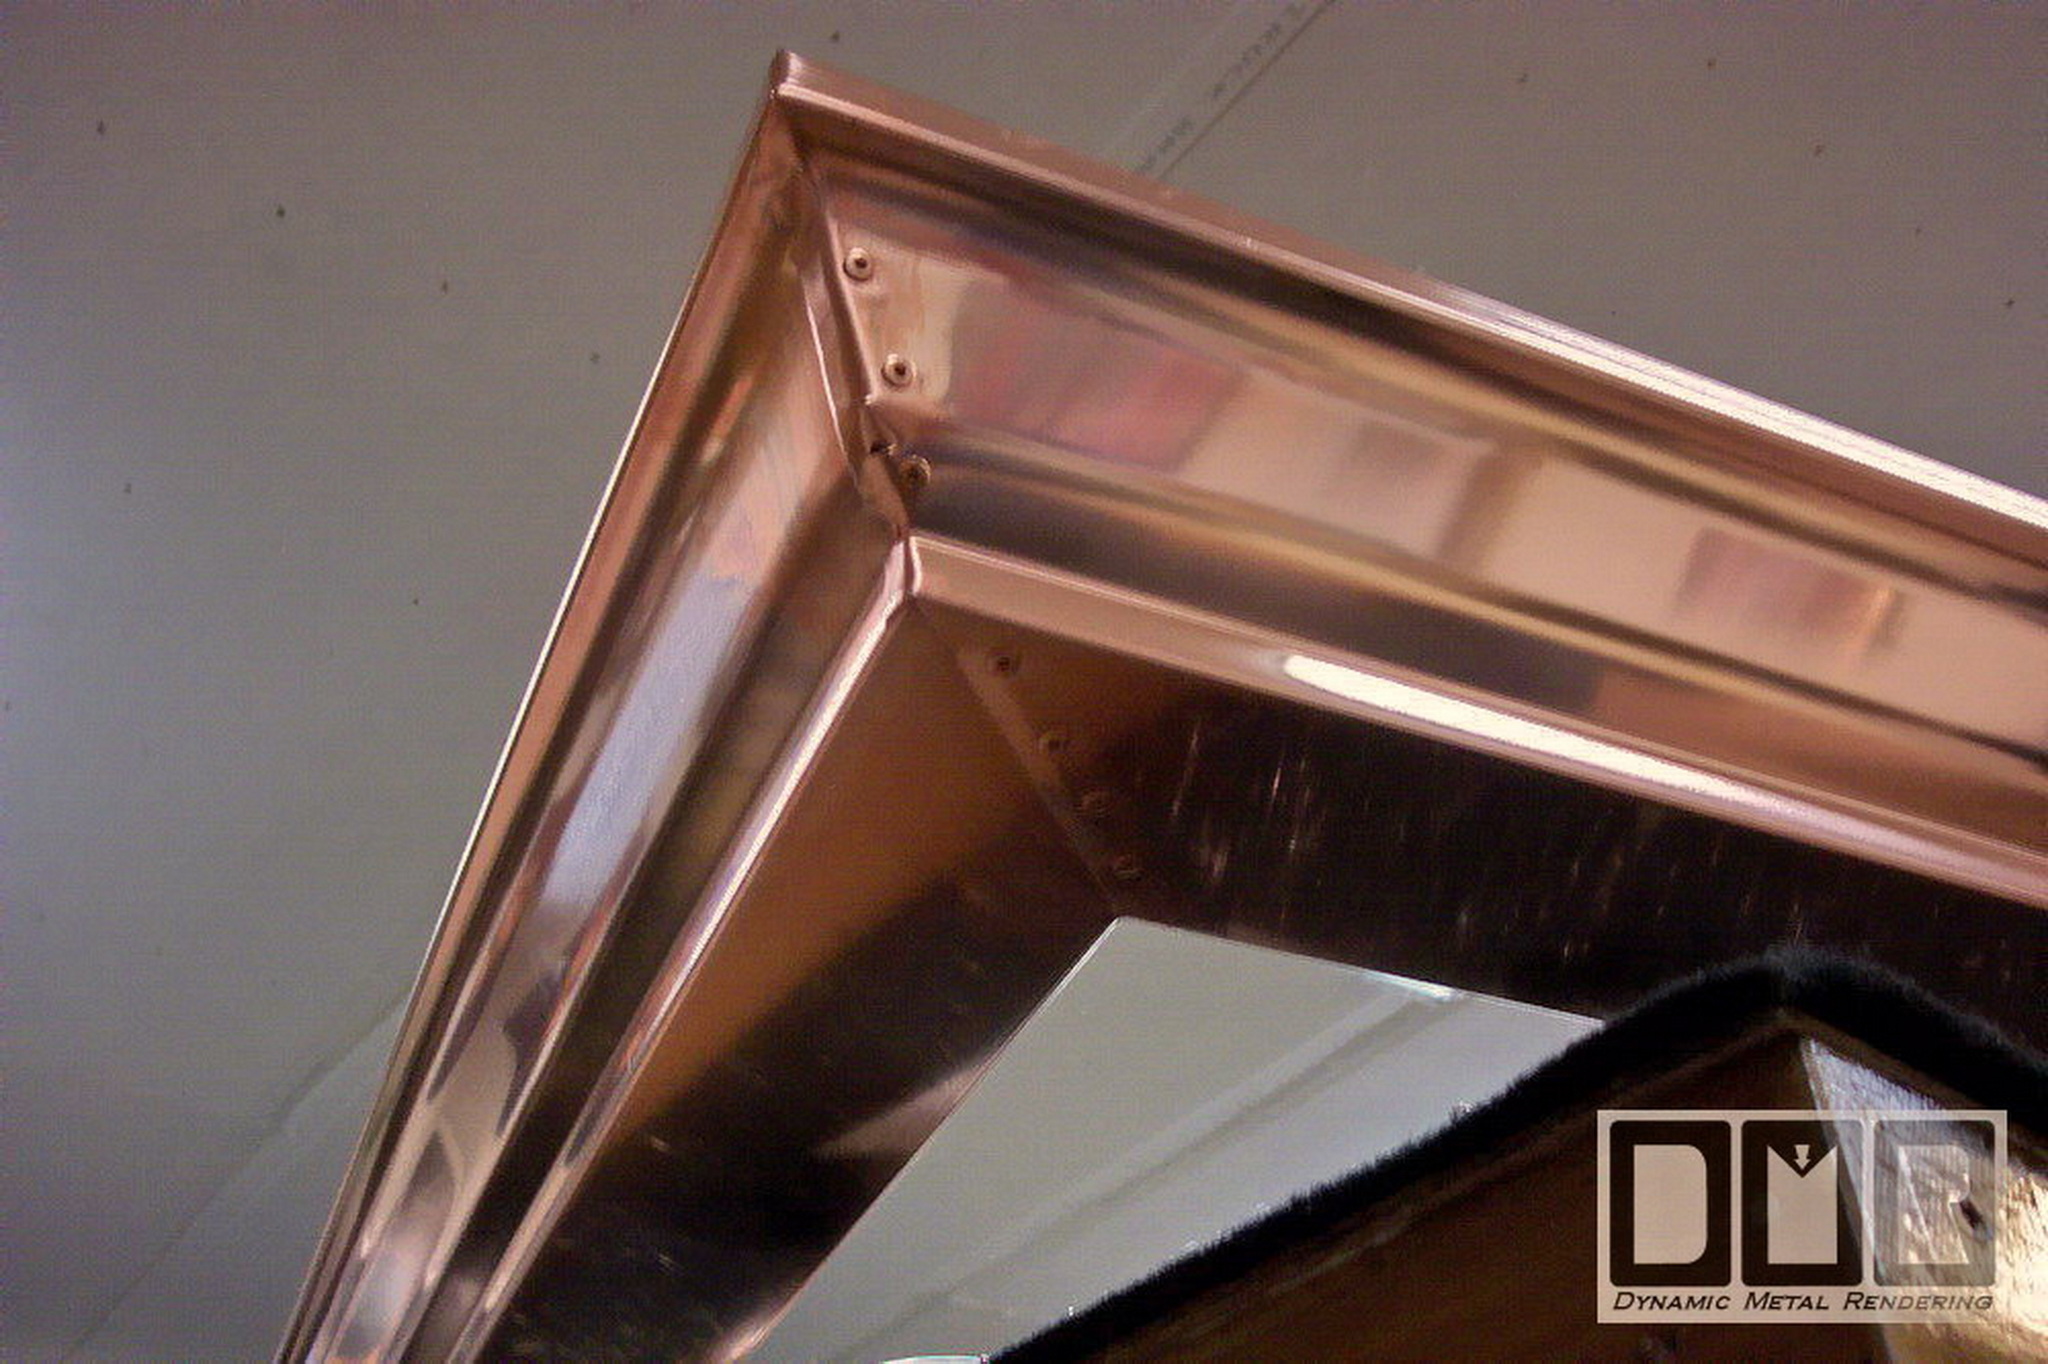
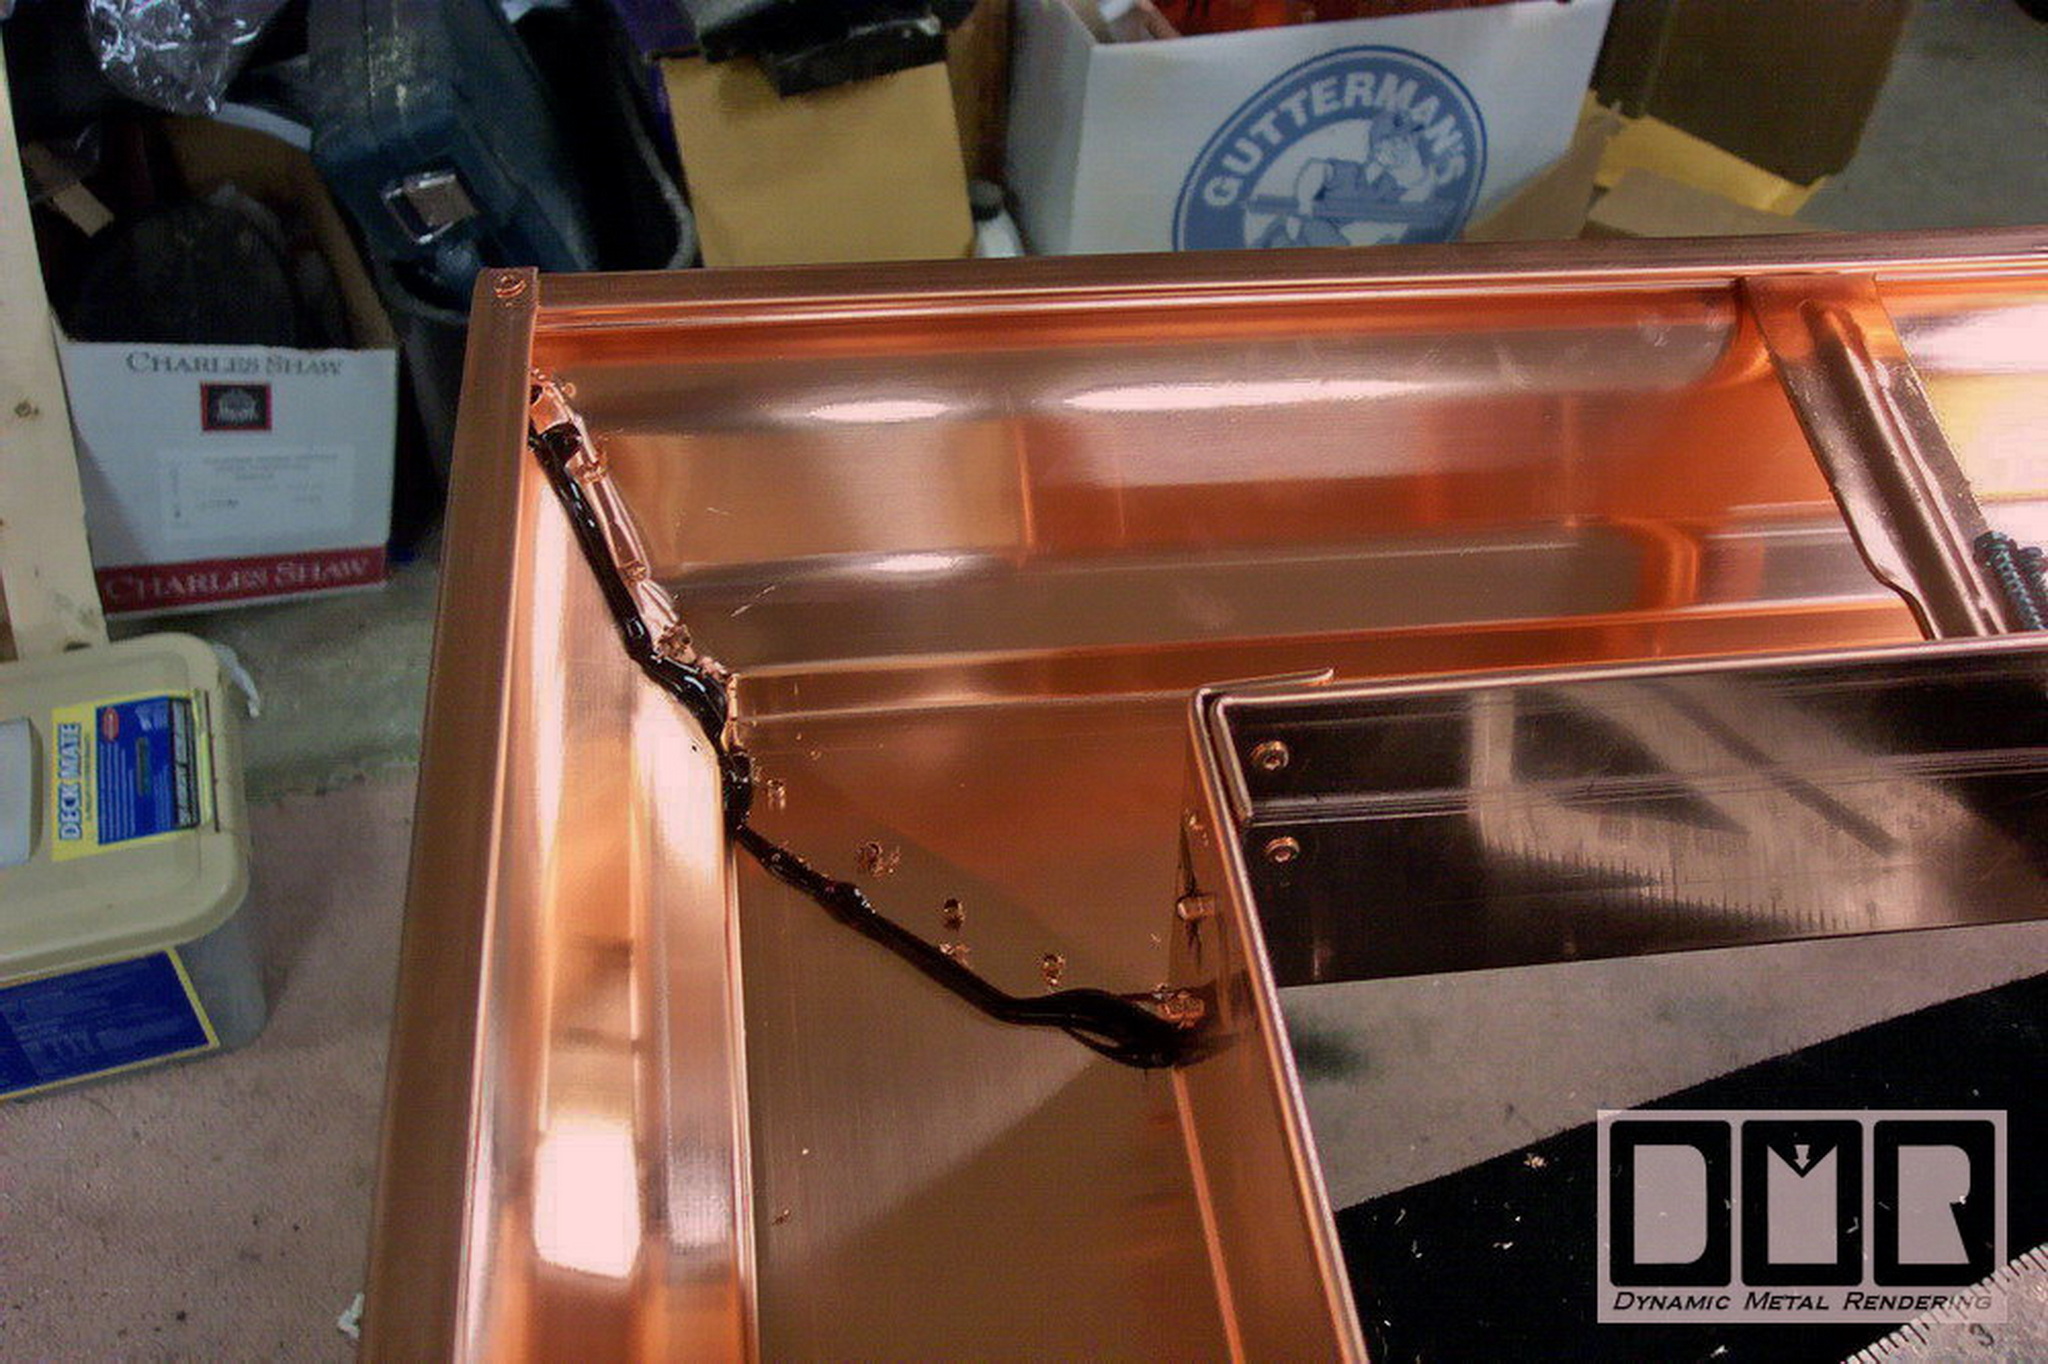
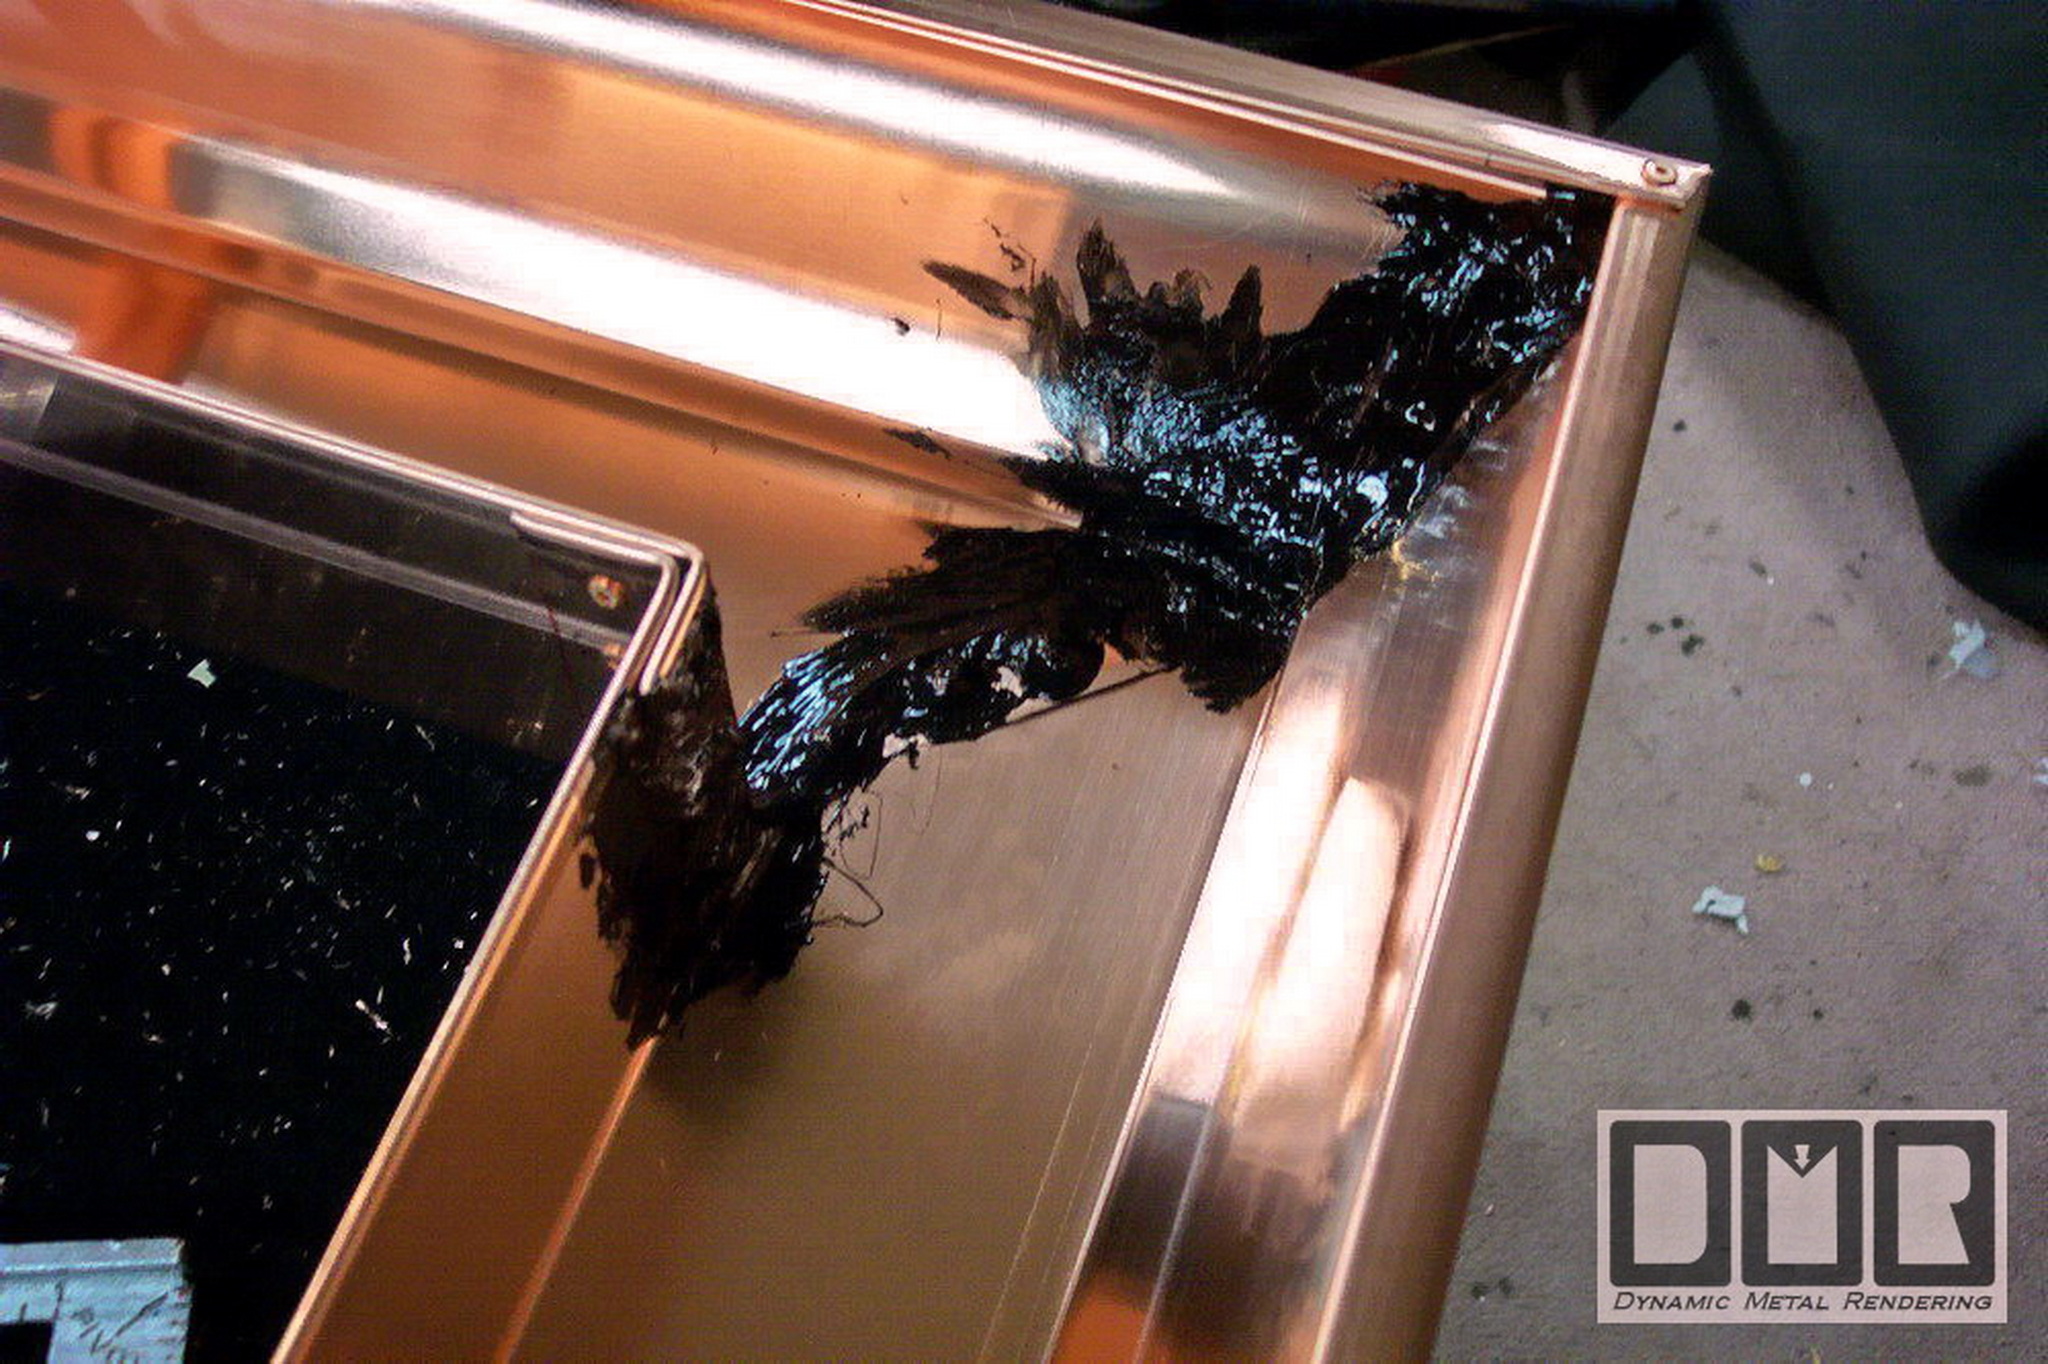
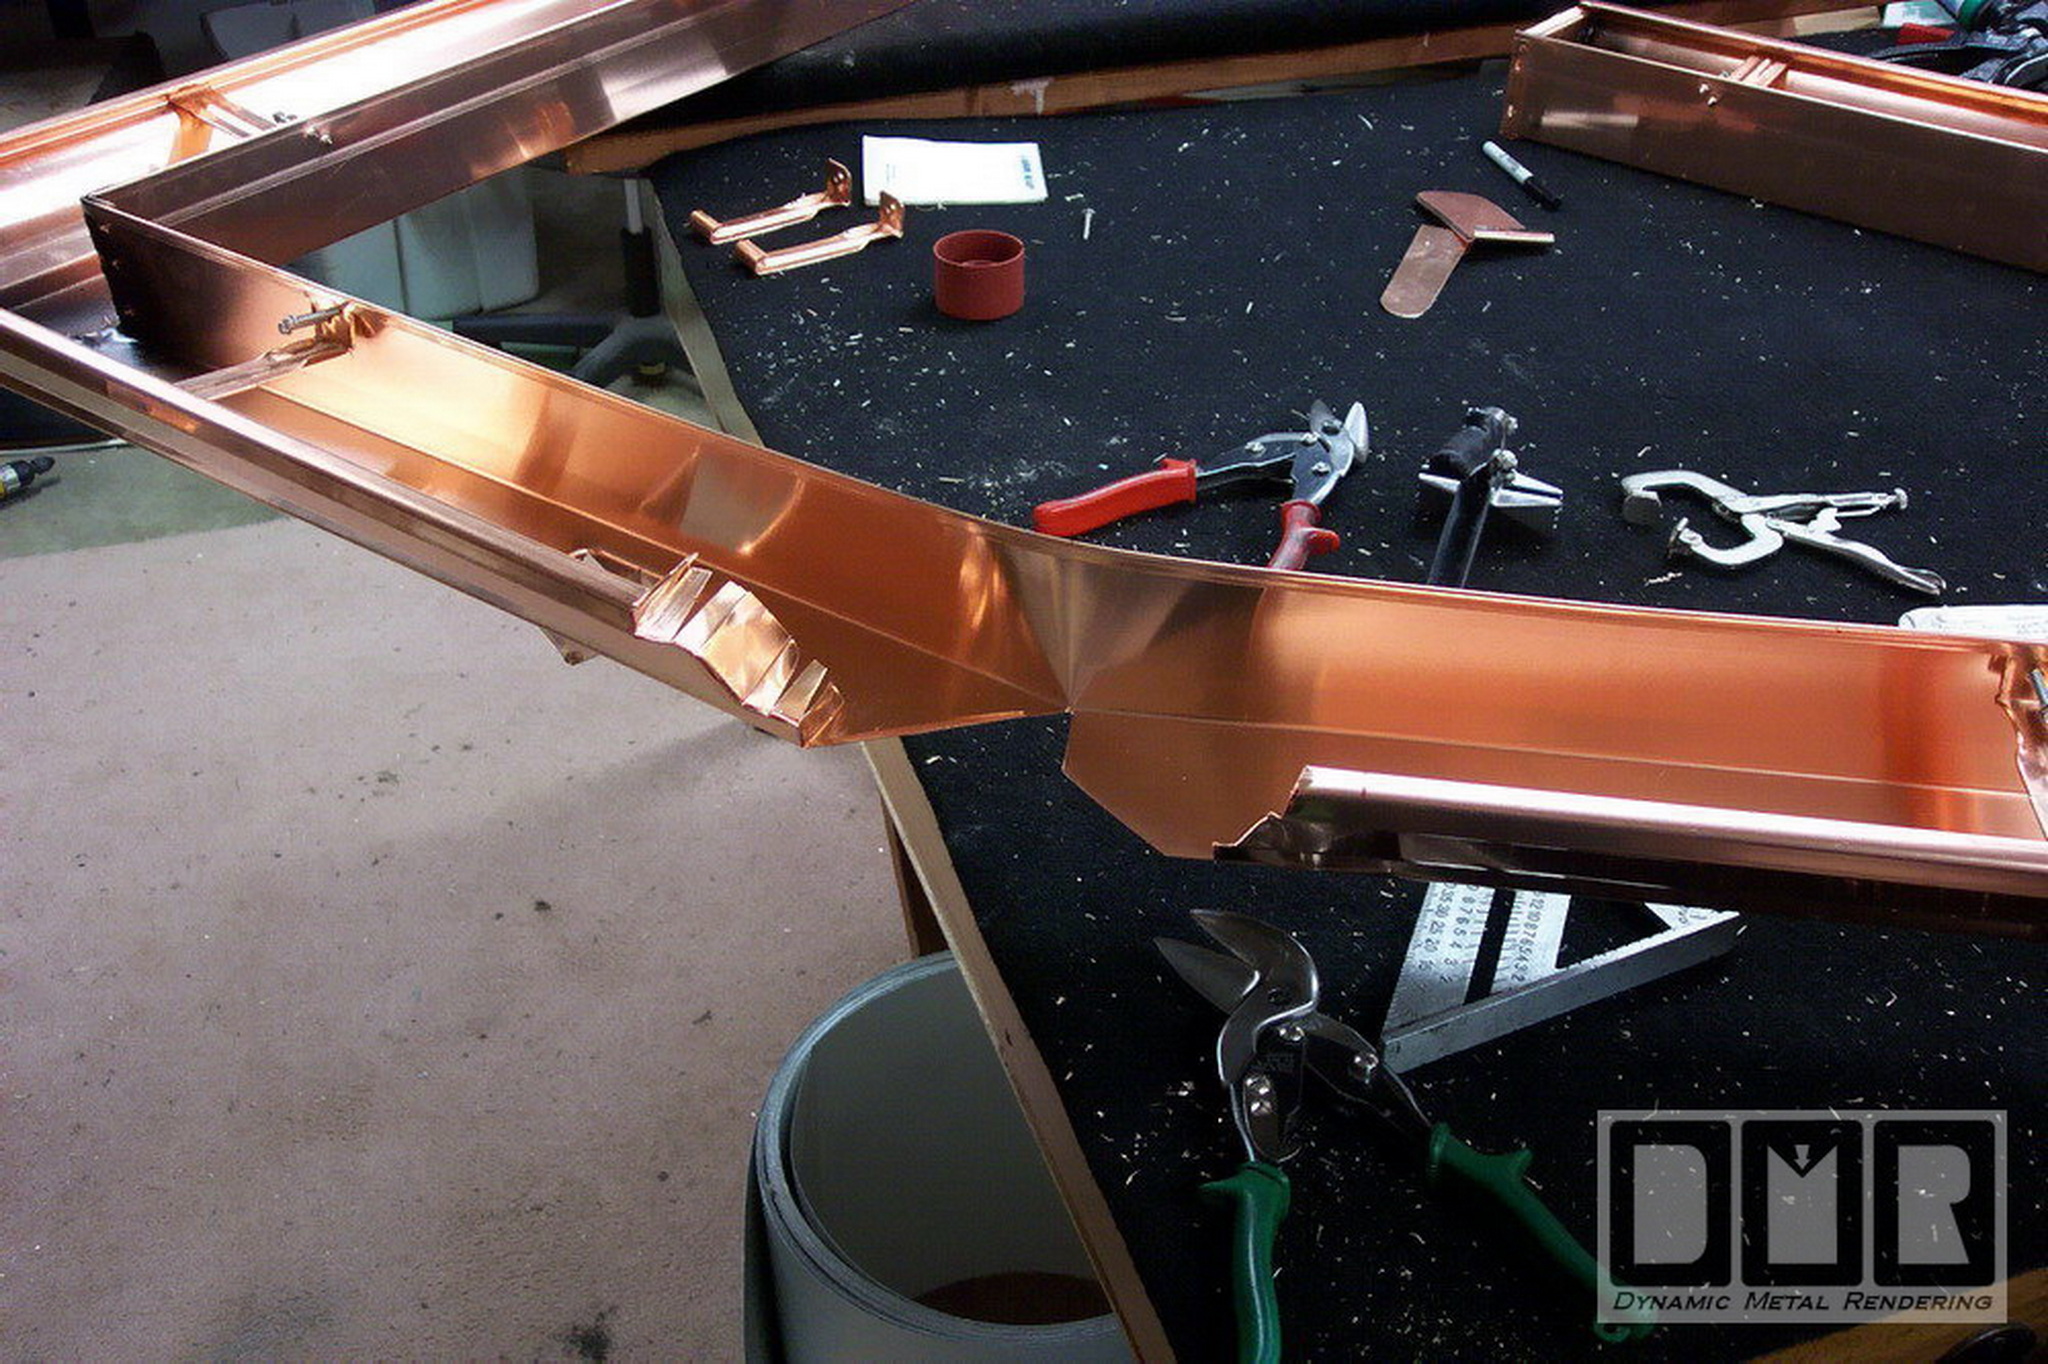
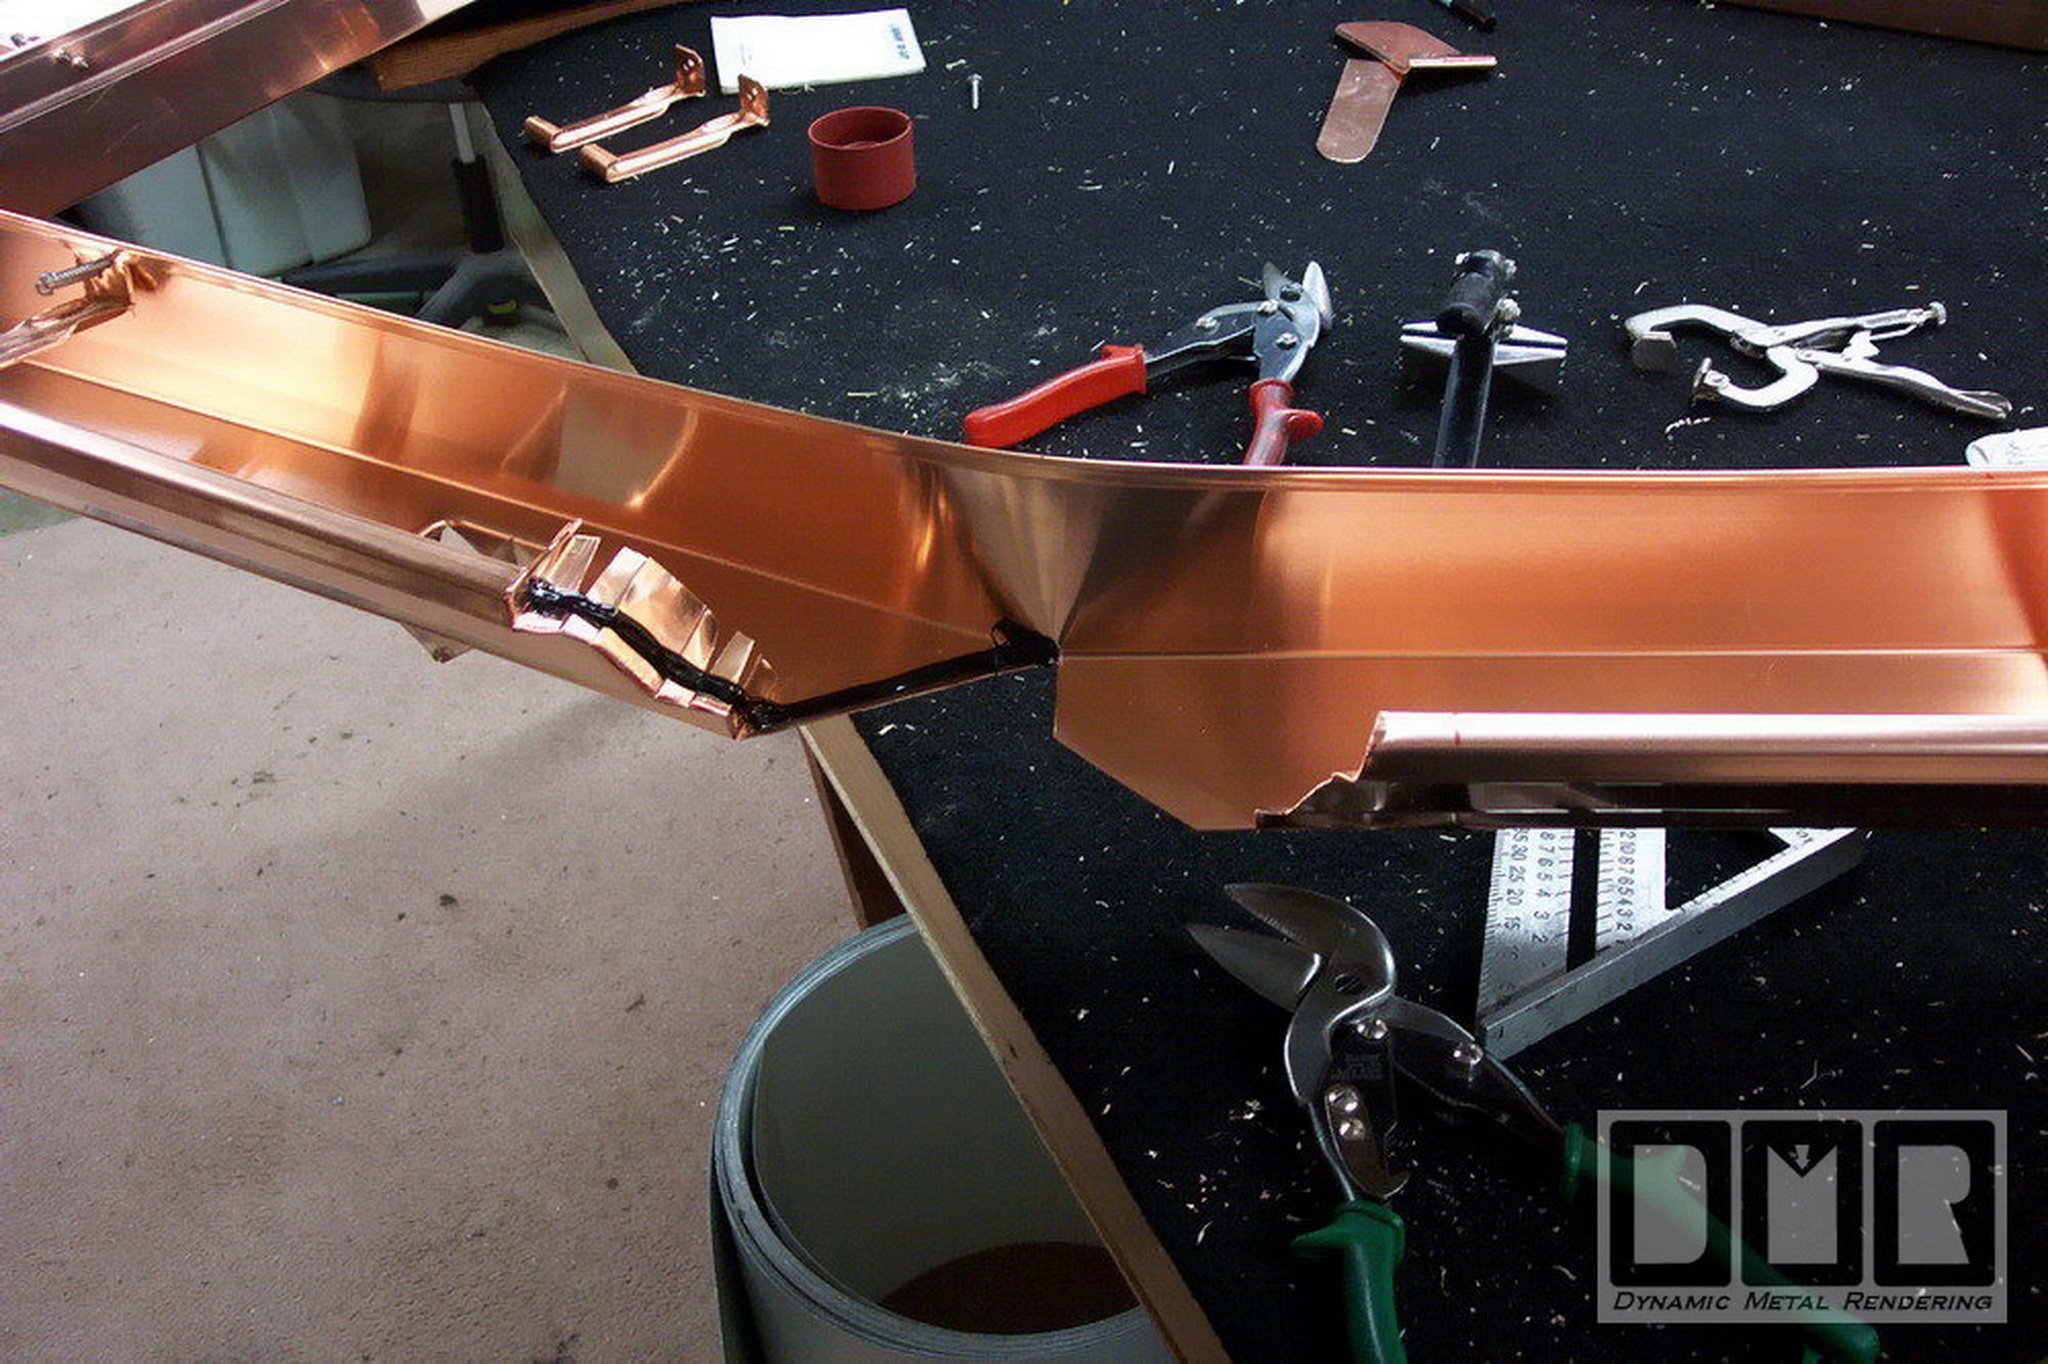
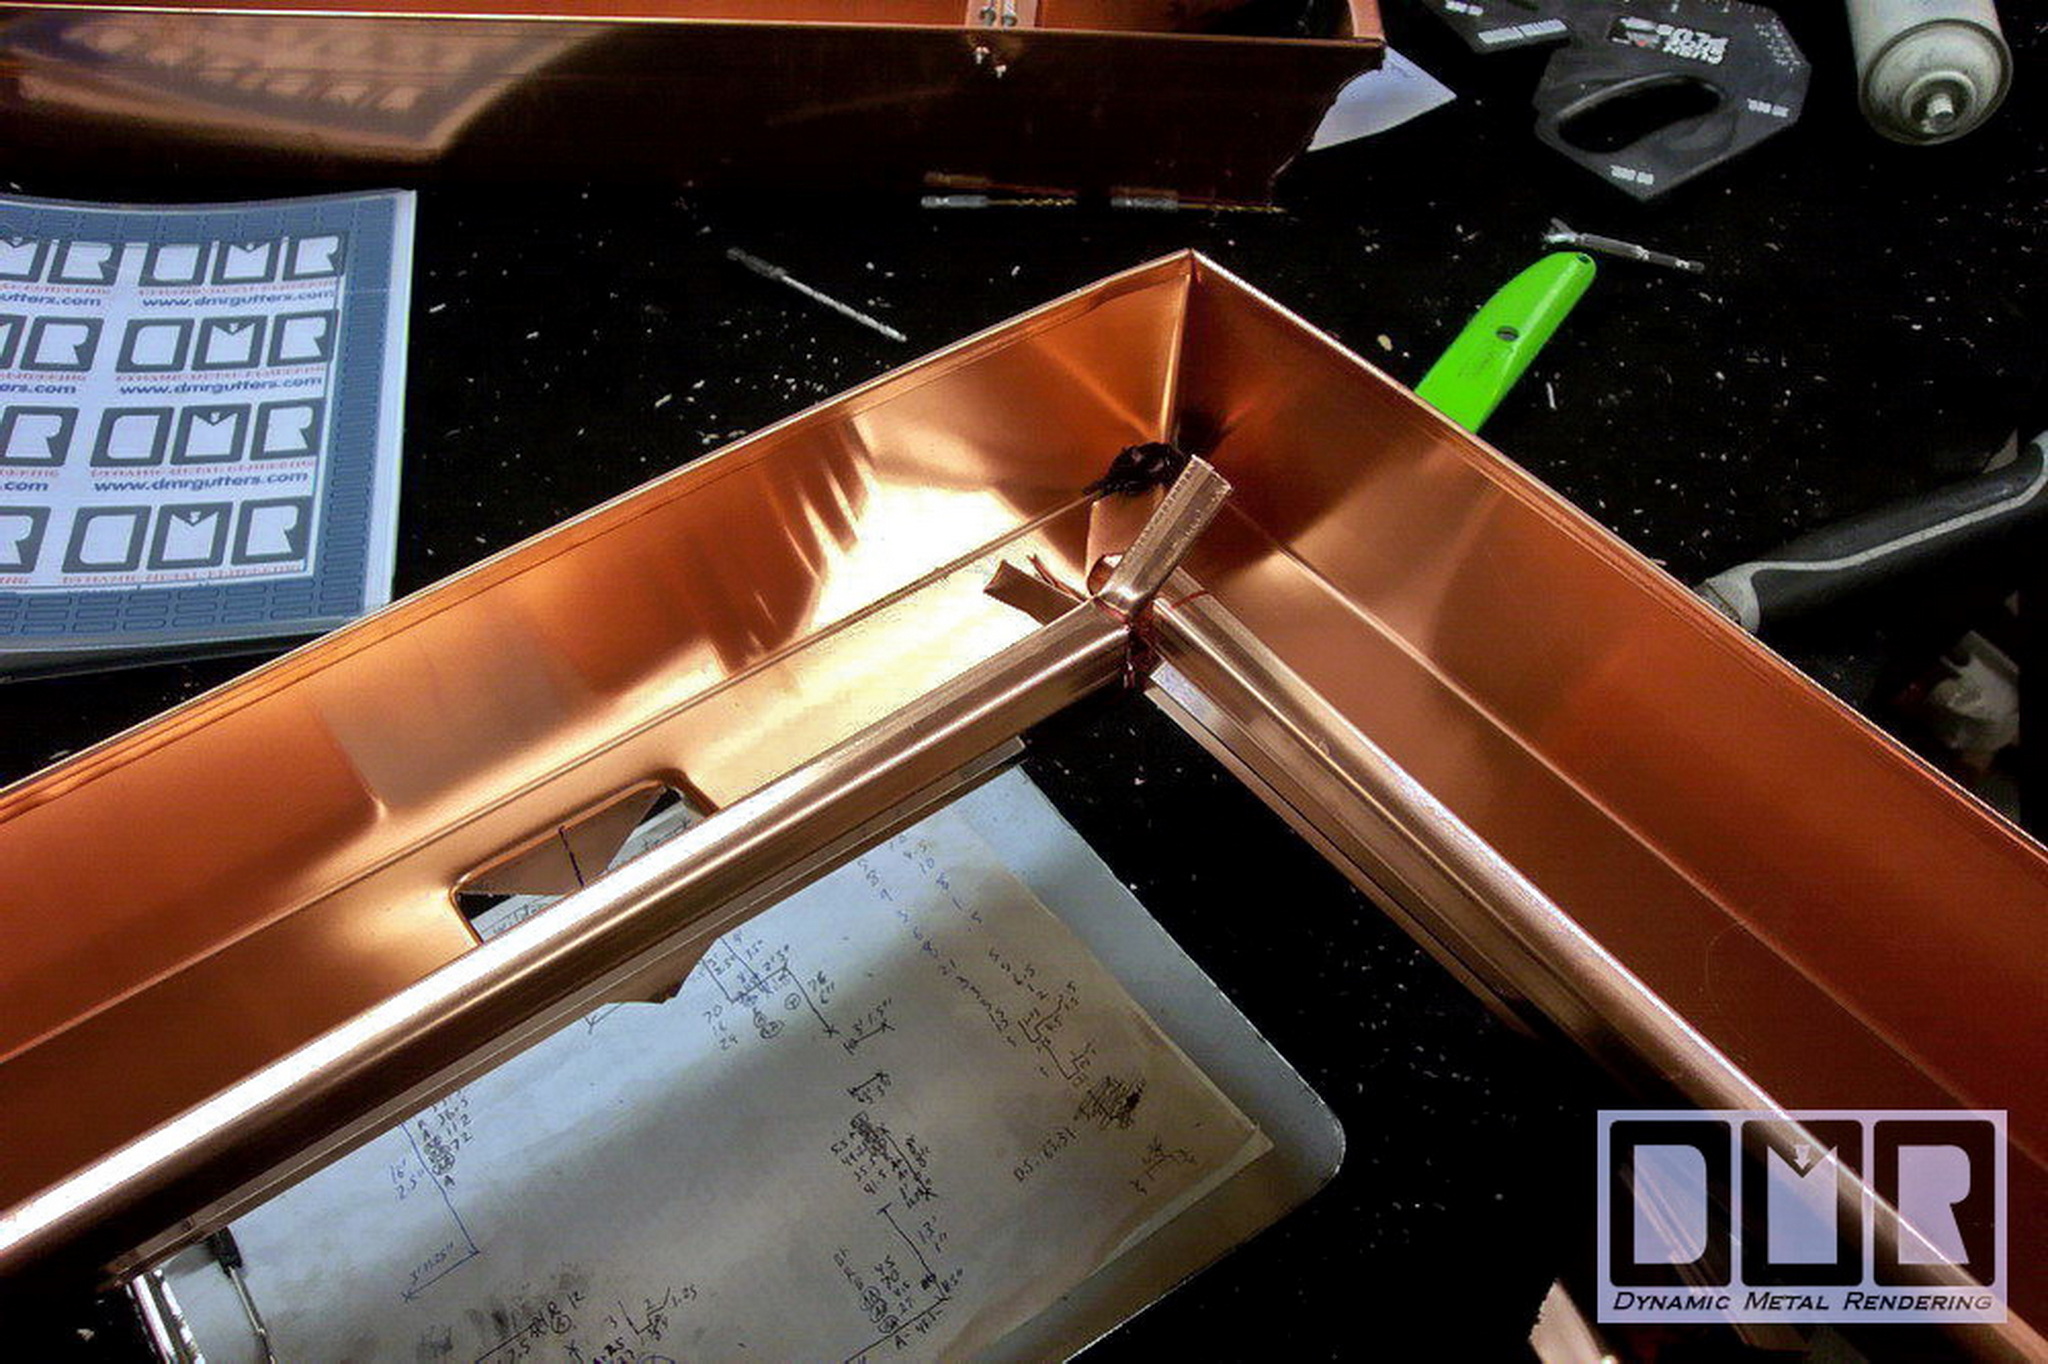
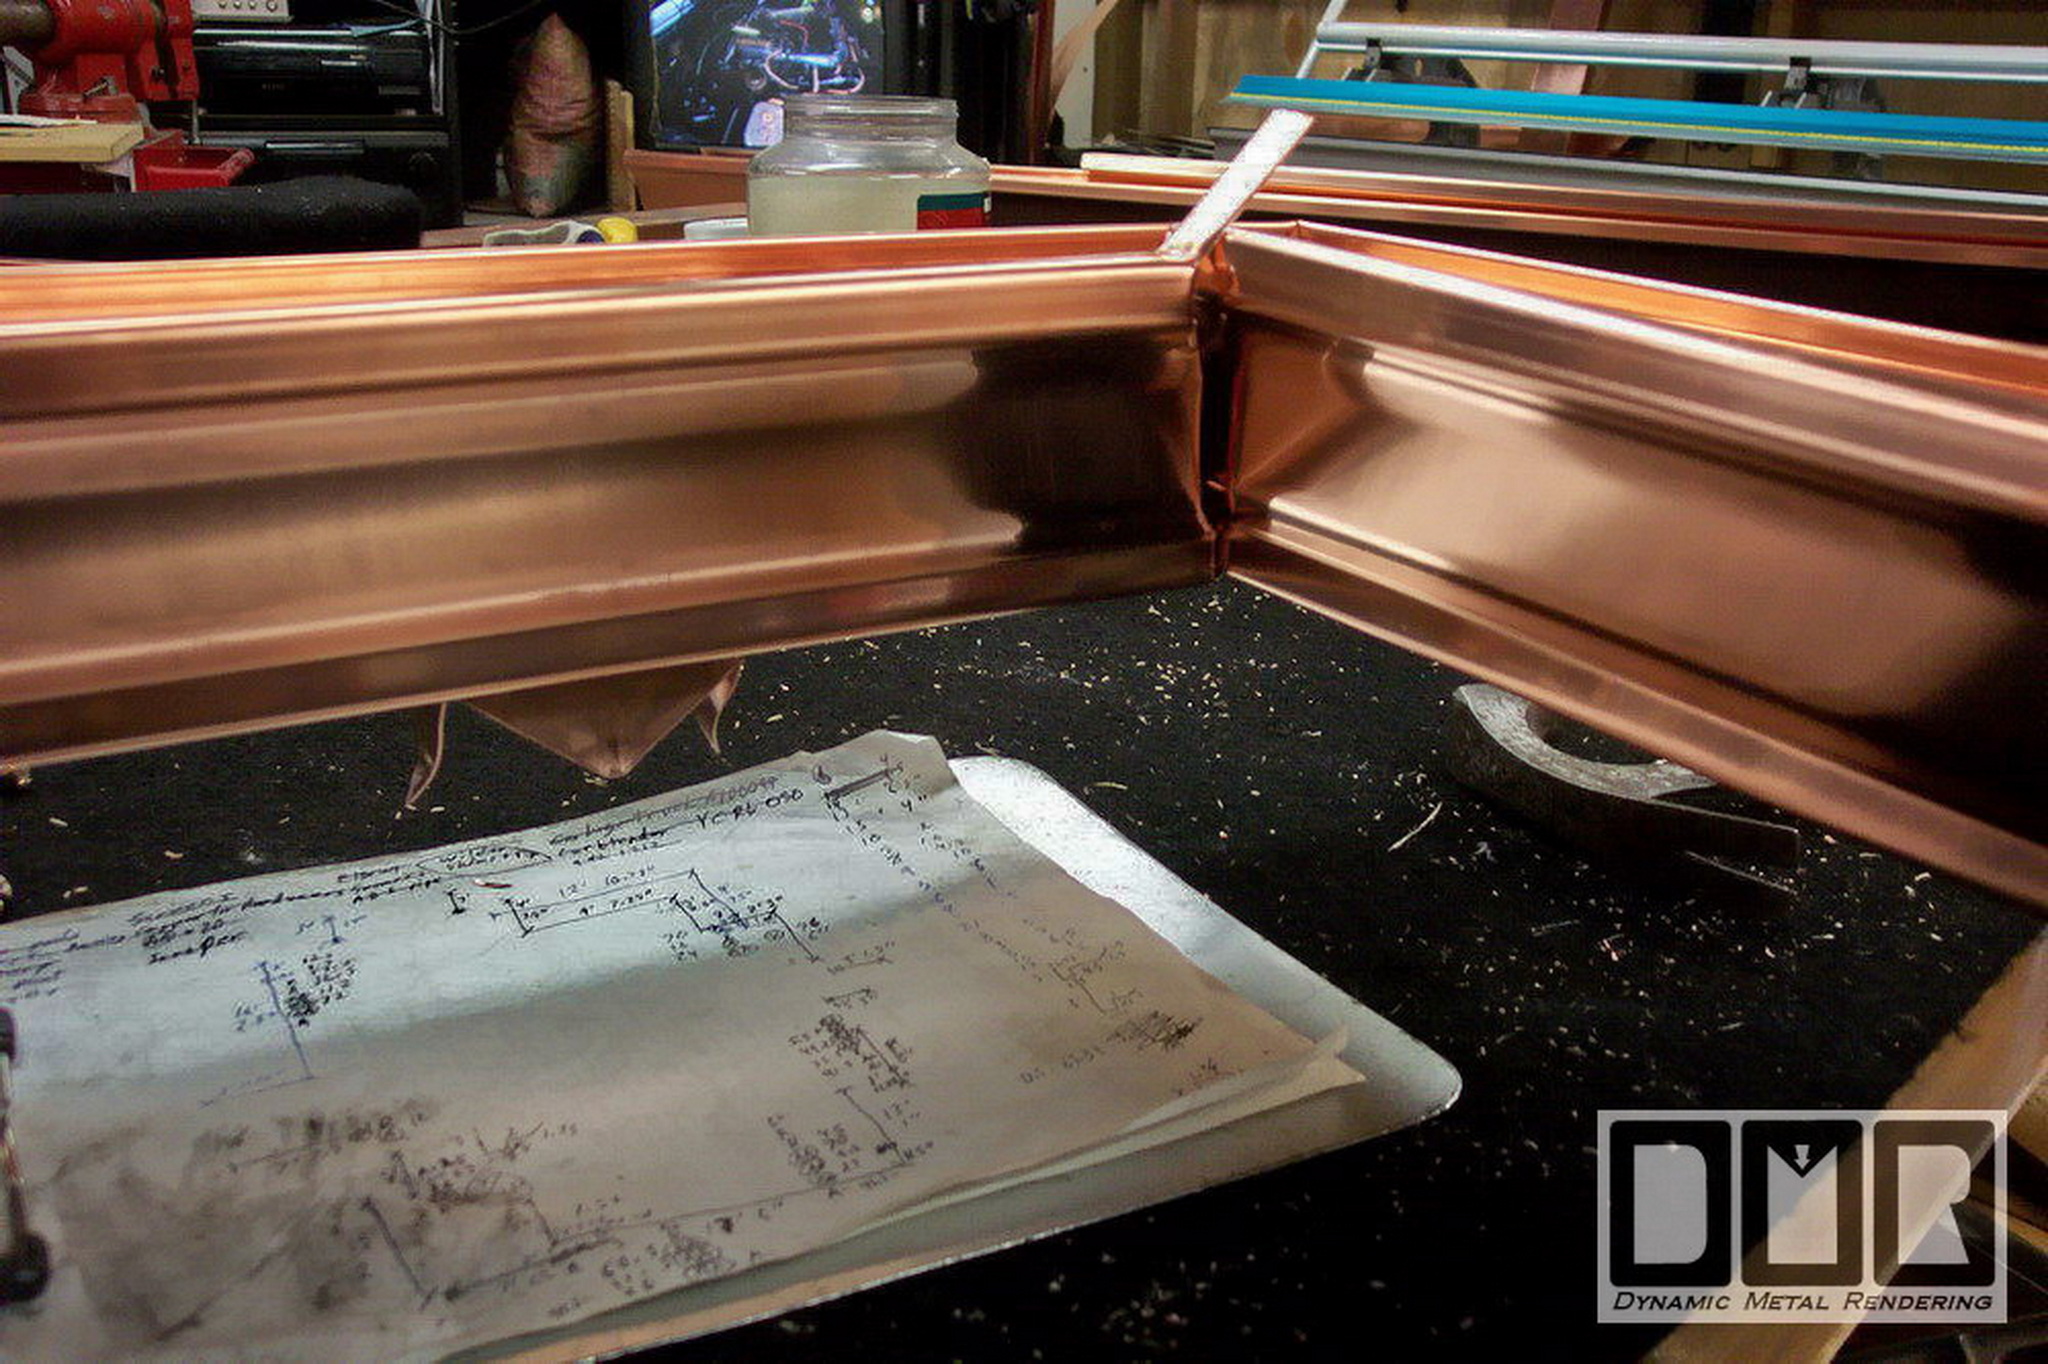
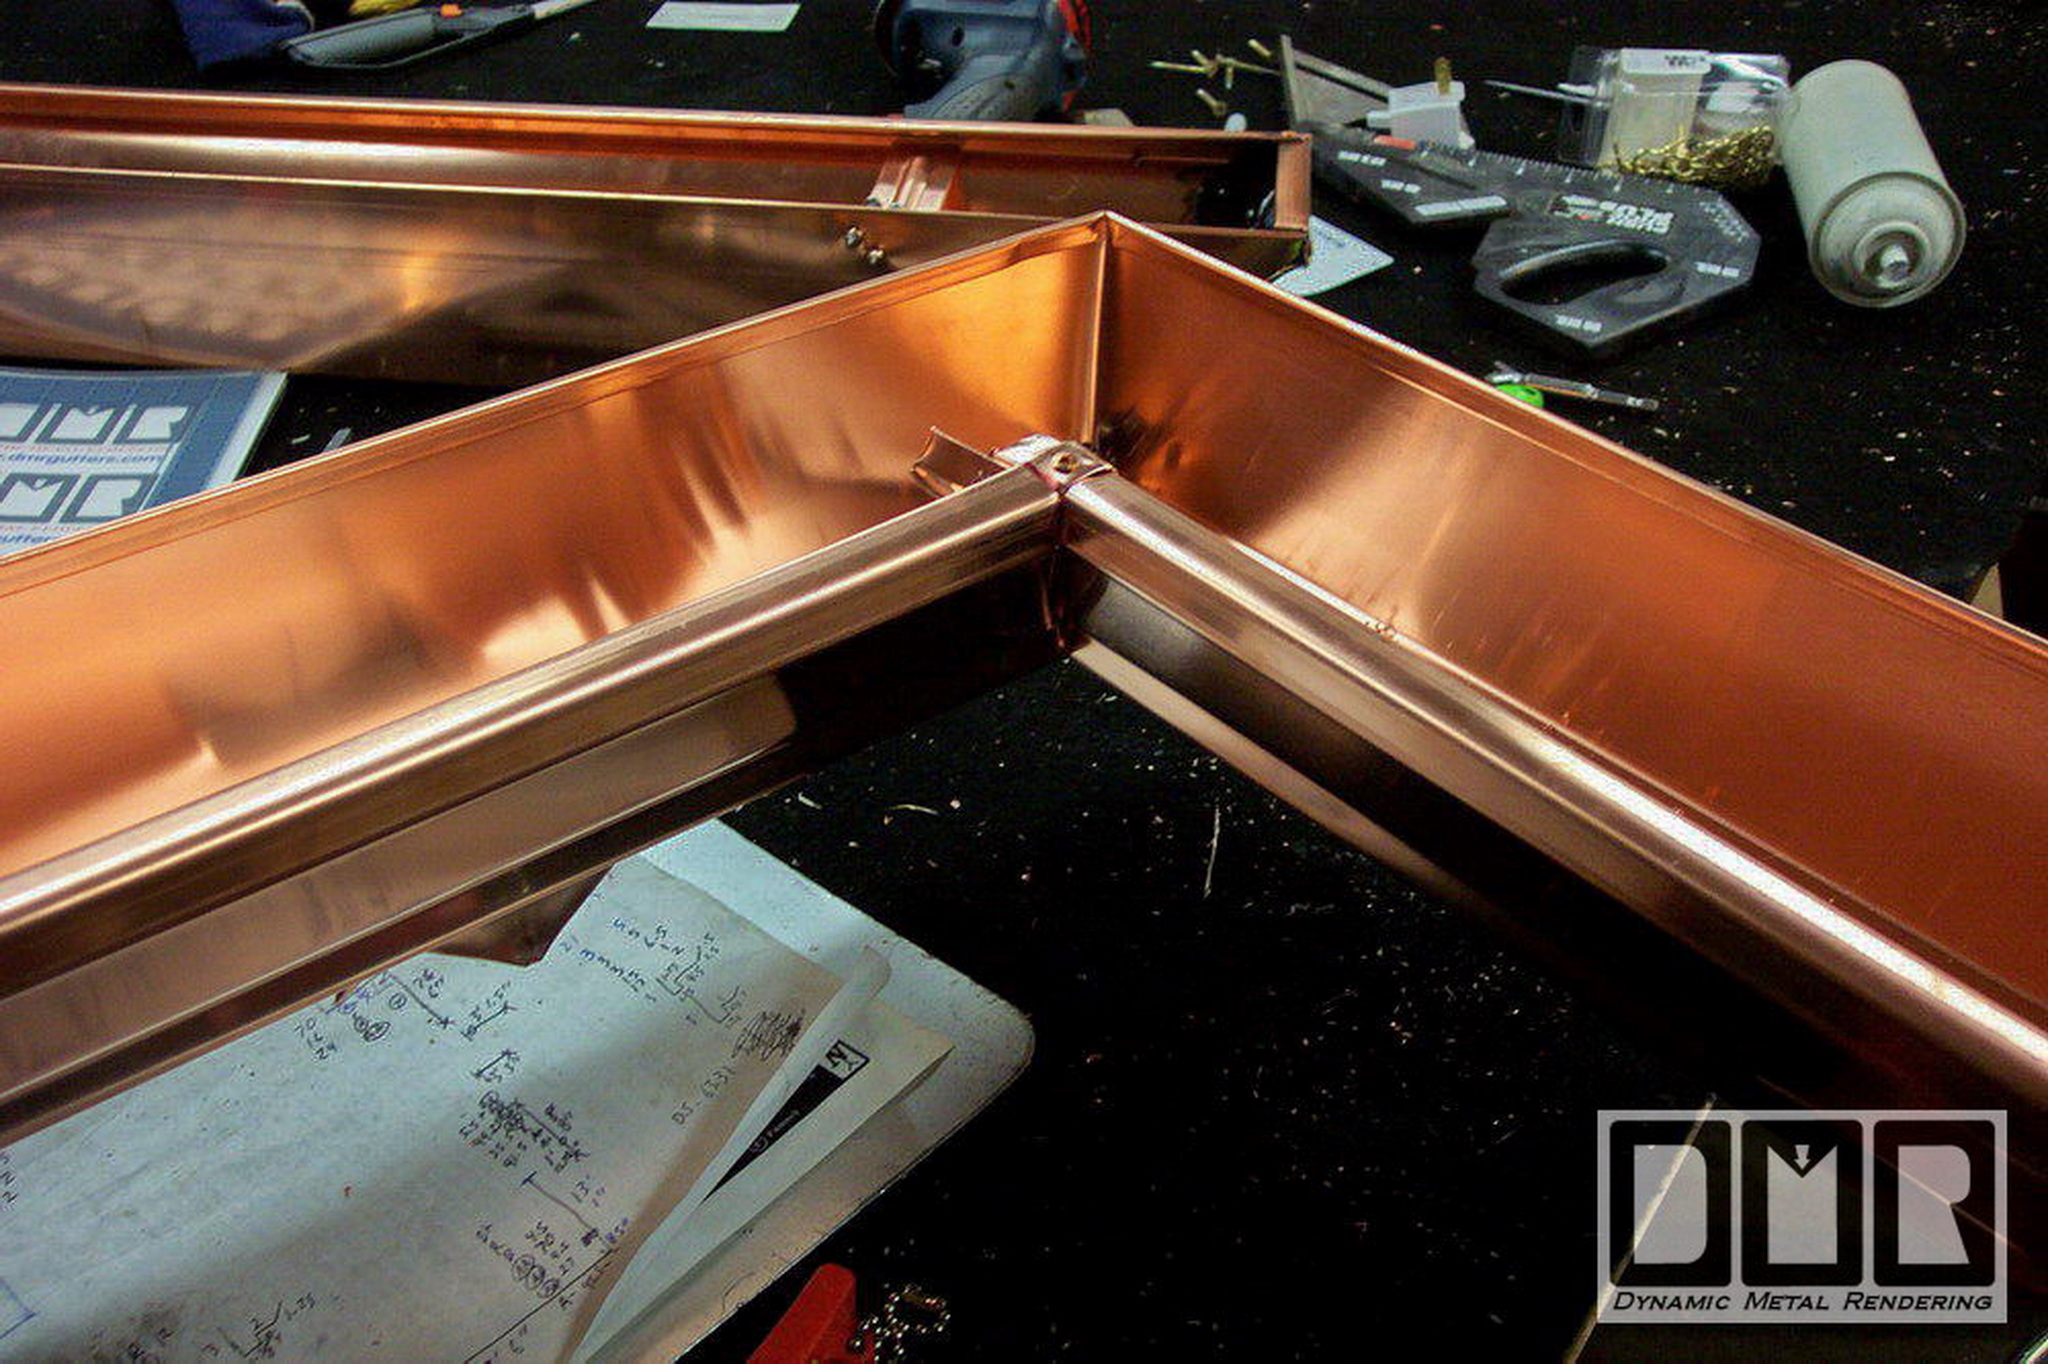
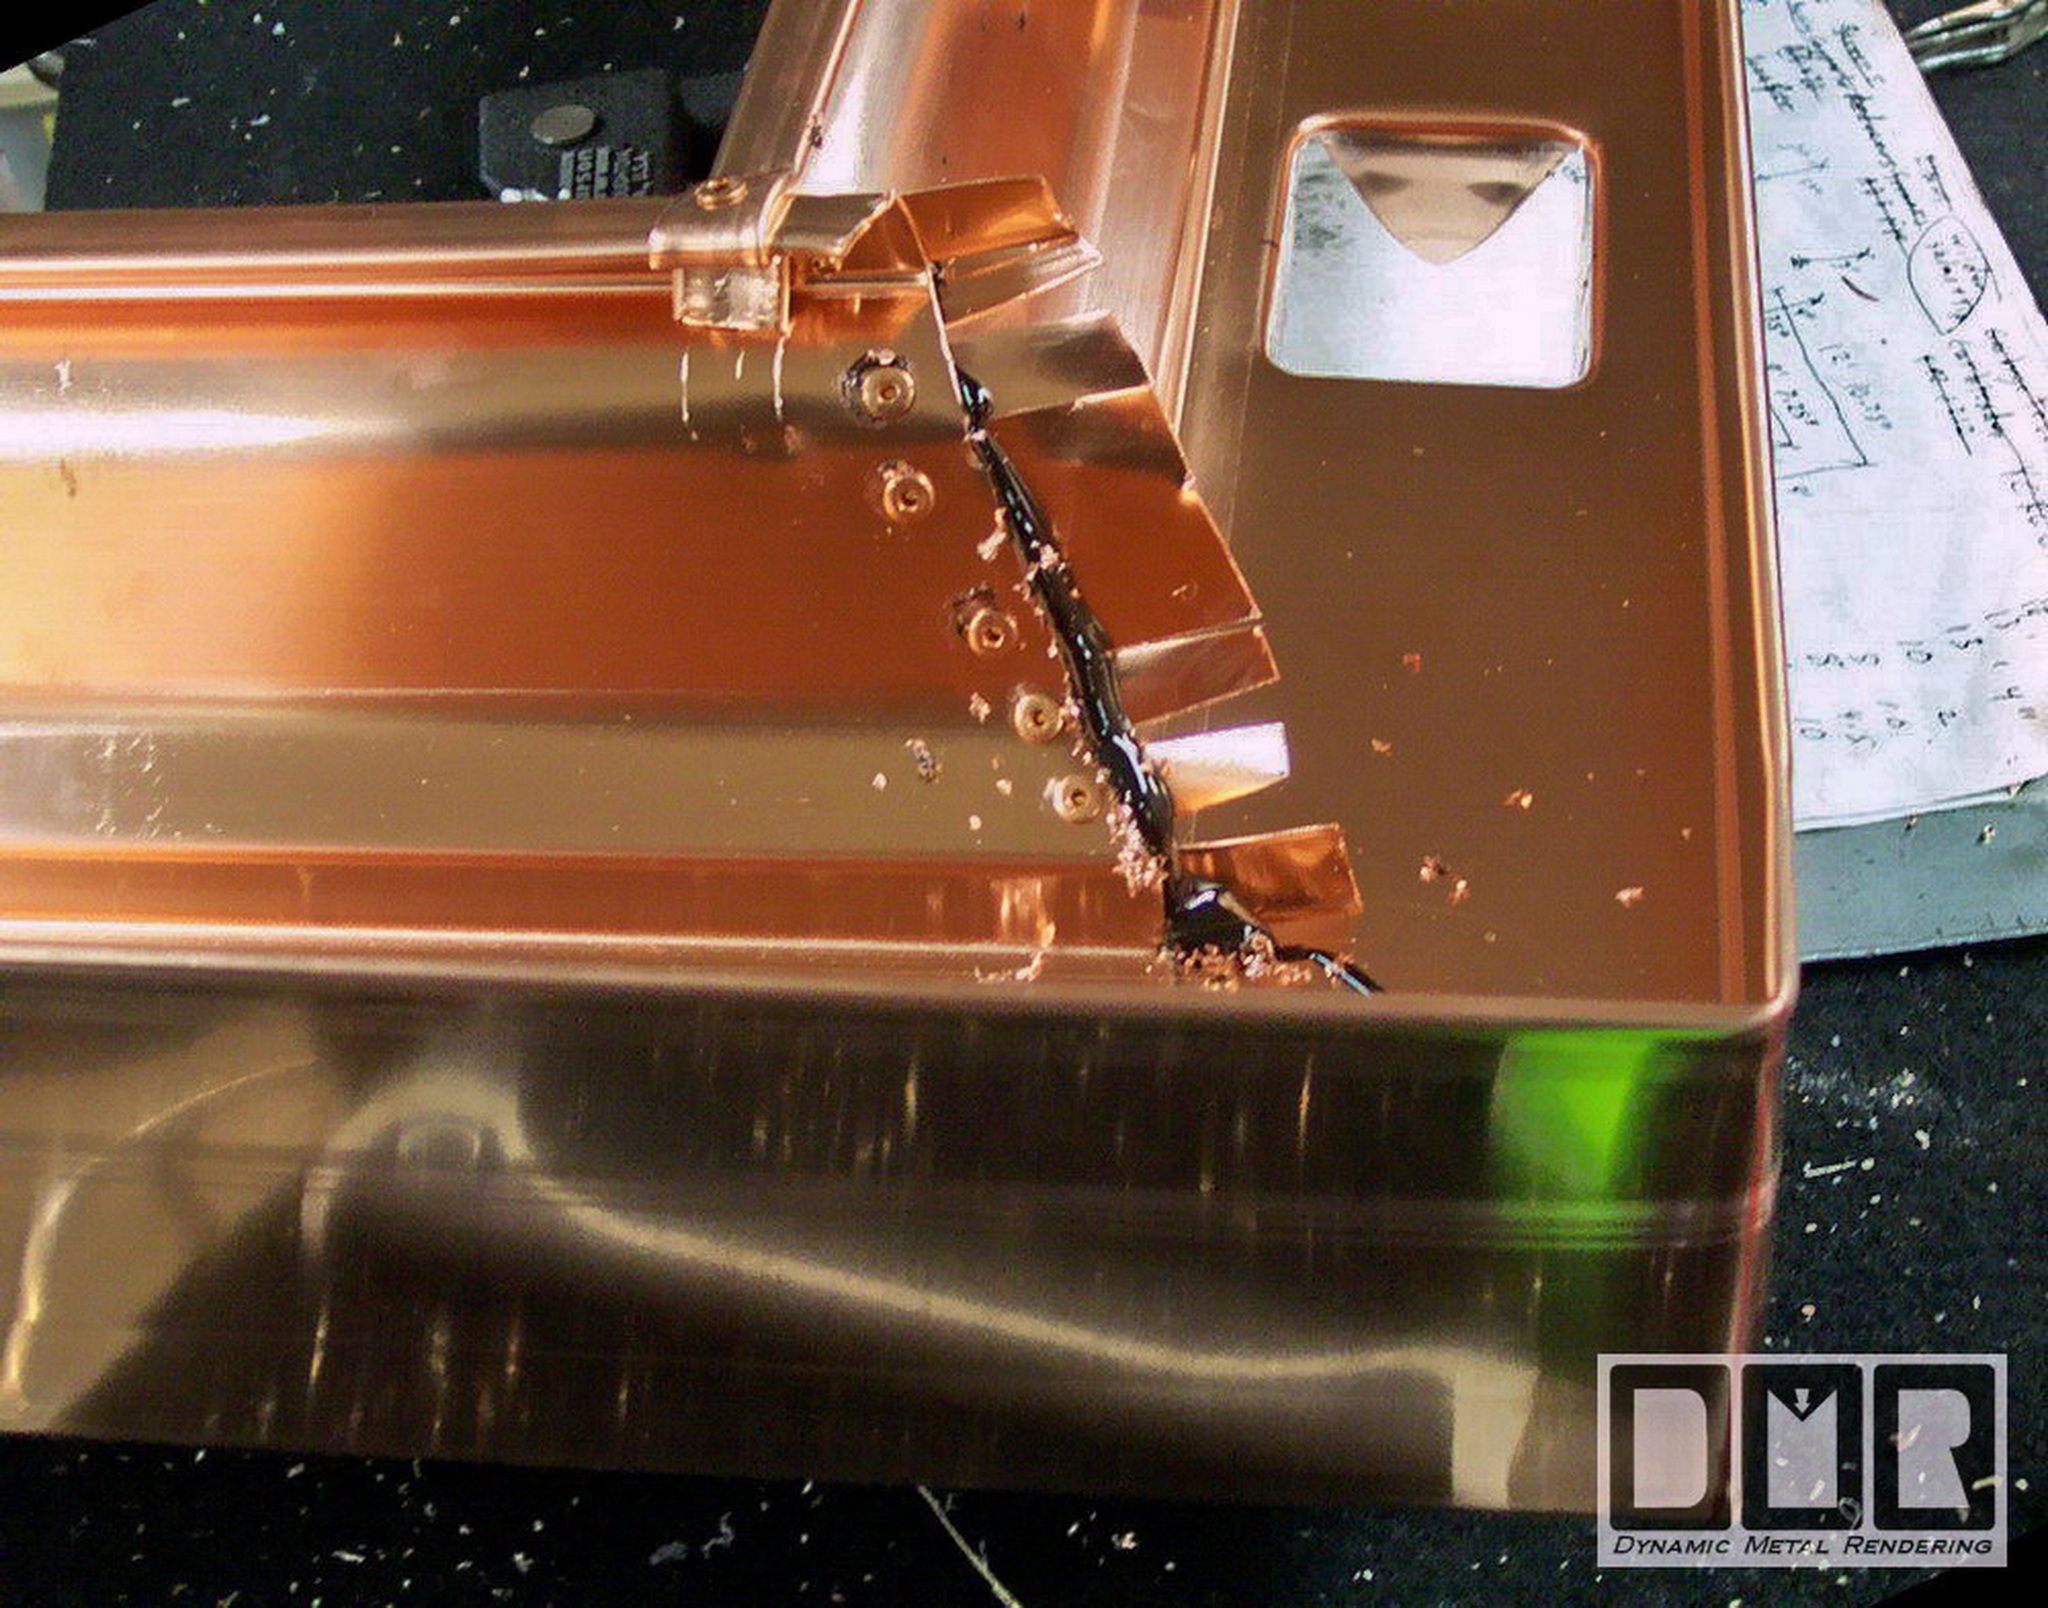
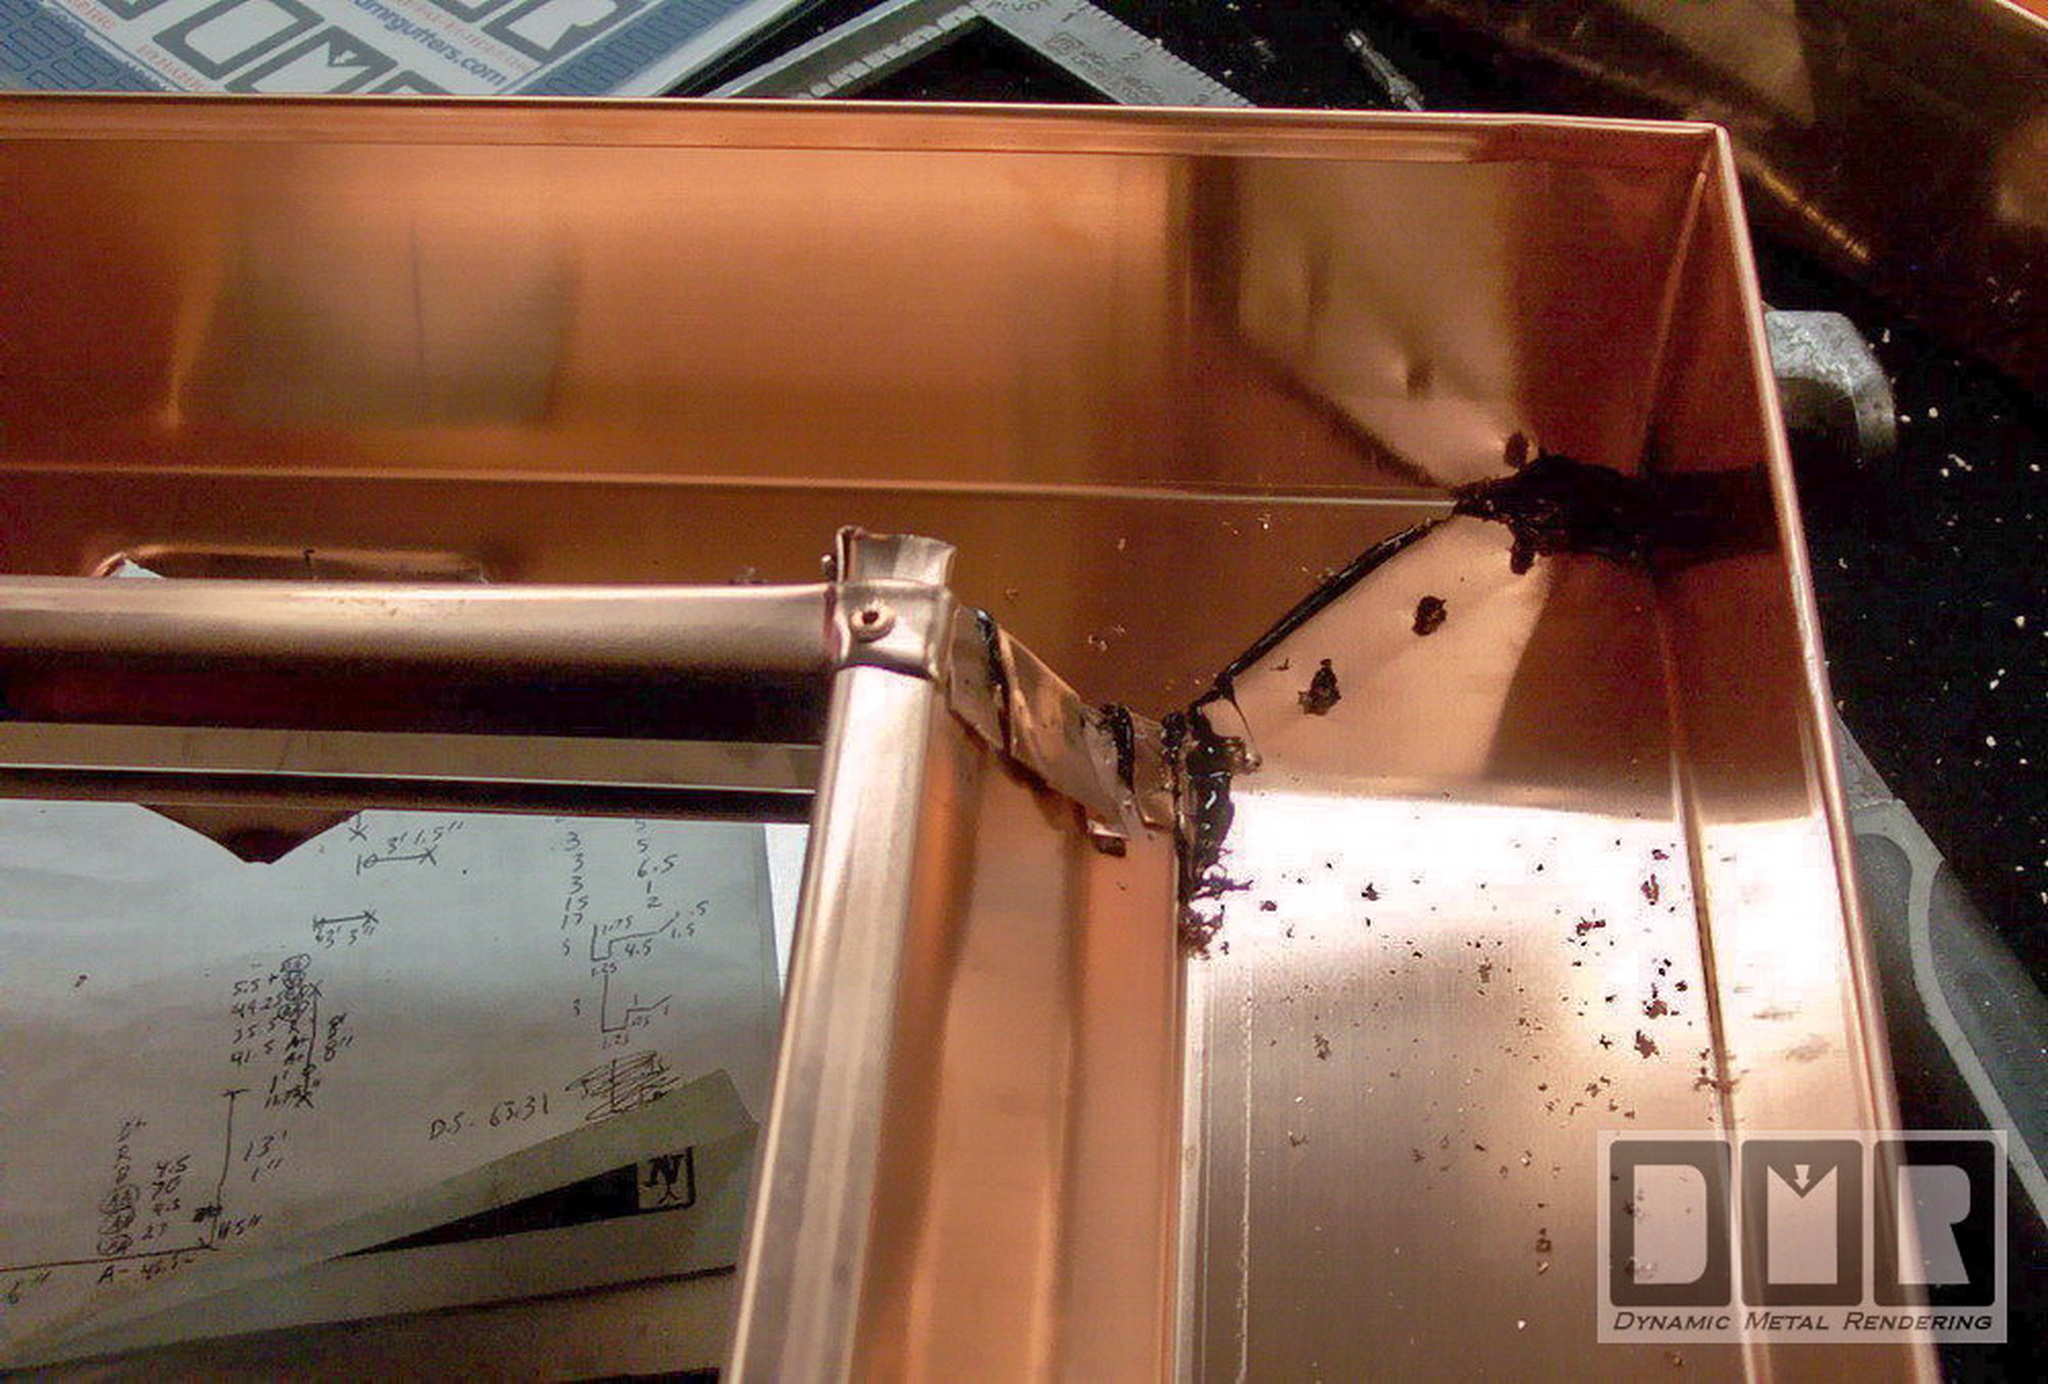
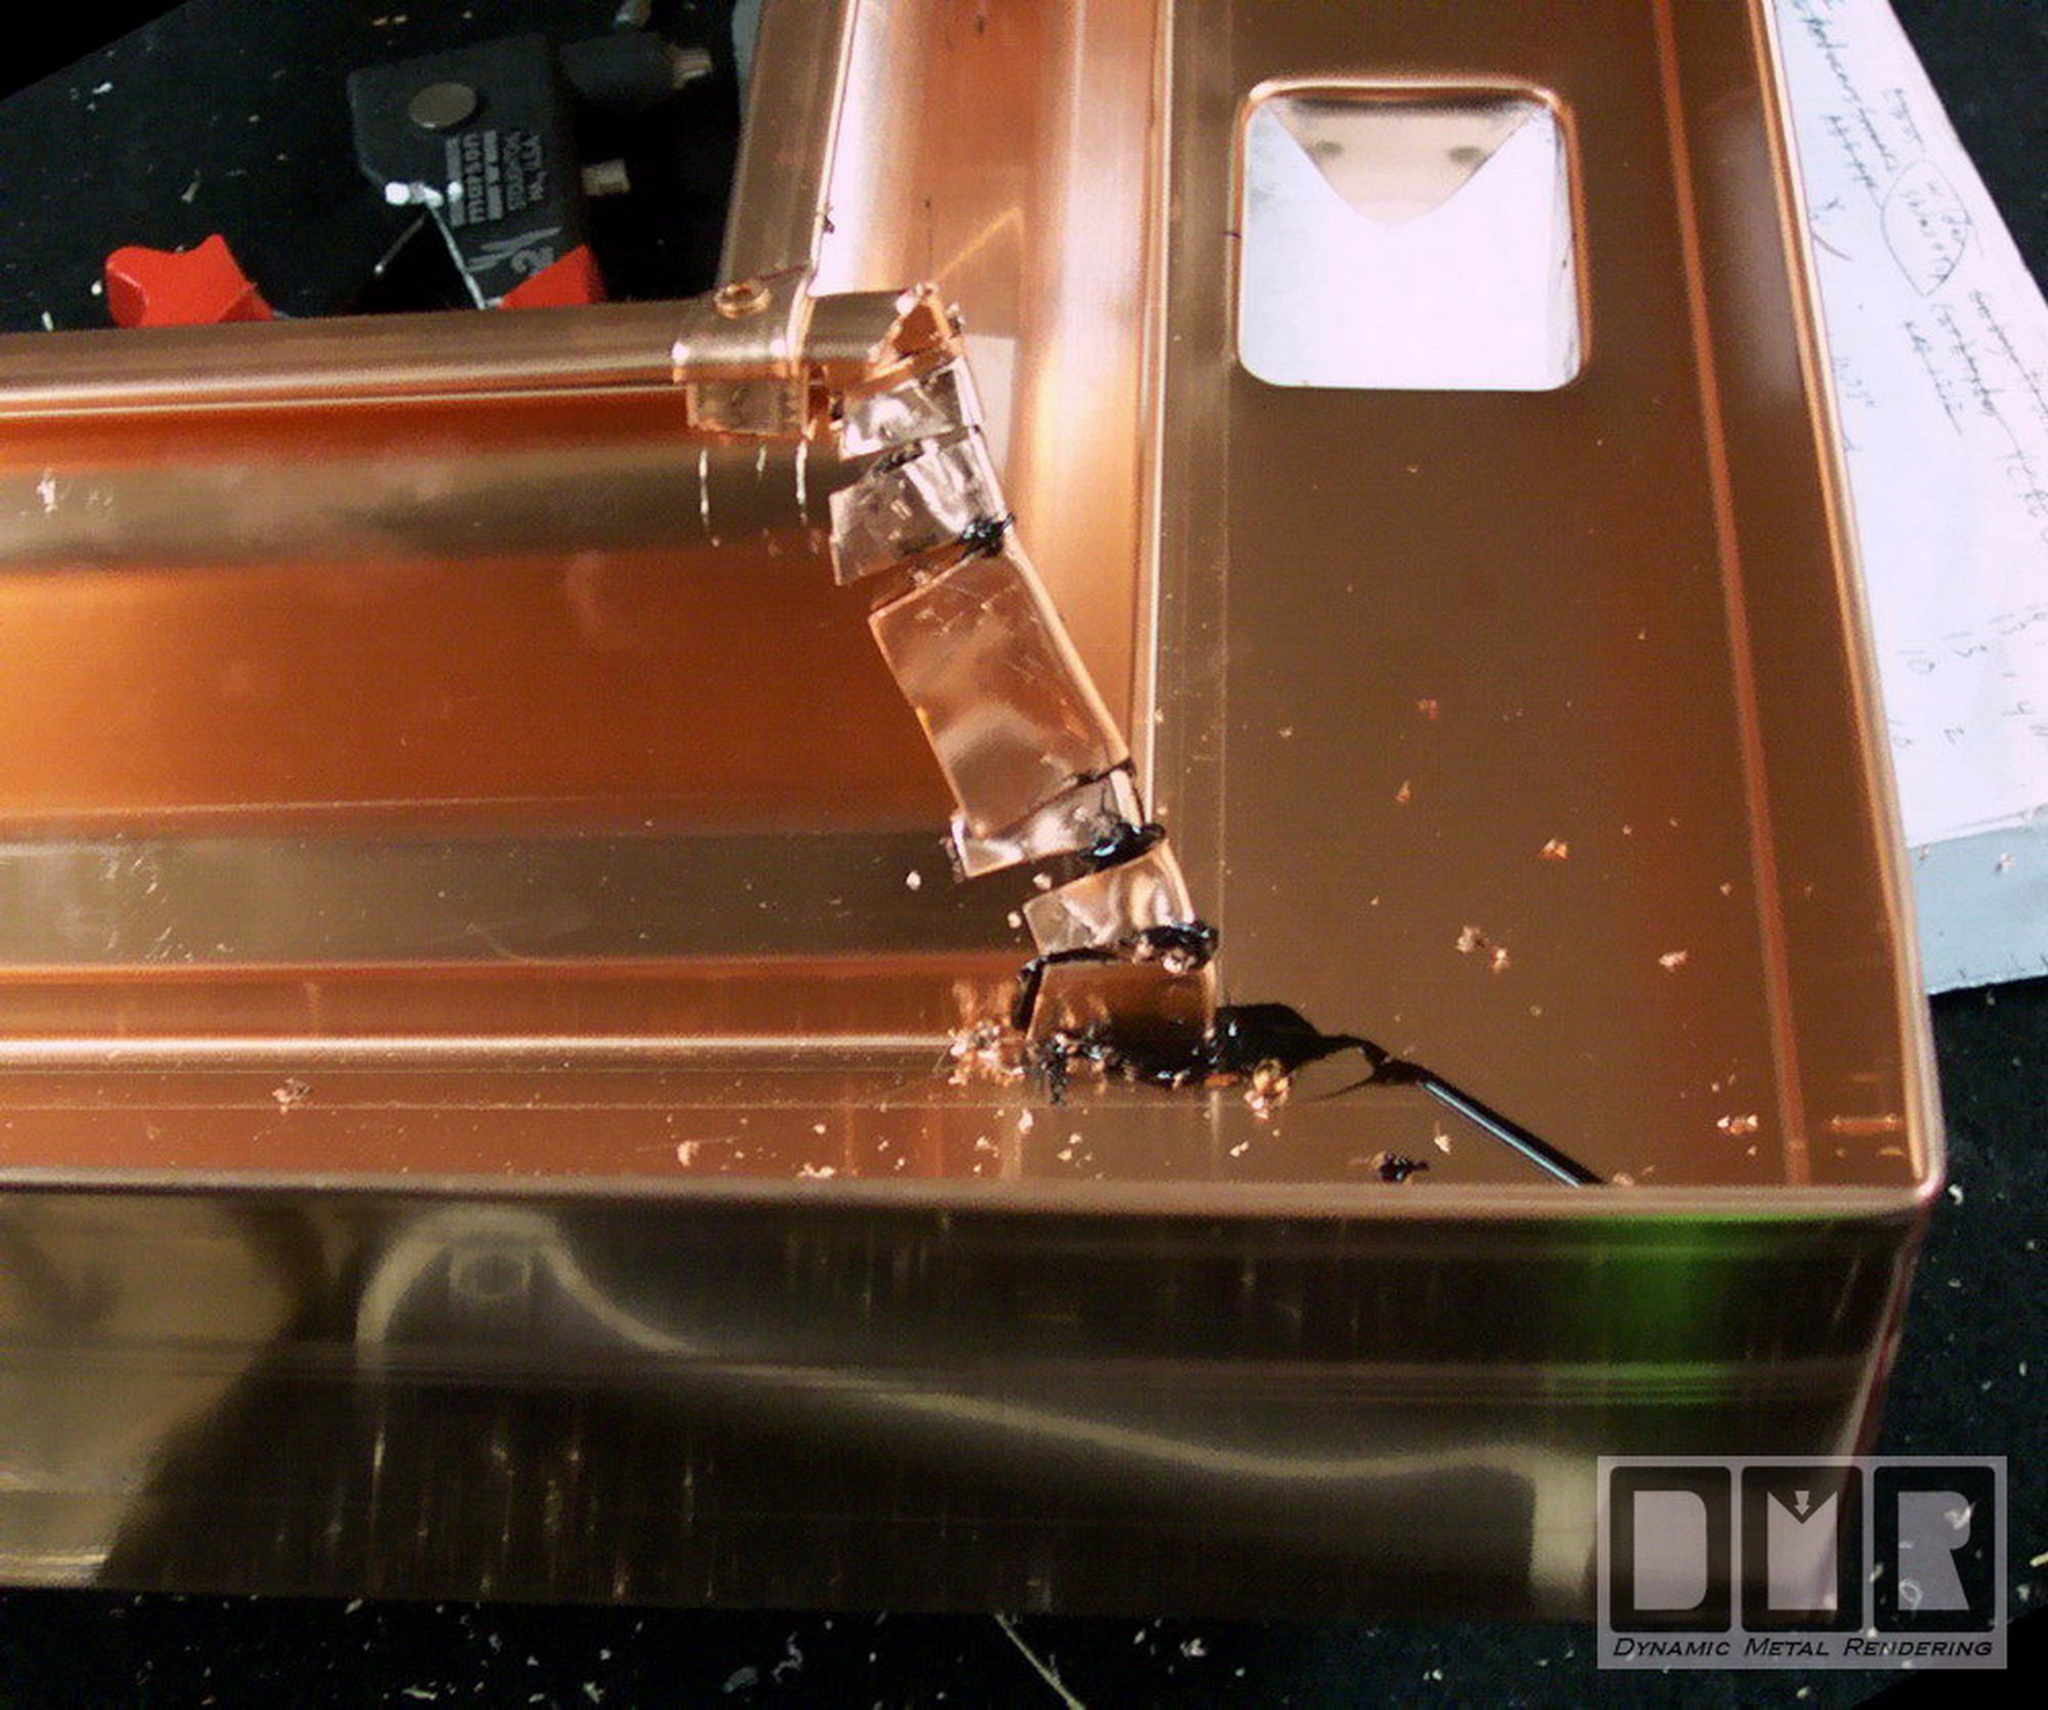
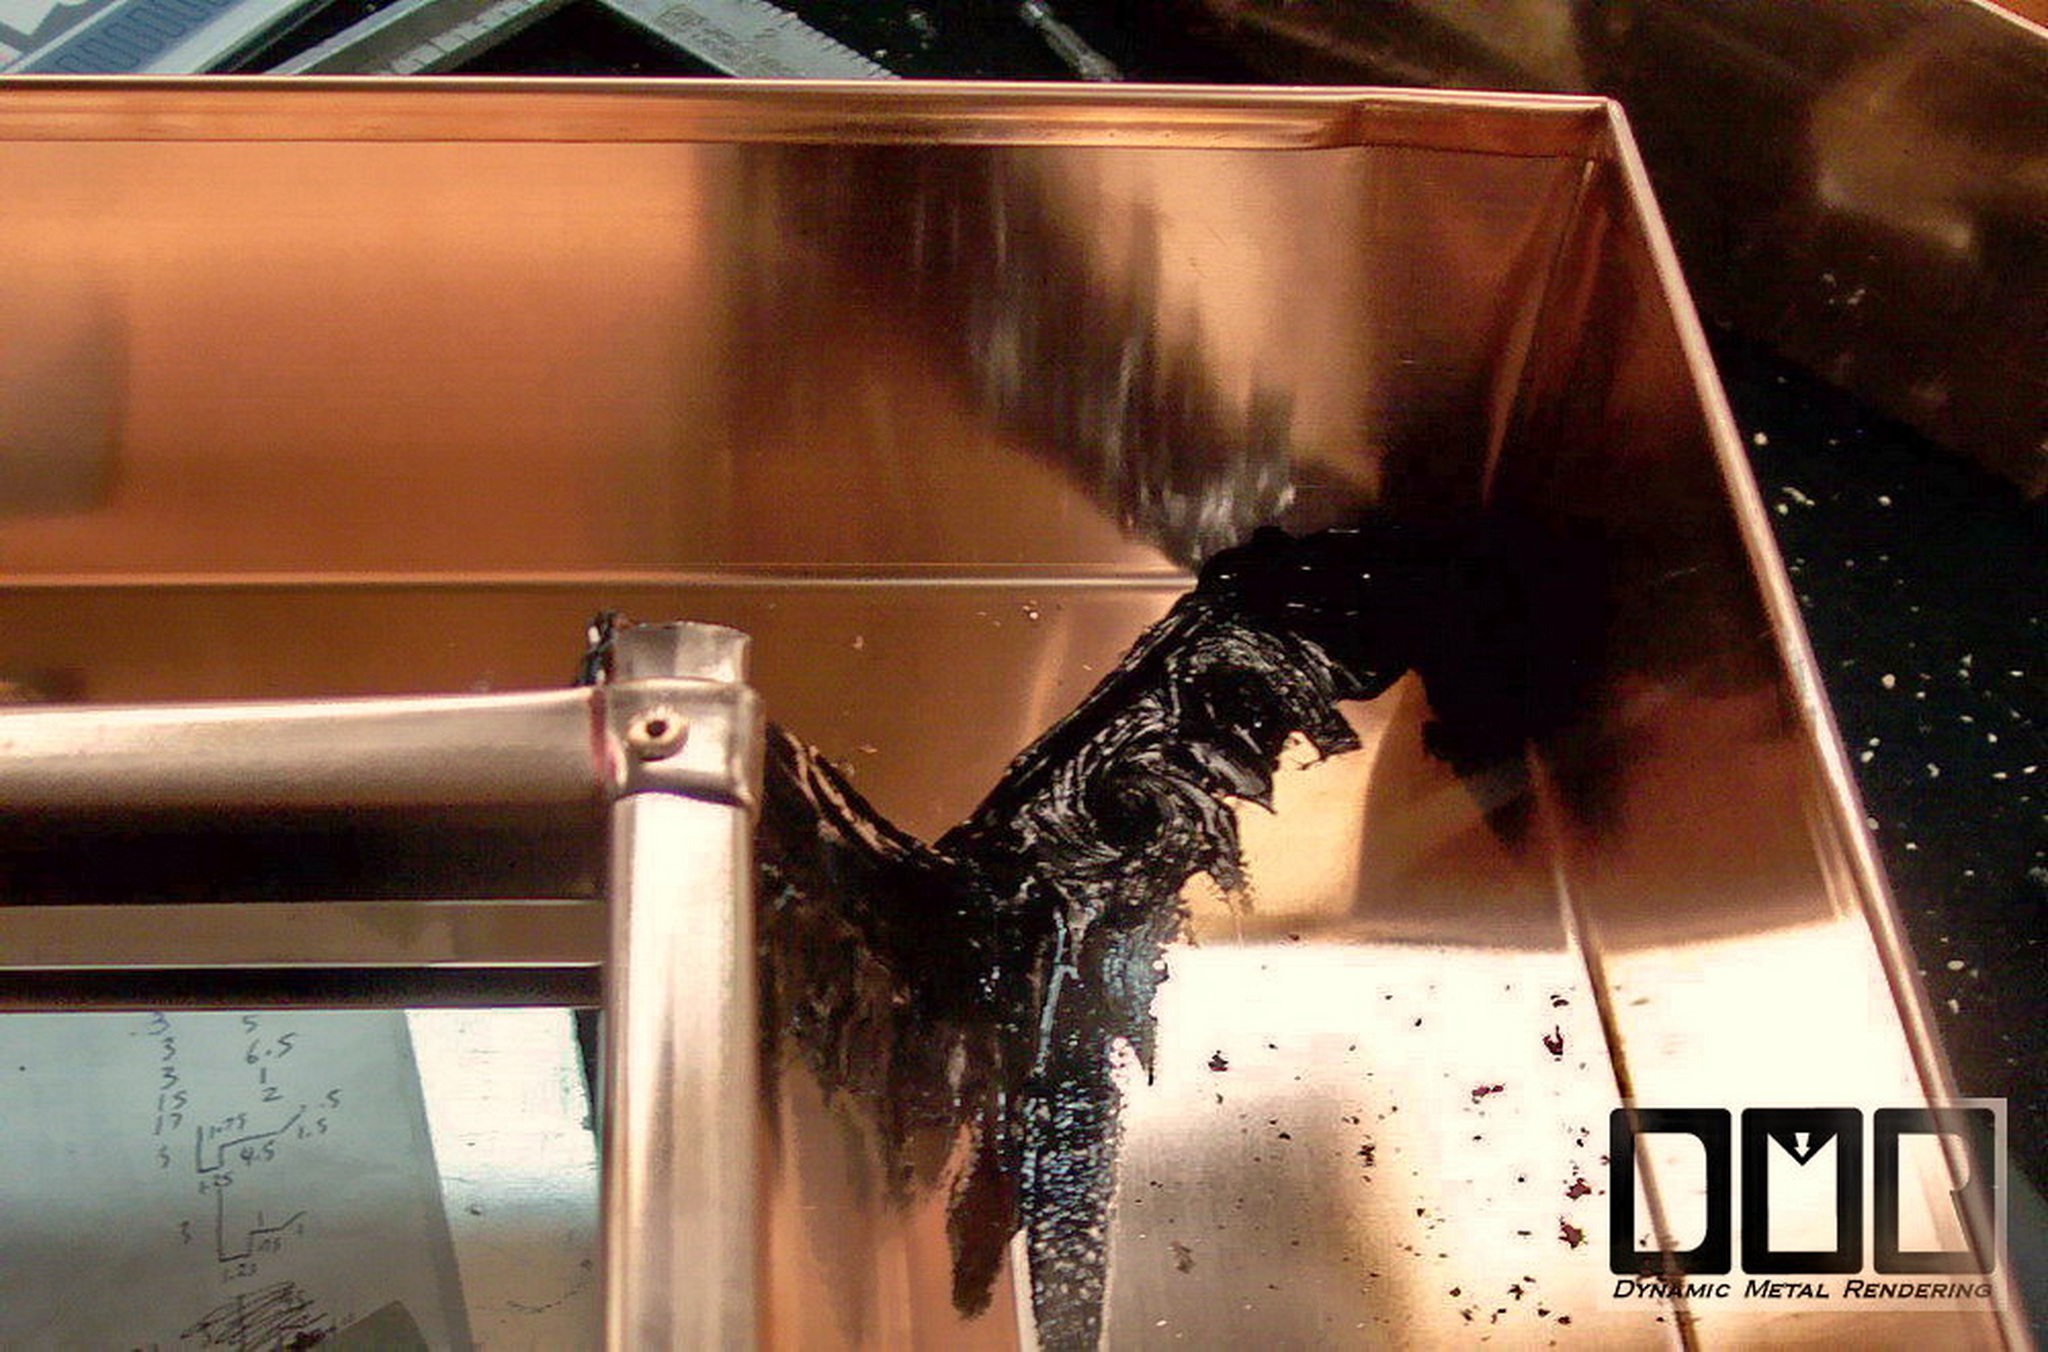
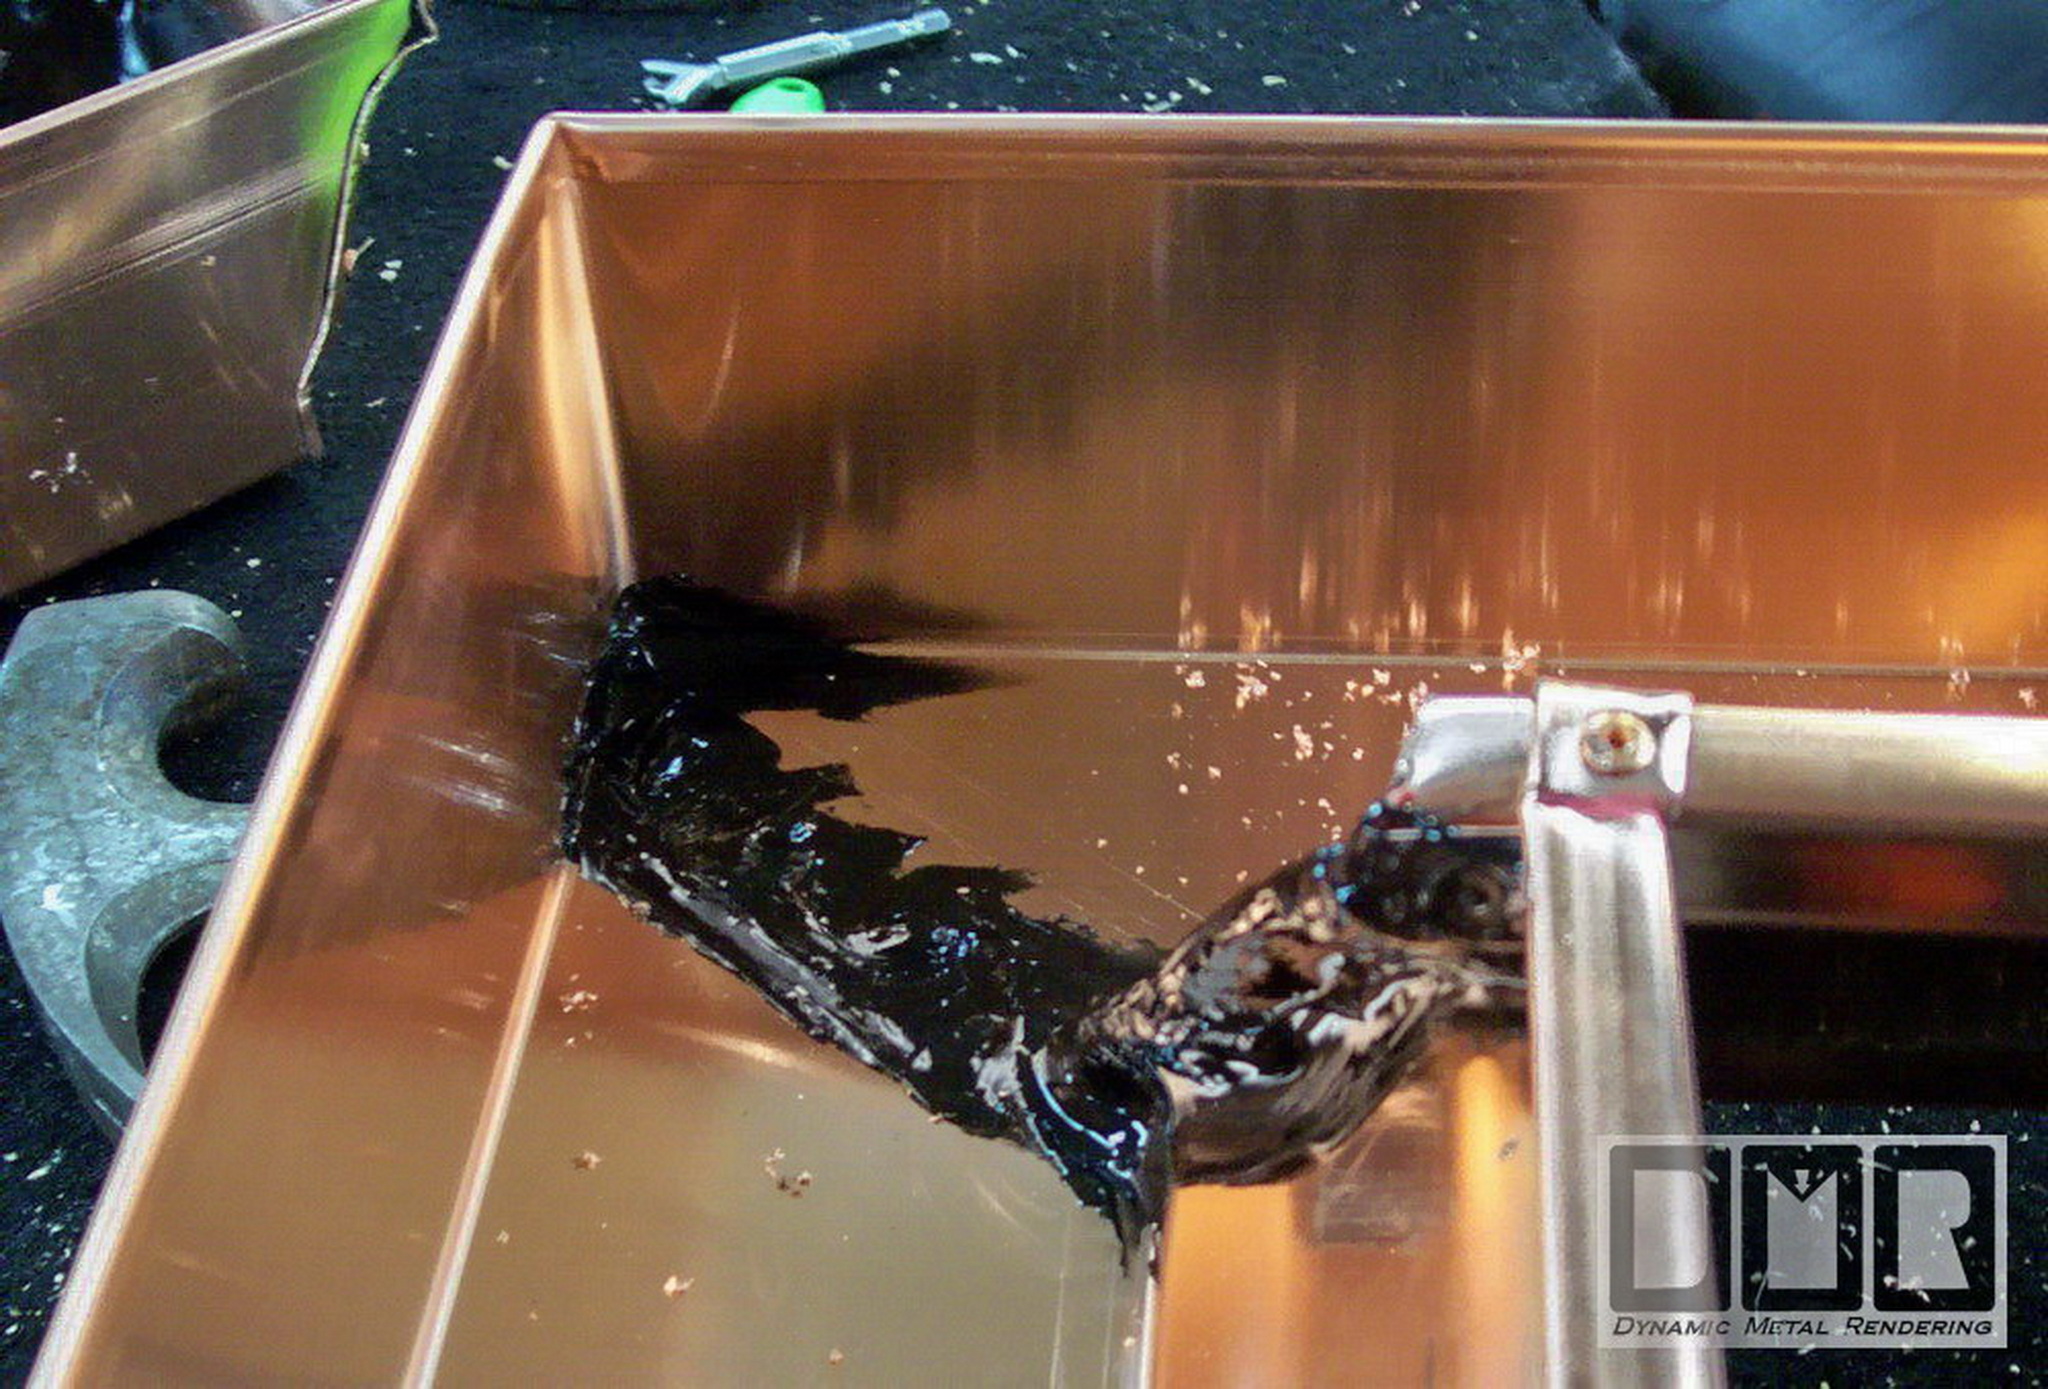
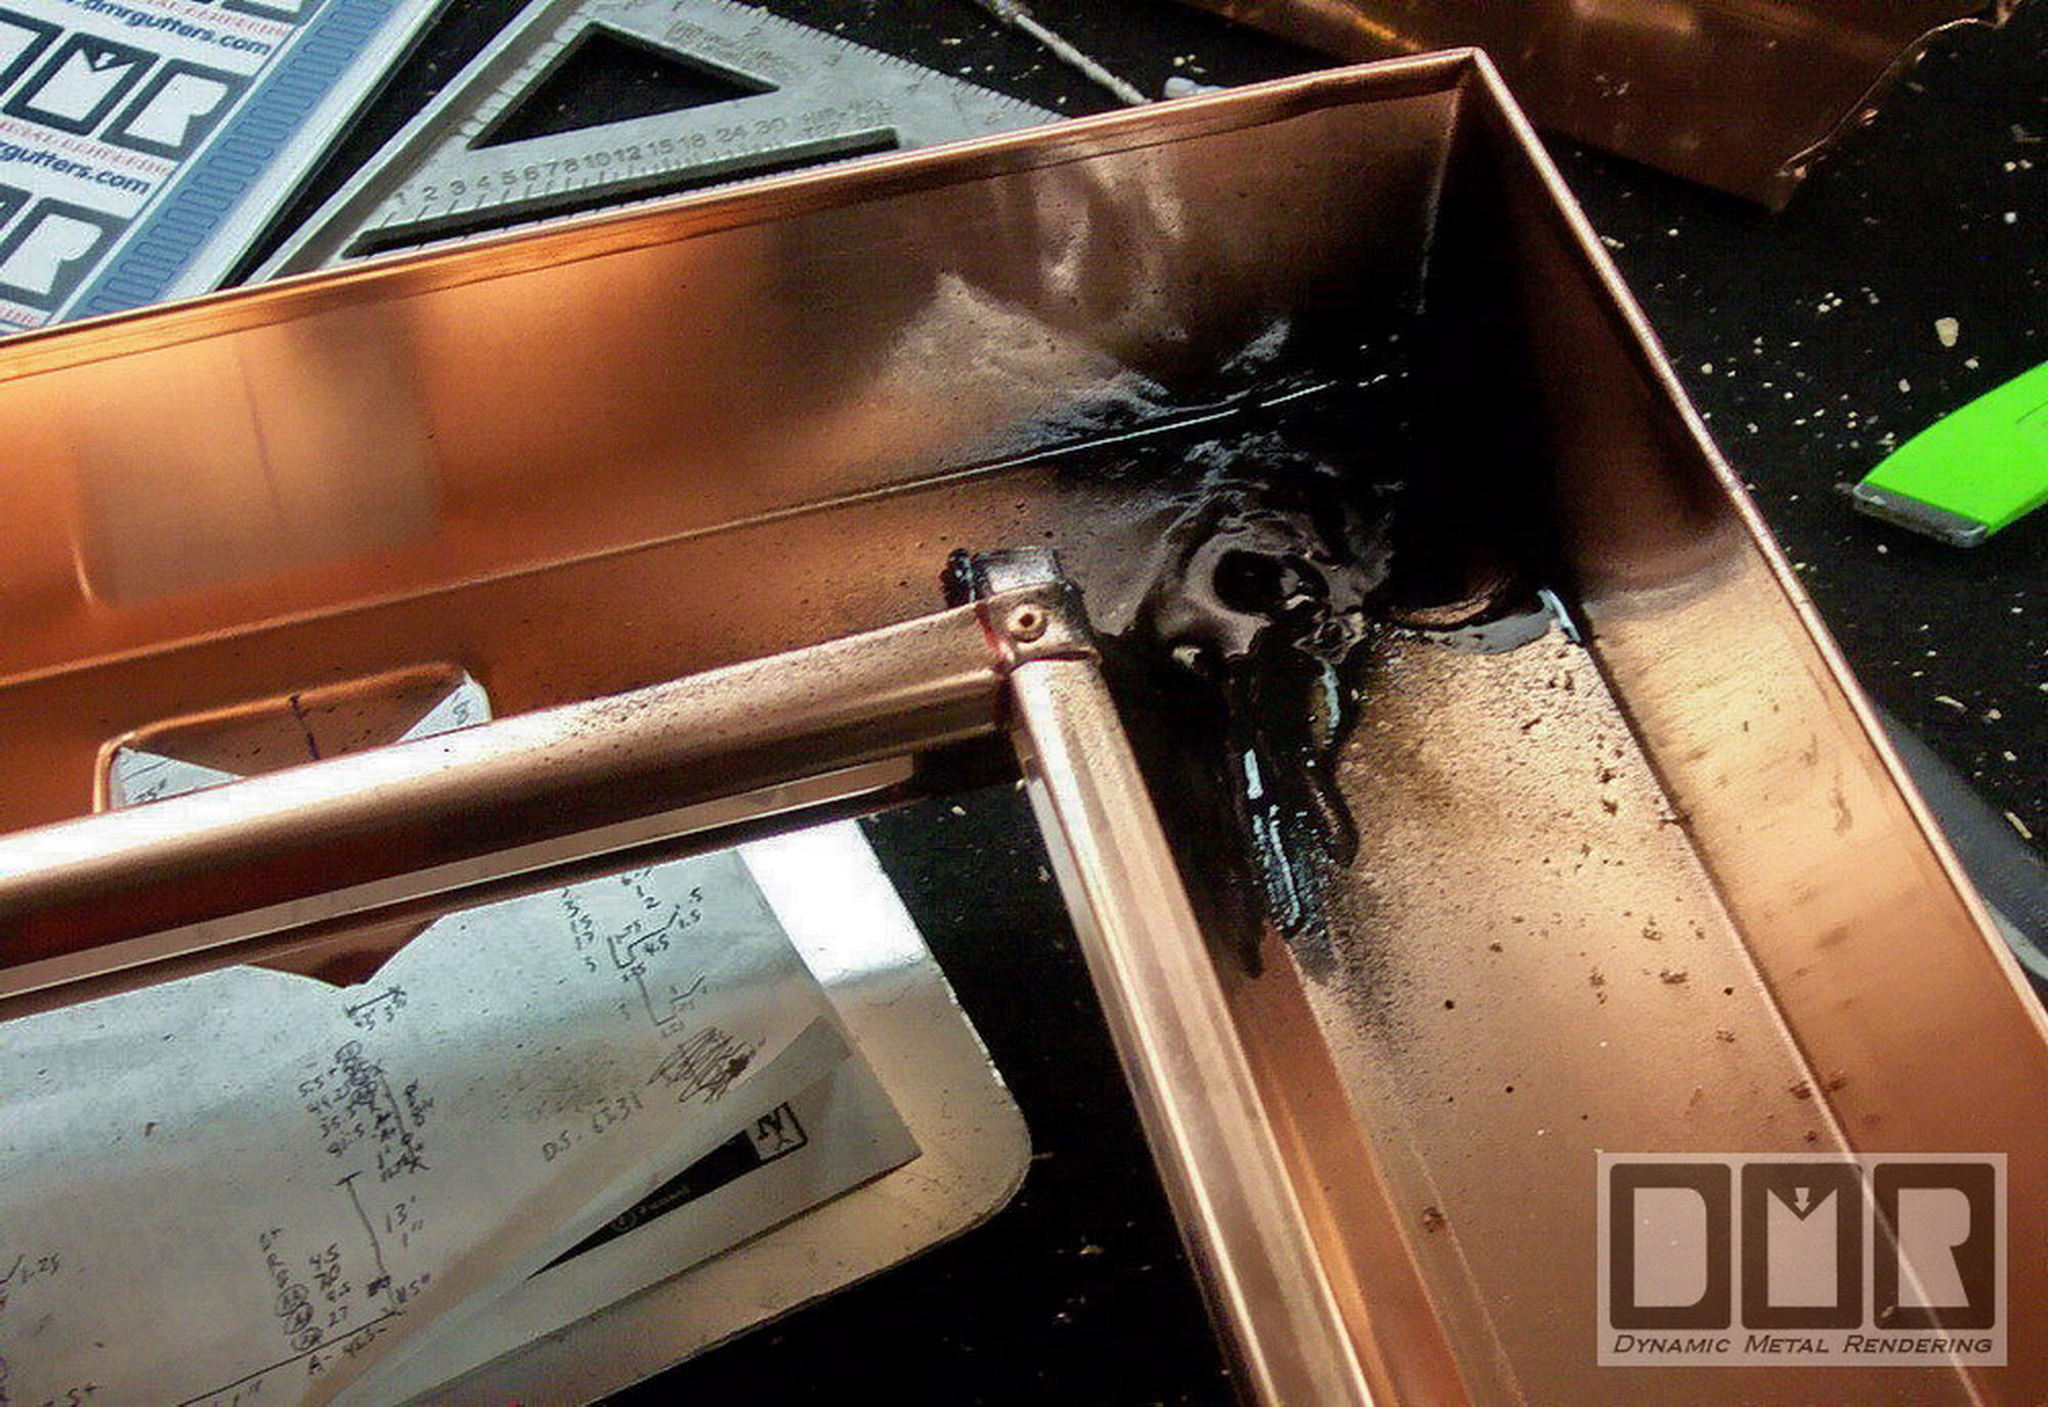
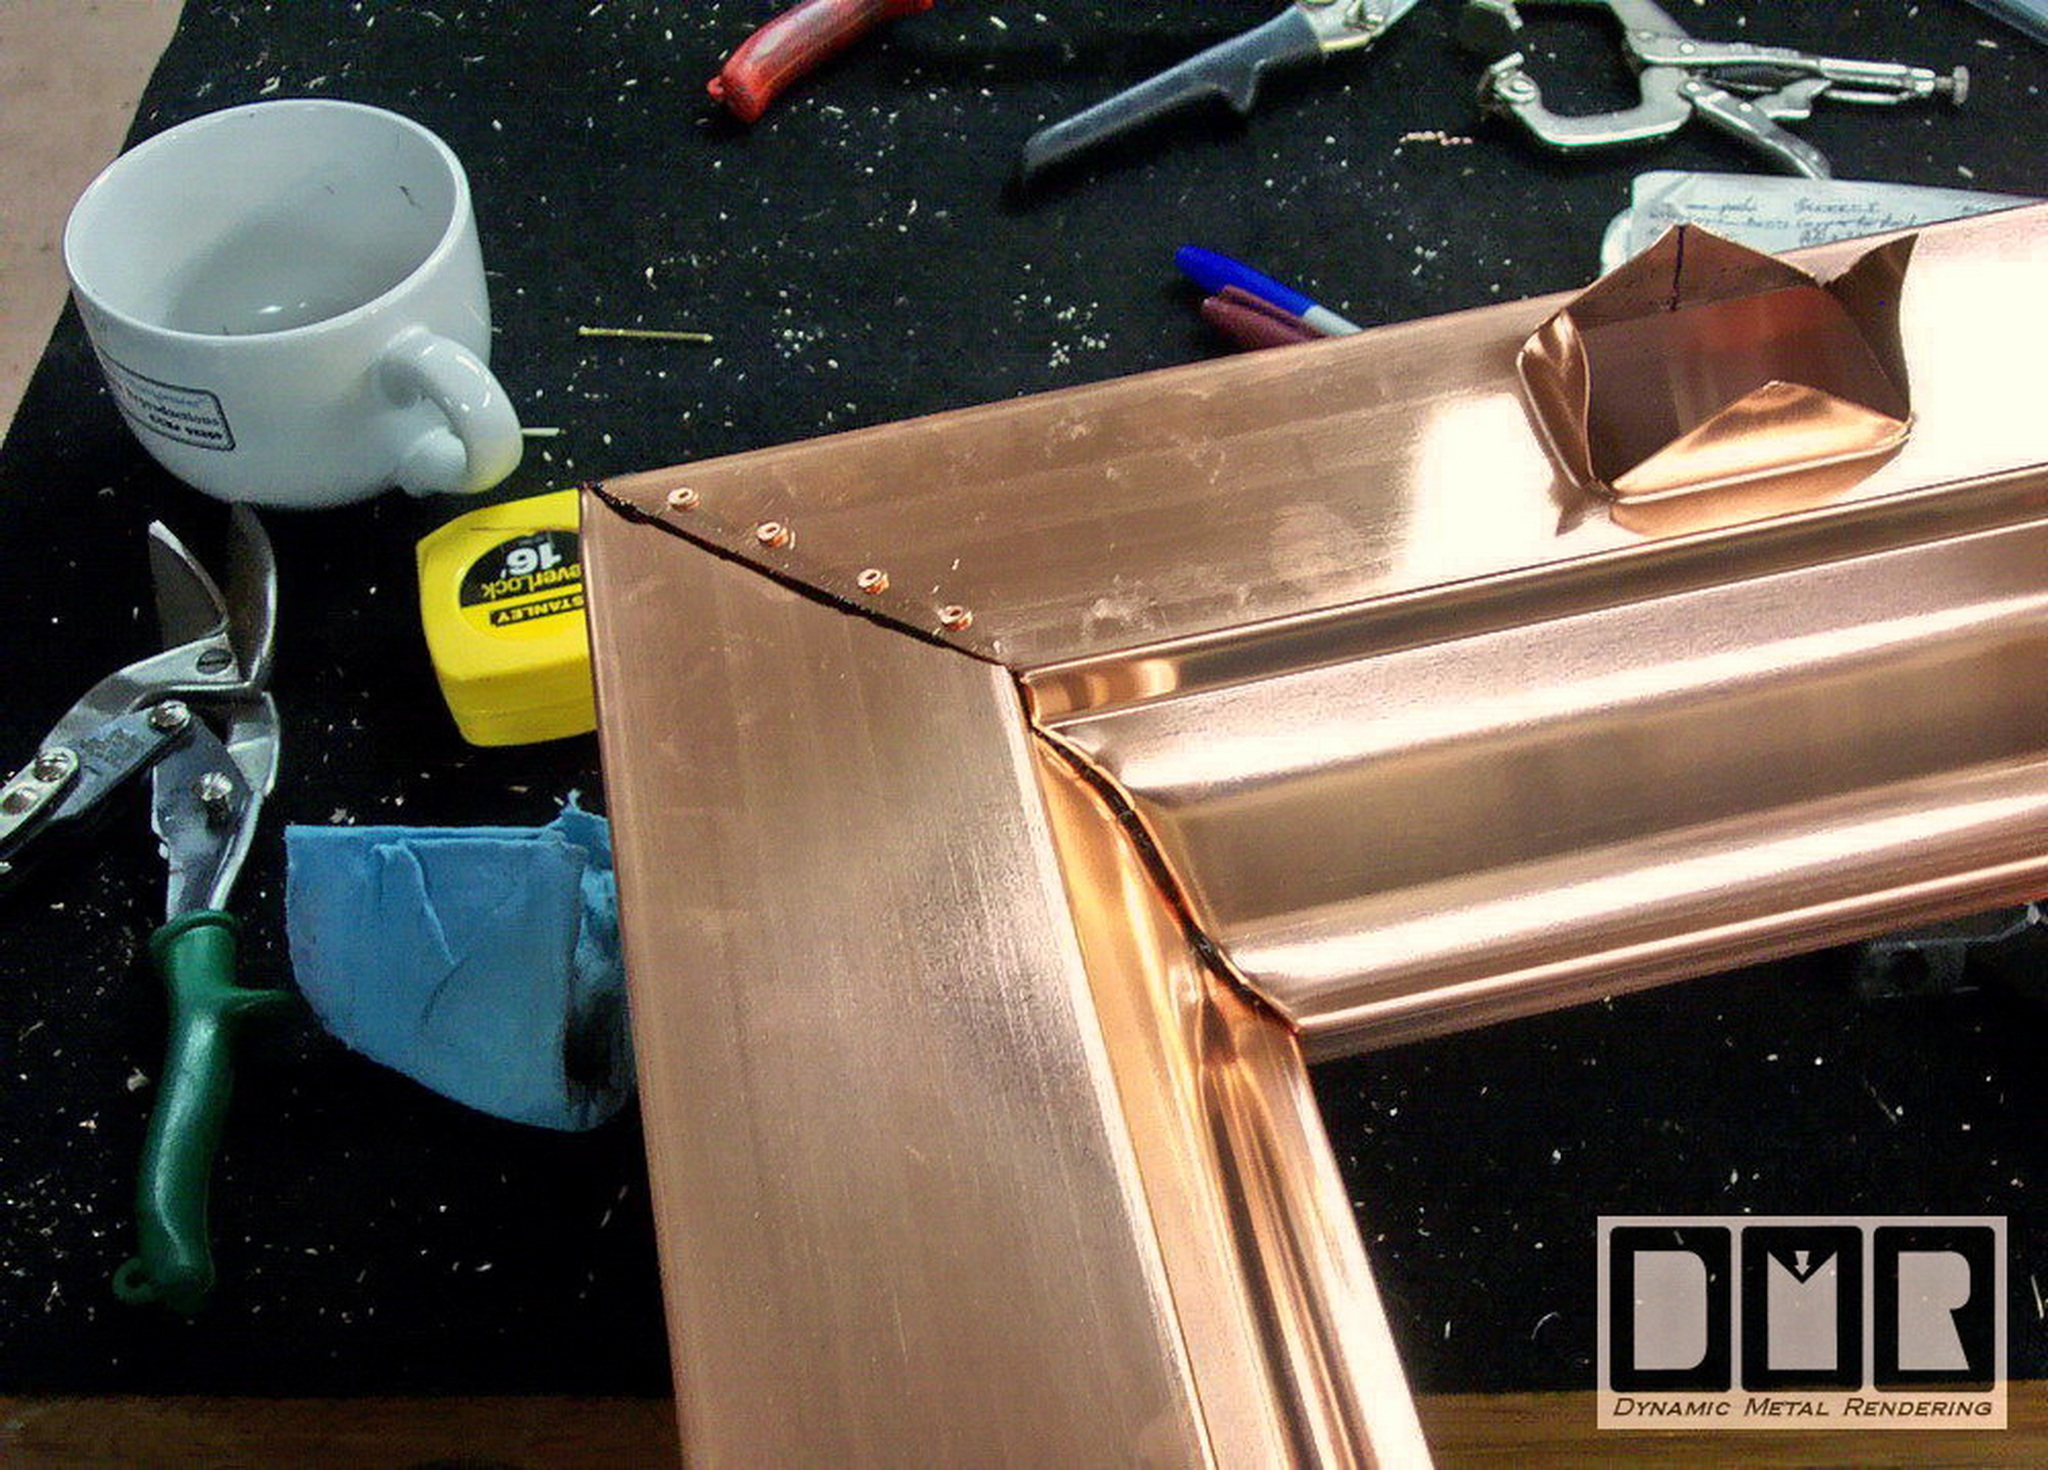
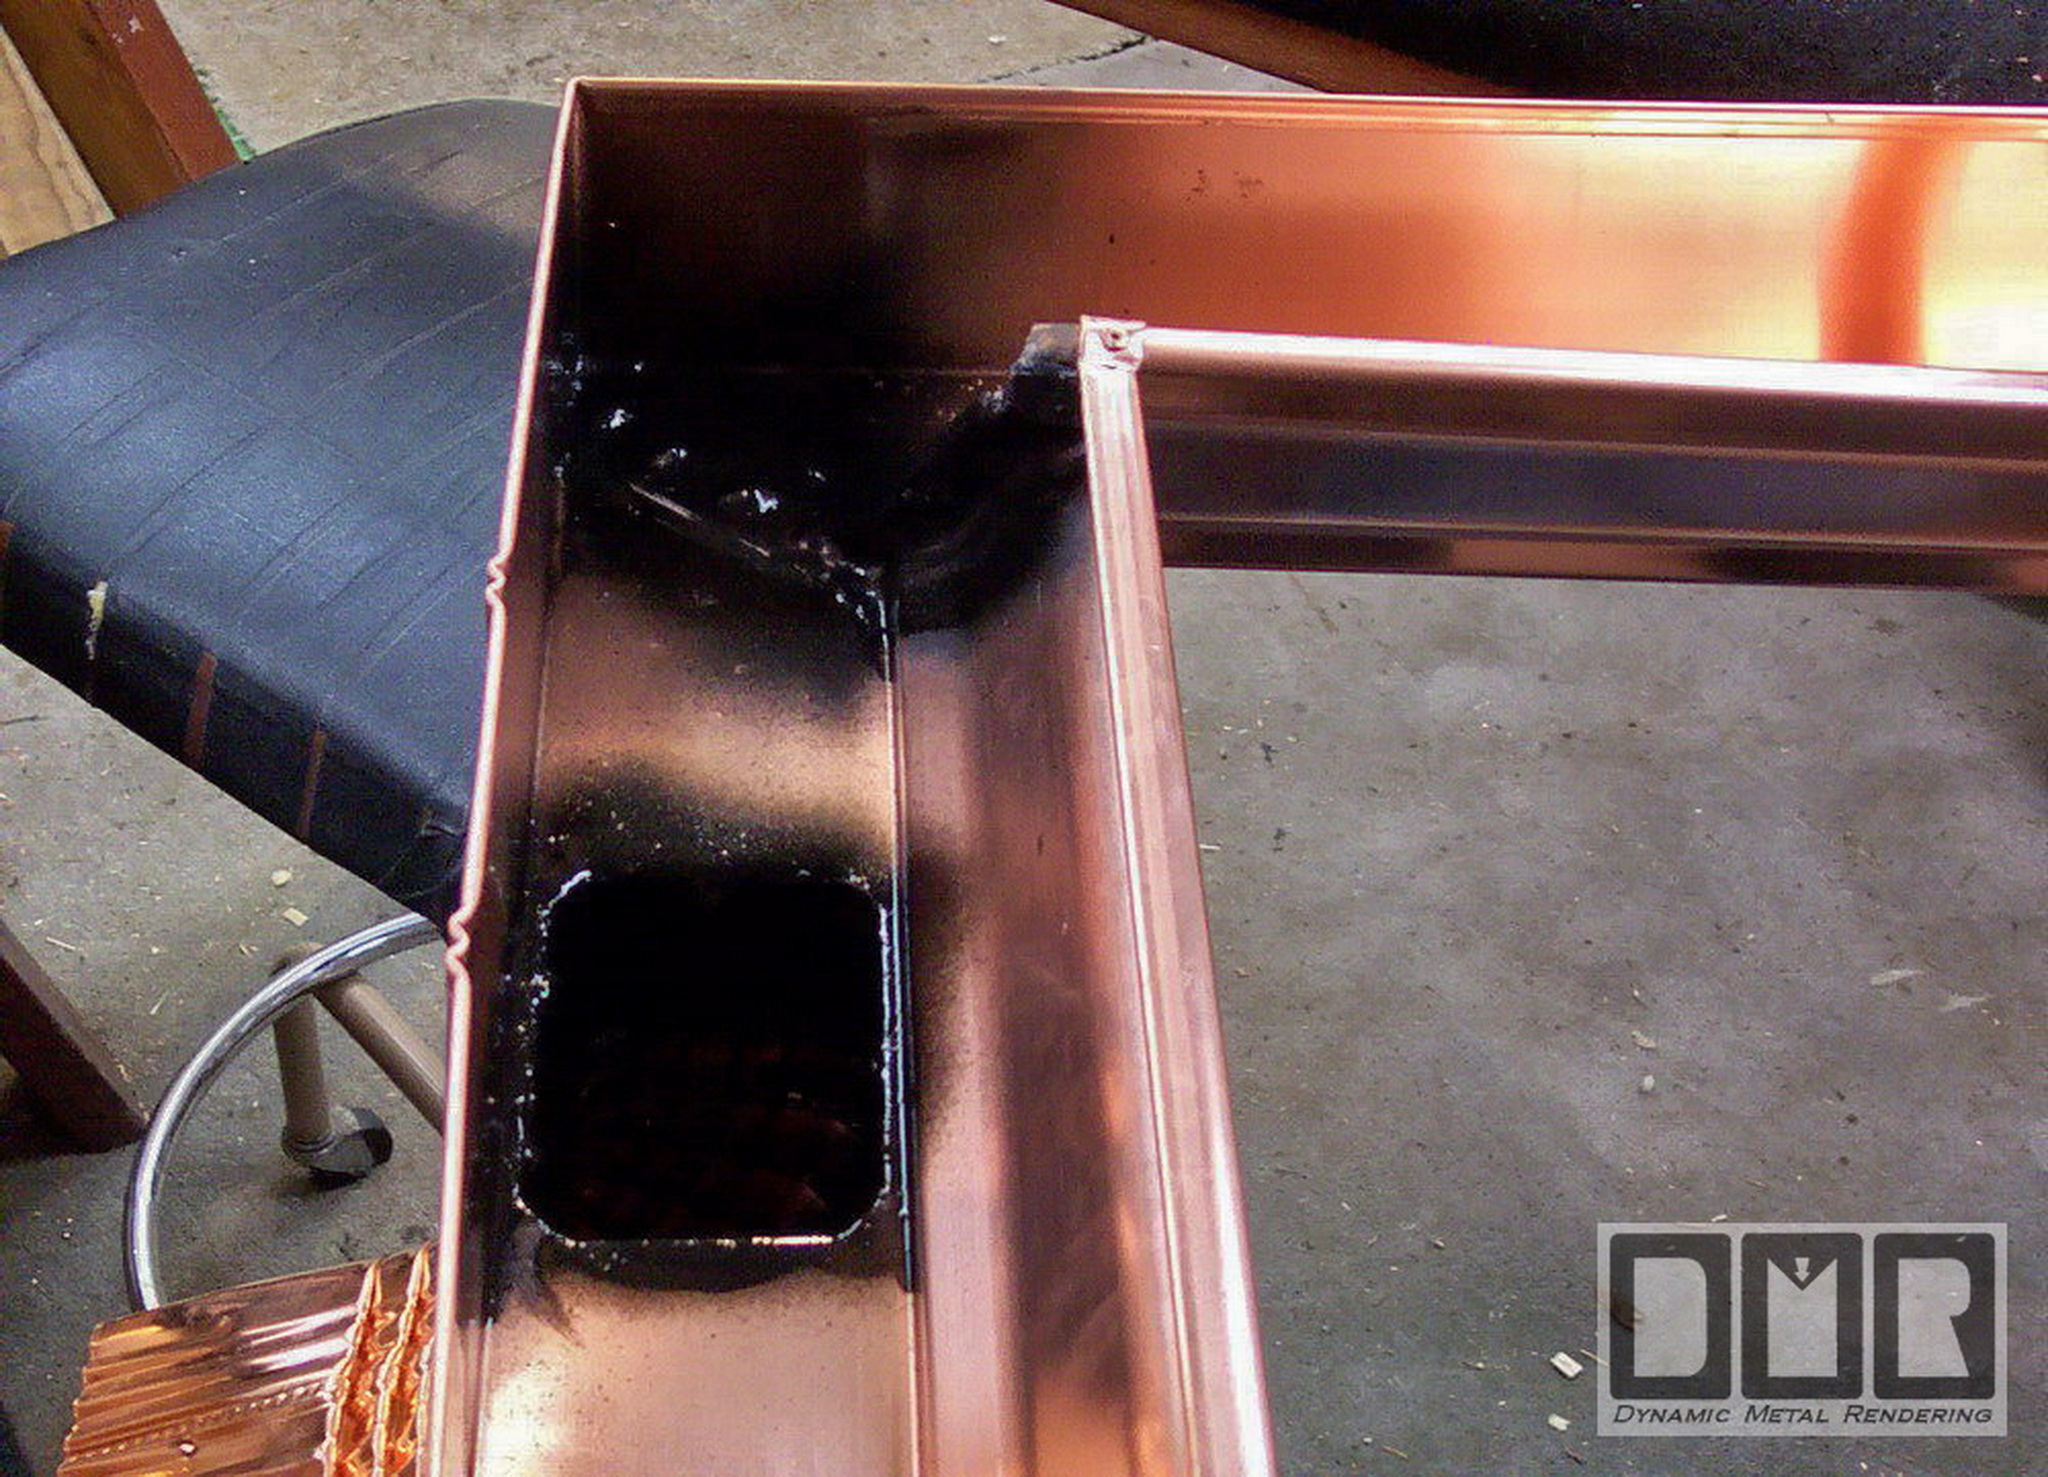
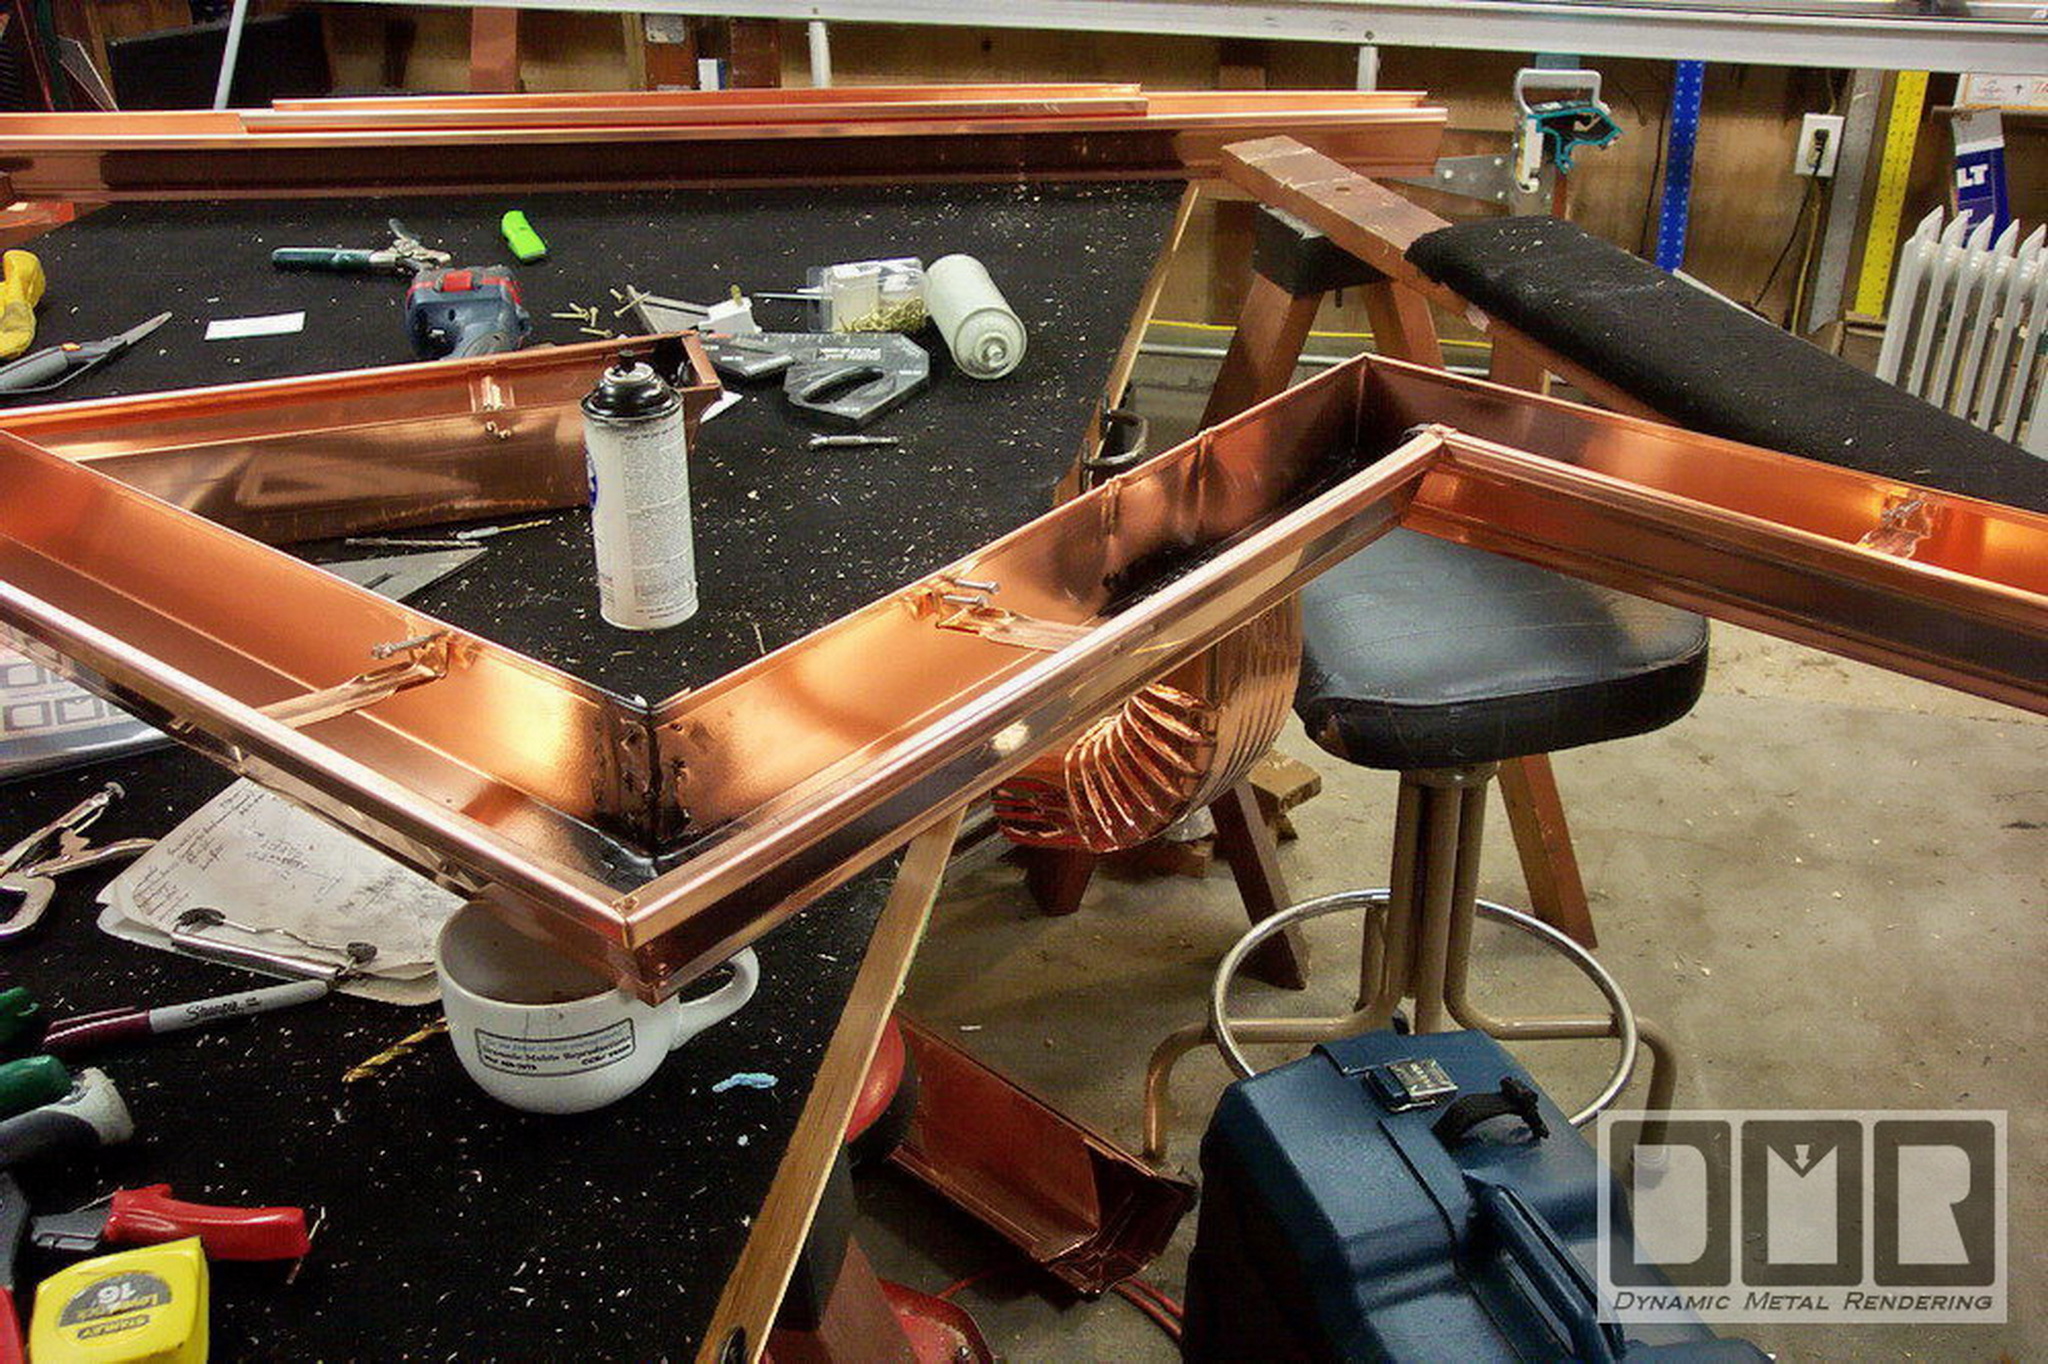
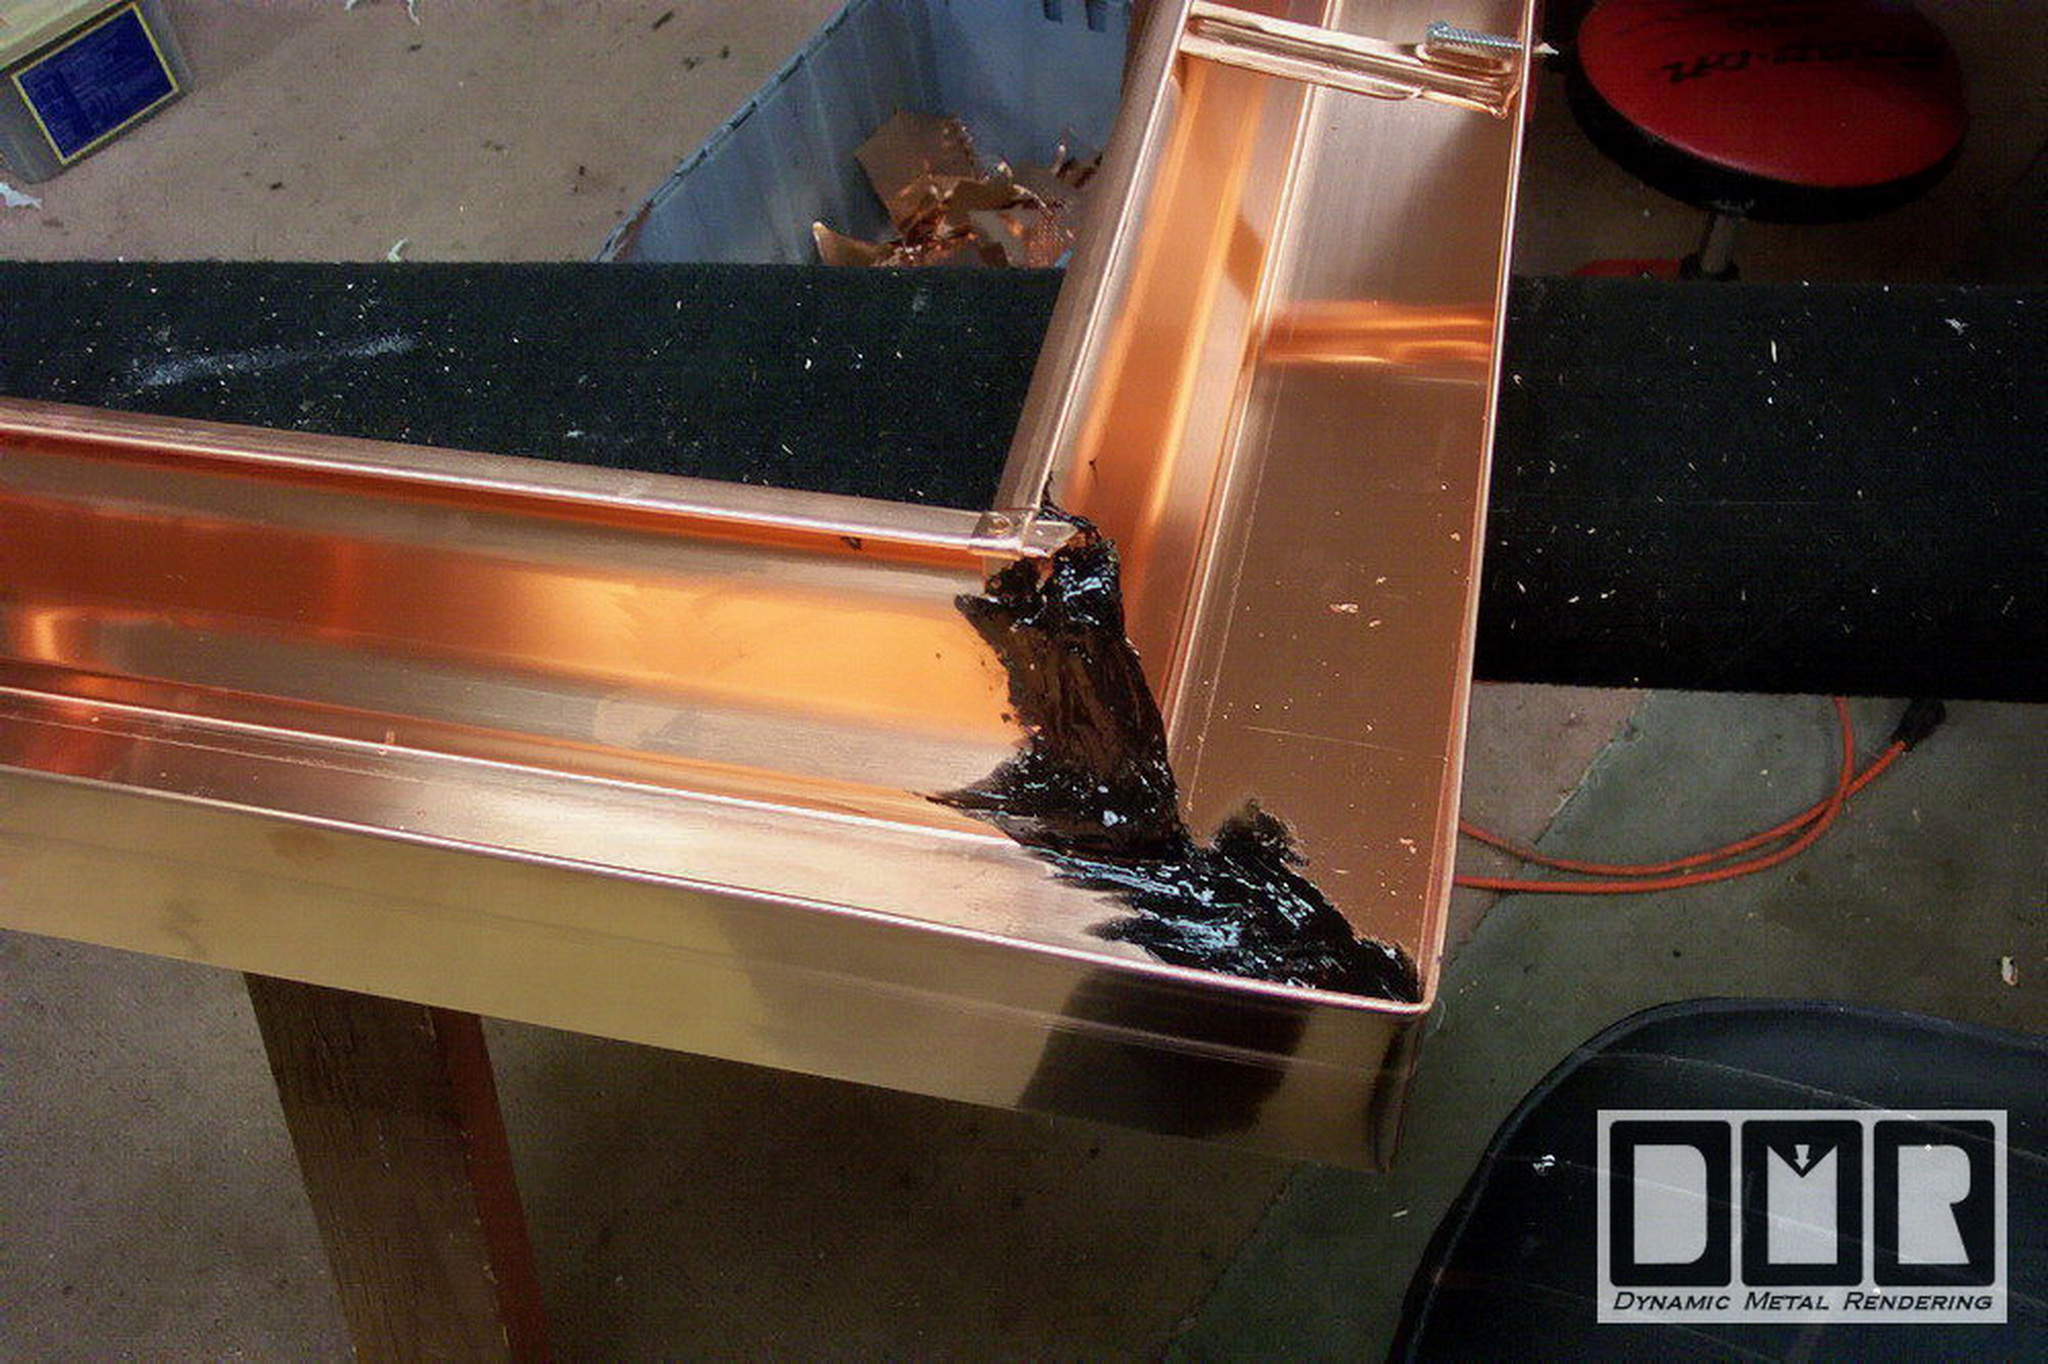
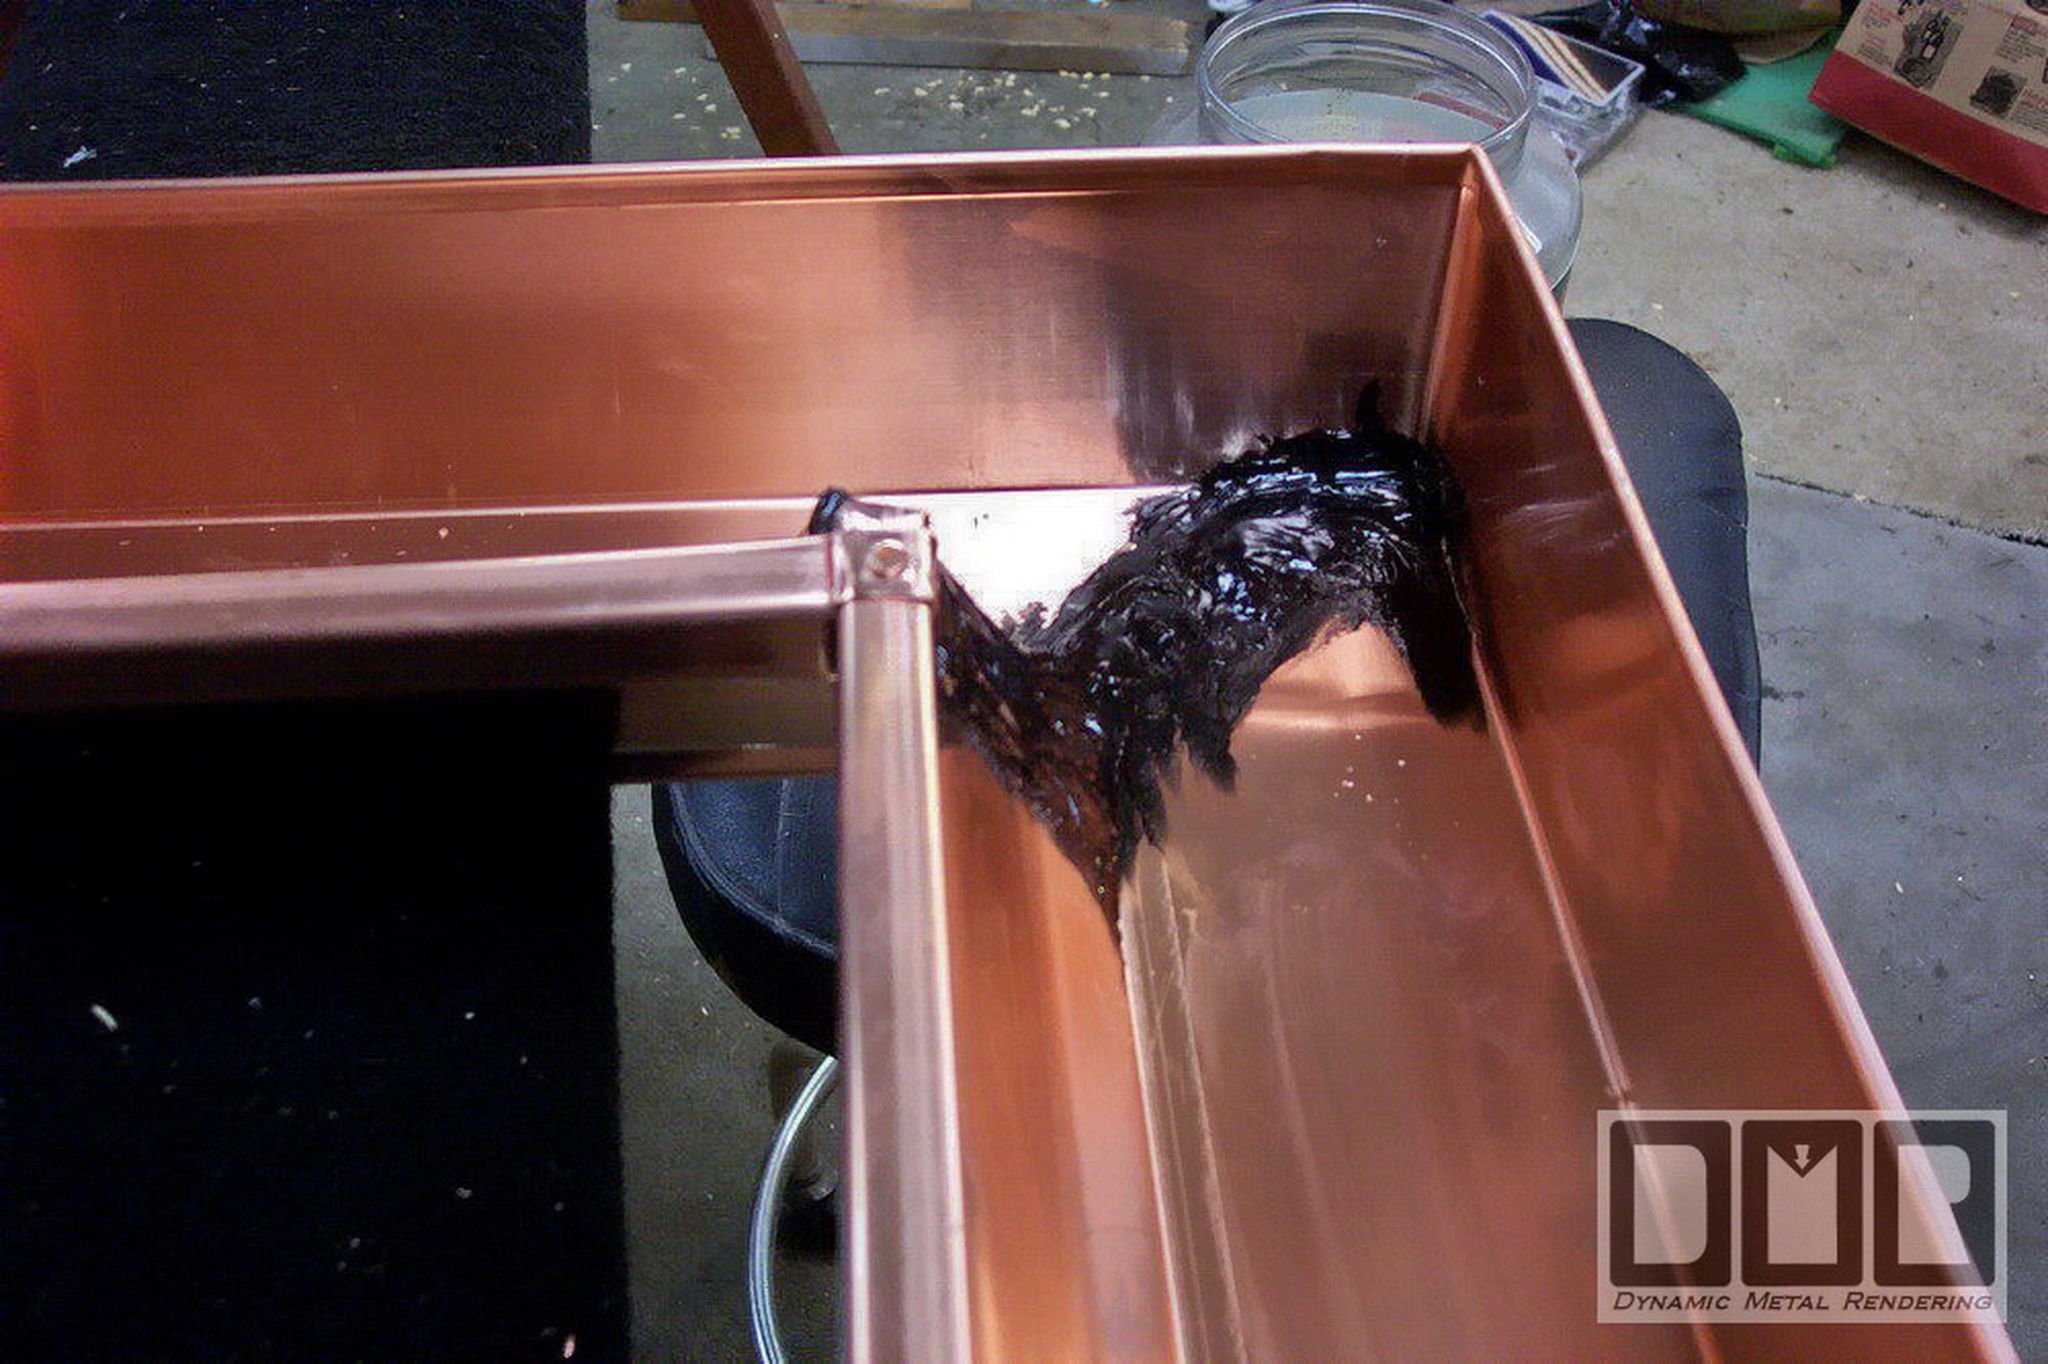
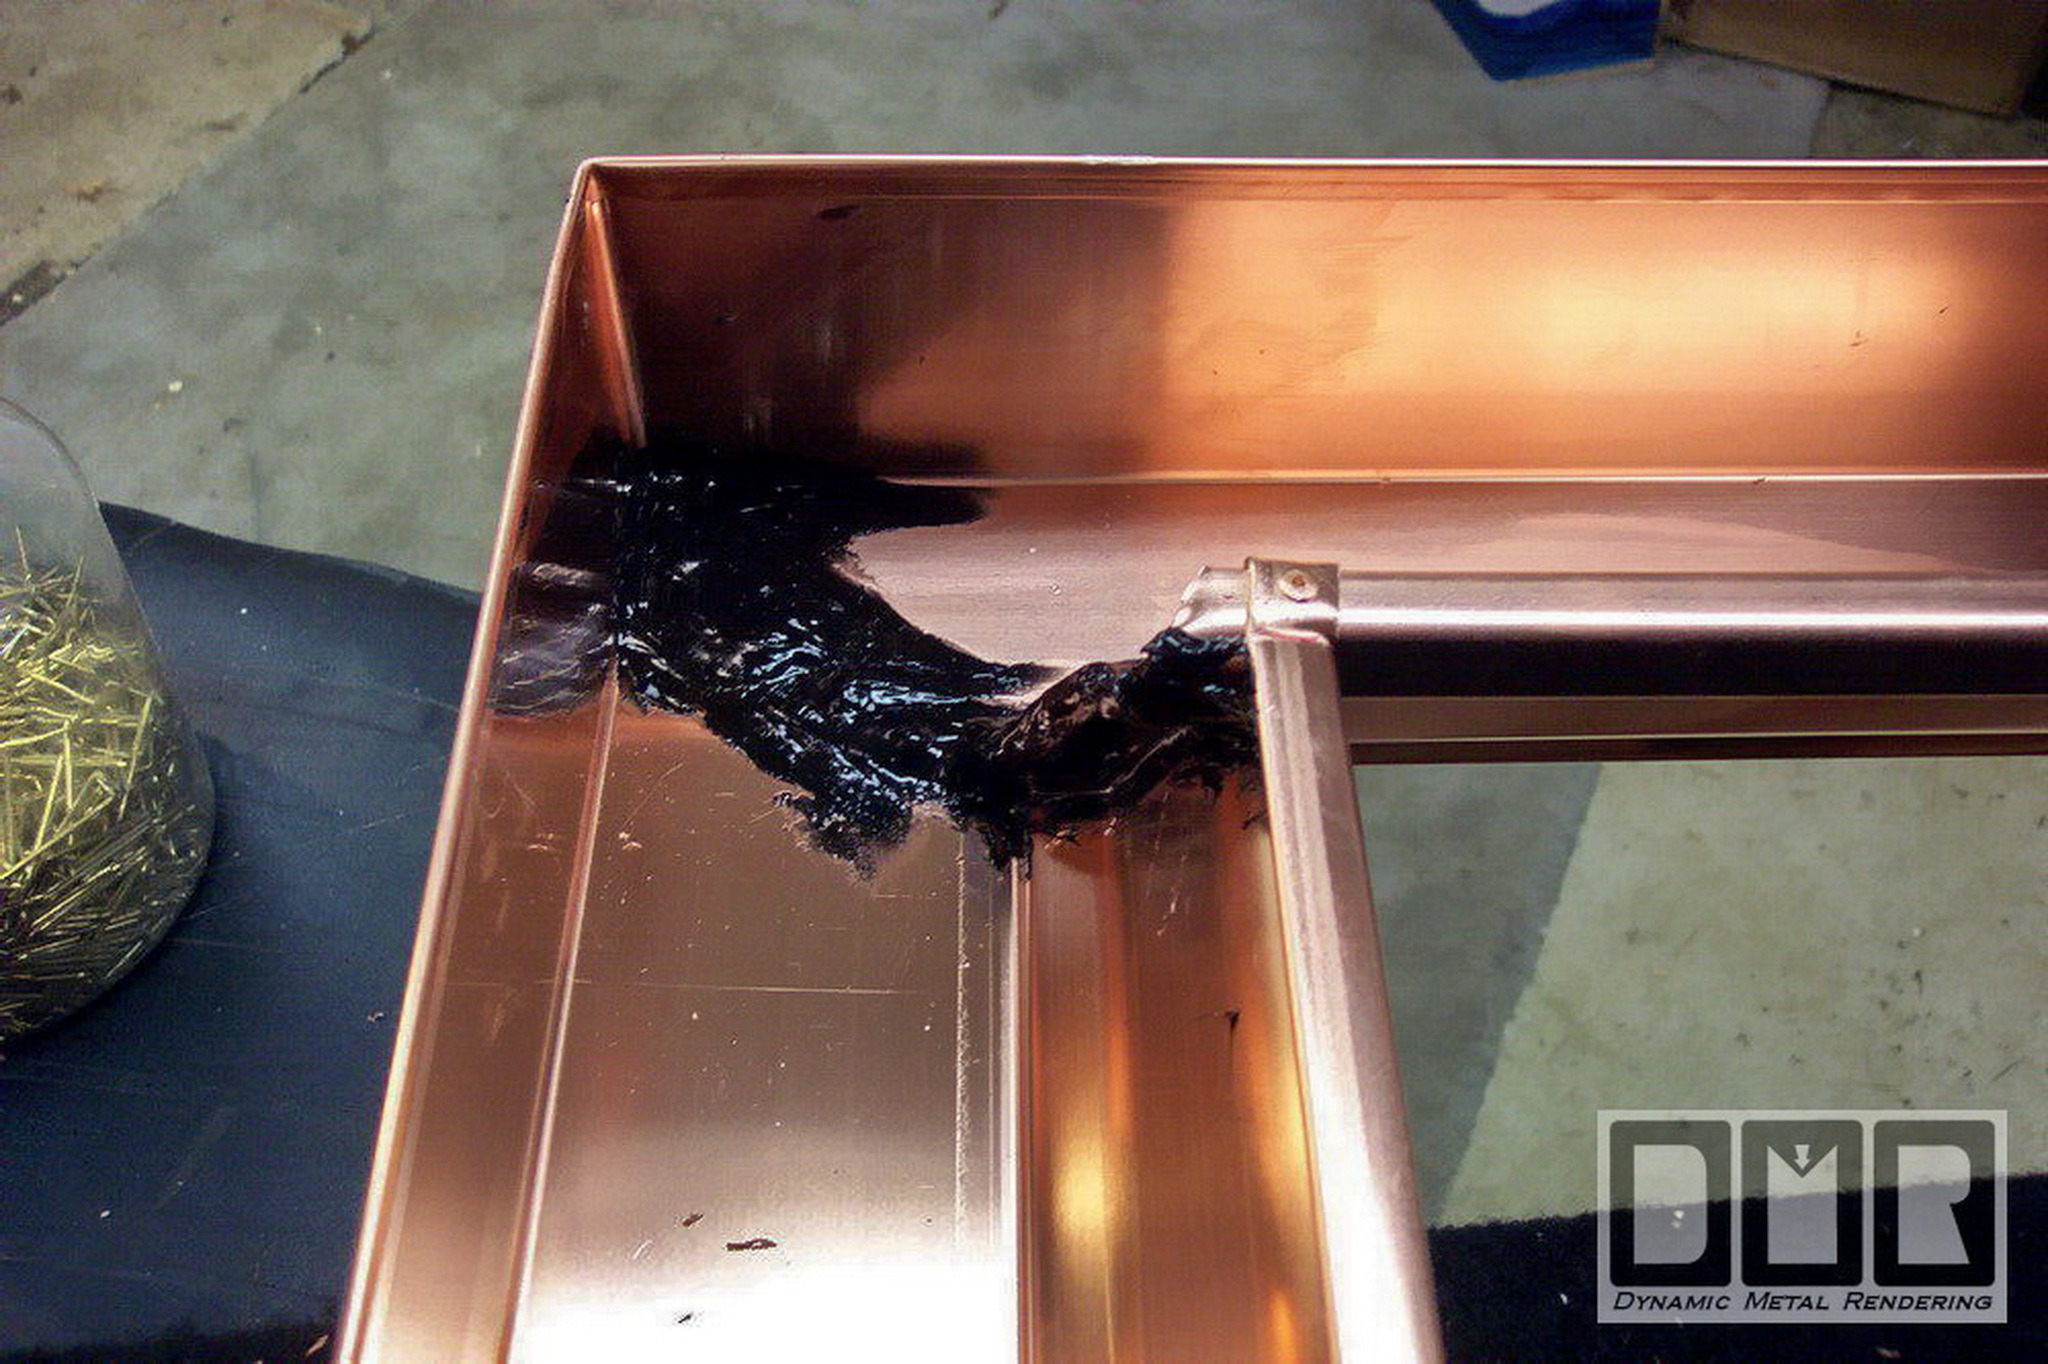
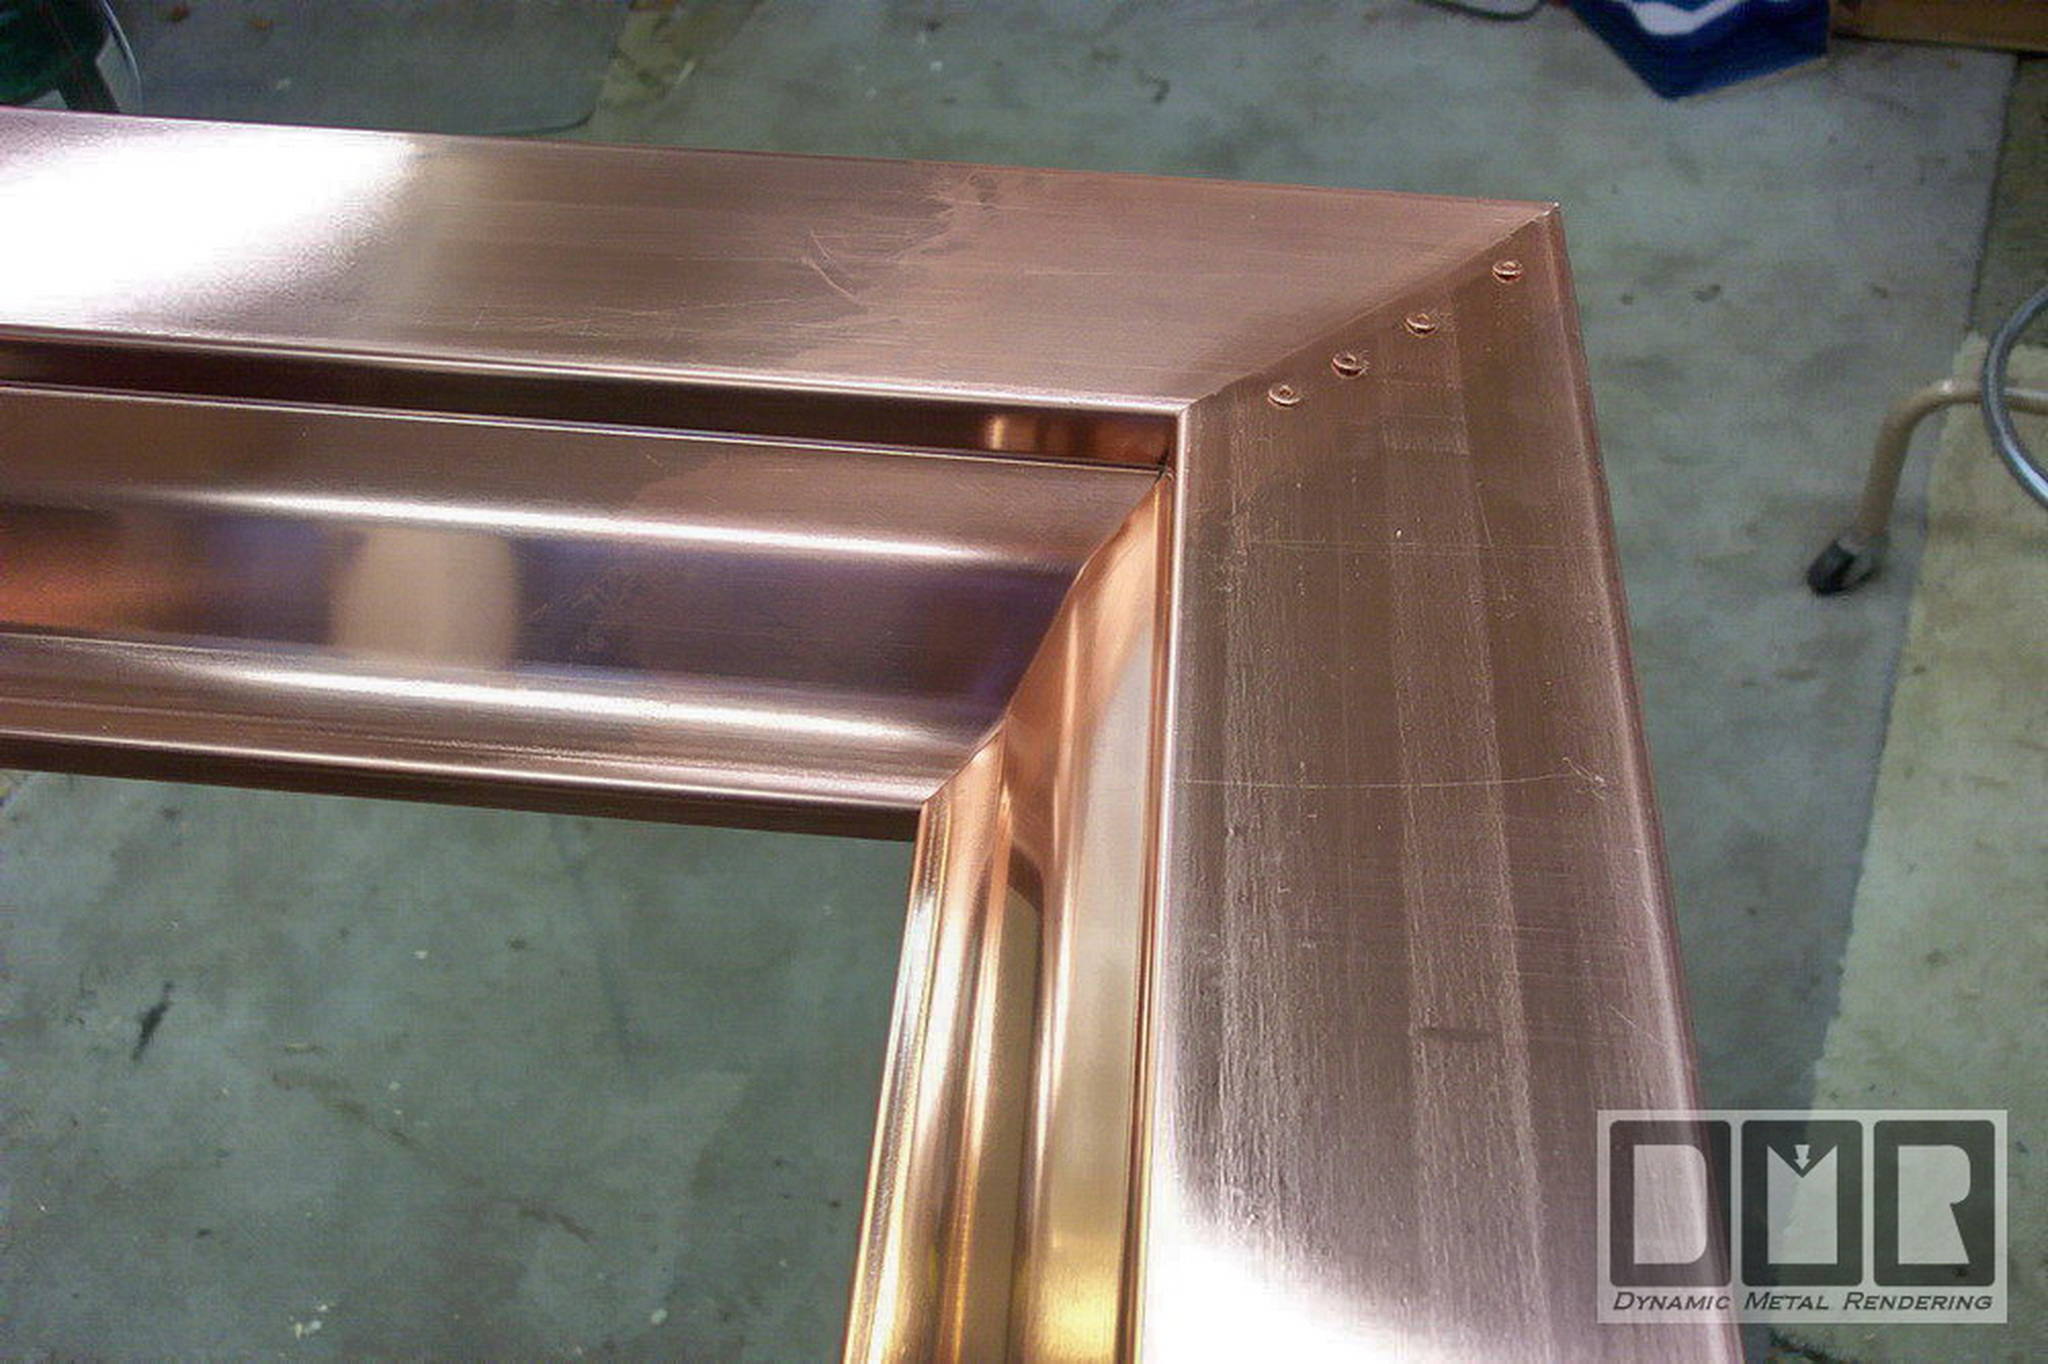
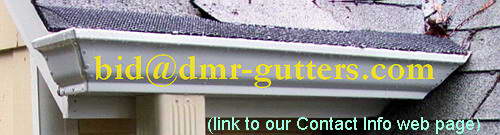
Solder - V - Caulk & Rivets

I use a better caulk than all the other gutter installers.  They use to use a lead based solder to seal gutters. Soldering still is a good way to seal water pipes that can be made with a very tight clearances, with much less room for any expansion and contraction.  Although with the risk of open flame so near the wood structure of the house, the brittleness of this solder, and the new advanced caulks we have today, we believe it is best to caulk and rivet the seams together, instead of soldering them.

Below you will read about and see how I join and seal gutters together.

.

An Outside 90 Degree Mitered Corner

Below is an example of the 90 degree outside corner fabrication on a copper gutter.  This is the most common corner that gutter installers will do. The local wholesale suppliers sell pre-formed corner units that can be easily spliced onto the ends of to gutters that are to come together, but most professional installers will miter their own corner on the ends of the gutter sections, so there is only one possible seam to leak, instead of three seams.

I first measure for placement and then draw the corner cut-outs on the straight gutter with a small tool called a square, that actually is a triangle shape.  I then use the left and right off-set tin snips to cut the copper away from the corner to be formed and bend the tabs.  I was not able to take photos while cutting, so you will just have to take my word for it. <LOL>

I then bend the over-lap seams and caulk inside the gutter before folding it into the corner shape, so there is caulk between the two layers of copper.  again, we have yet to hear of any installer that will go to the trouble to fold a corner like I do.

I then drill 1/8" holes through the two layer overlaps for the rivets to hold them tightly together.  I now use 5 rivets across the bottom floor of the gutter, 6 rivets to hold the seal of the back side, then another 4 rivets to hold the outer face together.

I then hammer the overlap seam of the outer face over the corner.

I then add more caulk to the inside of the gutter's seam and over the rivets. I work the caulk into the seam and over the rivets with my finger. I then use spray paint as a solvent to again smoothen out the caulk and work it over the inside of the seams.  I then spray it again over the caulk to seal the caulk from the sun's UV rays.  This should be a good tight seal to last well over half a century

.

.

90 Degree Inside Corners

Below is an example of our custom mitered 90 degree corners we fabricate.  We designed this process special to hide the fasteners for a cleaner look, yet strong as possible and not prone to leaks.  It begins with drawing out the corner cuts on the copper with a small square and a magic marker.  Then to cut away the excess metal.  Fold the flaps inward and run a bead of caulk to seal between the two layers of over-lapping metal when we fold the back side of the gutter to form the inside corner.

Here is how it is done:

I then drill 1/8" holes through the two layer overlaps for the rivets to hold them tightly together.  I use 4 rivets across the bottom, and another 6 rivets to hold and seal the outside face together.  The back side needs no sealing since it is the solidly connected part of the gutter.

I then tightly bend the cut flaps over the edge of the solid side of this outer face.
I then add more caulk to the inside of the gutter's seam and over the rivets.  I work the caulk into the seam and over the rivets with my finger.  I then use spray paint as a solvent to again smoothen out the caulk and work it over the inside of the seams.  It then spray it again over the caulk to seal the caulk from the sun's UV rays.  Again, this should be a good tight seal to last well over half a century with out trouble.  I wipe off any exterior caulk with lacquer thinner.  I go through a lot of the blue shop towels when processing these copper gutters.
Here is the two corner in opposite directions, making this ziz-zag to match the roof edge all as one continuous gutter, and the outlet with the elbow attached.  It is continuous as much as possible anyway.  Straight lengths of gutter can be seamless, but there is no way known to make a seamless corner, so how we caulk, seal, and fasten the gutters together make all the difference.  This processing of just a few gutters will take us a full day to do with all the care and effort we put into it.  Some think us costly, but clearly you can see we are quite the bargain for what we invest into our fabrications.
Here is another good look at an inside 90 degree corner fabrication just before the spray paint sealing.

.

.

.

On to page #5
"More Copper Gutter Fabrication"
Just click on the copper gutter below


Back to the Kistler Gutters Job Page #1 "Before & After Pics"

.

.

.

.

Below is a photo of our
Better Business Bureau's
NW Business Integrity Award
for the year 1998

1999 Better Business Award

We were also a 1997 finalist for this same award. See our referral web page to see how we managed to be honored with this special award


Back to homepage
Homepage

Site Map


Company
Profile
Aluminum
Gutters
Copper
Gutters
Custom
Work
Award &
Referrals
Personal
Ethics

Our Contact
Information
.

.

.

.

.

.

.

.

.

.

.

 copper-by-design.com