|

|
K-5
Gutter Machine
Photo & Description
Pages -
part 2 Updated 3-6-2004
|

|
The pictures below are linked to larger
pictures of the same photo
For a closer look just click on the pictures
|
As
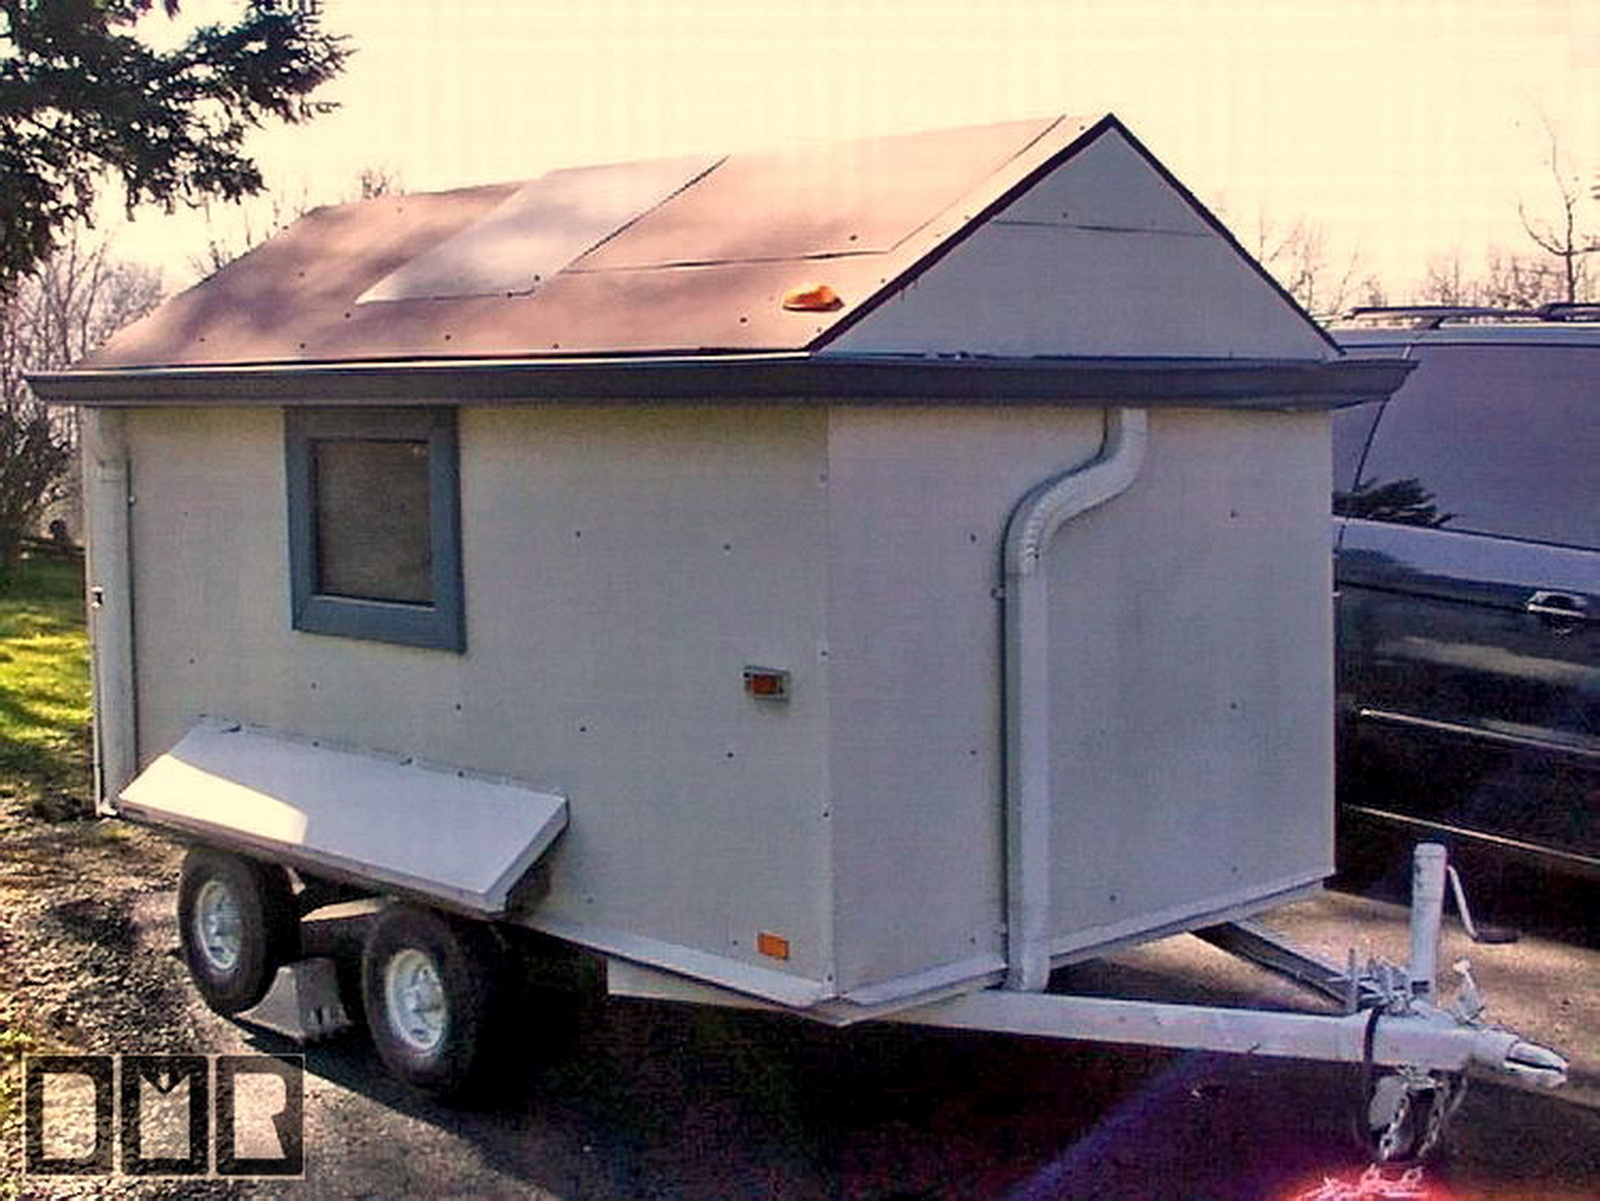
shown before, this was the first trailer we had for our gutter machine.
It was only a small 5' x 10' trailer. We wanted to keep it as light
as possible, since it was to be pulled by an Acura 4 door sedan with only
a 2700cc V6 engine. With all the tools and ladders, it is some times
all it can do to get up a steep hill.
This is in February of 2001,
just shortly before we dismantled it to move the gutter machine off, and
in to the new trailer. It originally came with a single axel with
larger tires from a used mobile home axel set, cut down to be narrower.
That type of axel was cheap, but the rim was near impossible to balance
and was giving me a bit of a vibration. So I had changed it over to
these two smaller axels. It worked OK, but it was pretty cramped to
move around the machine inside the trailer. also, if I needed to
store a box of new downspouts, the inside was just a few inches too short.
|
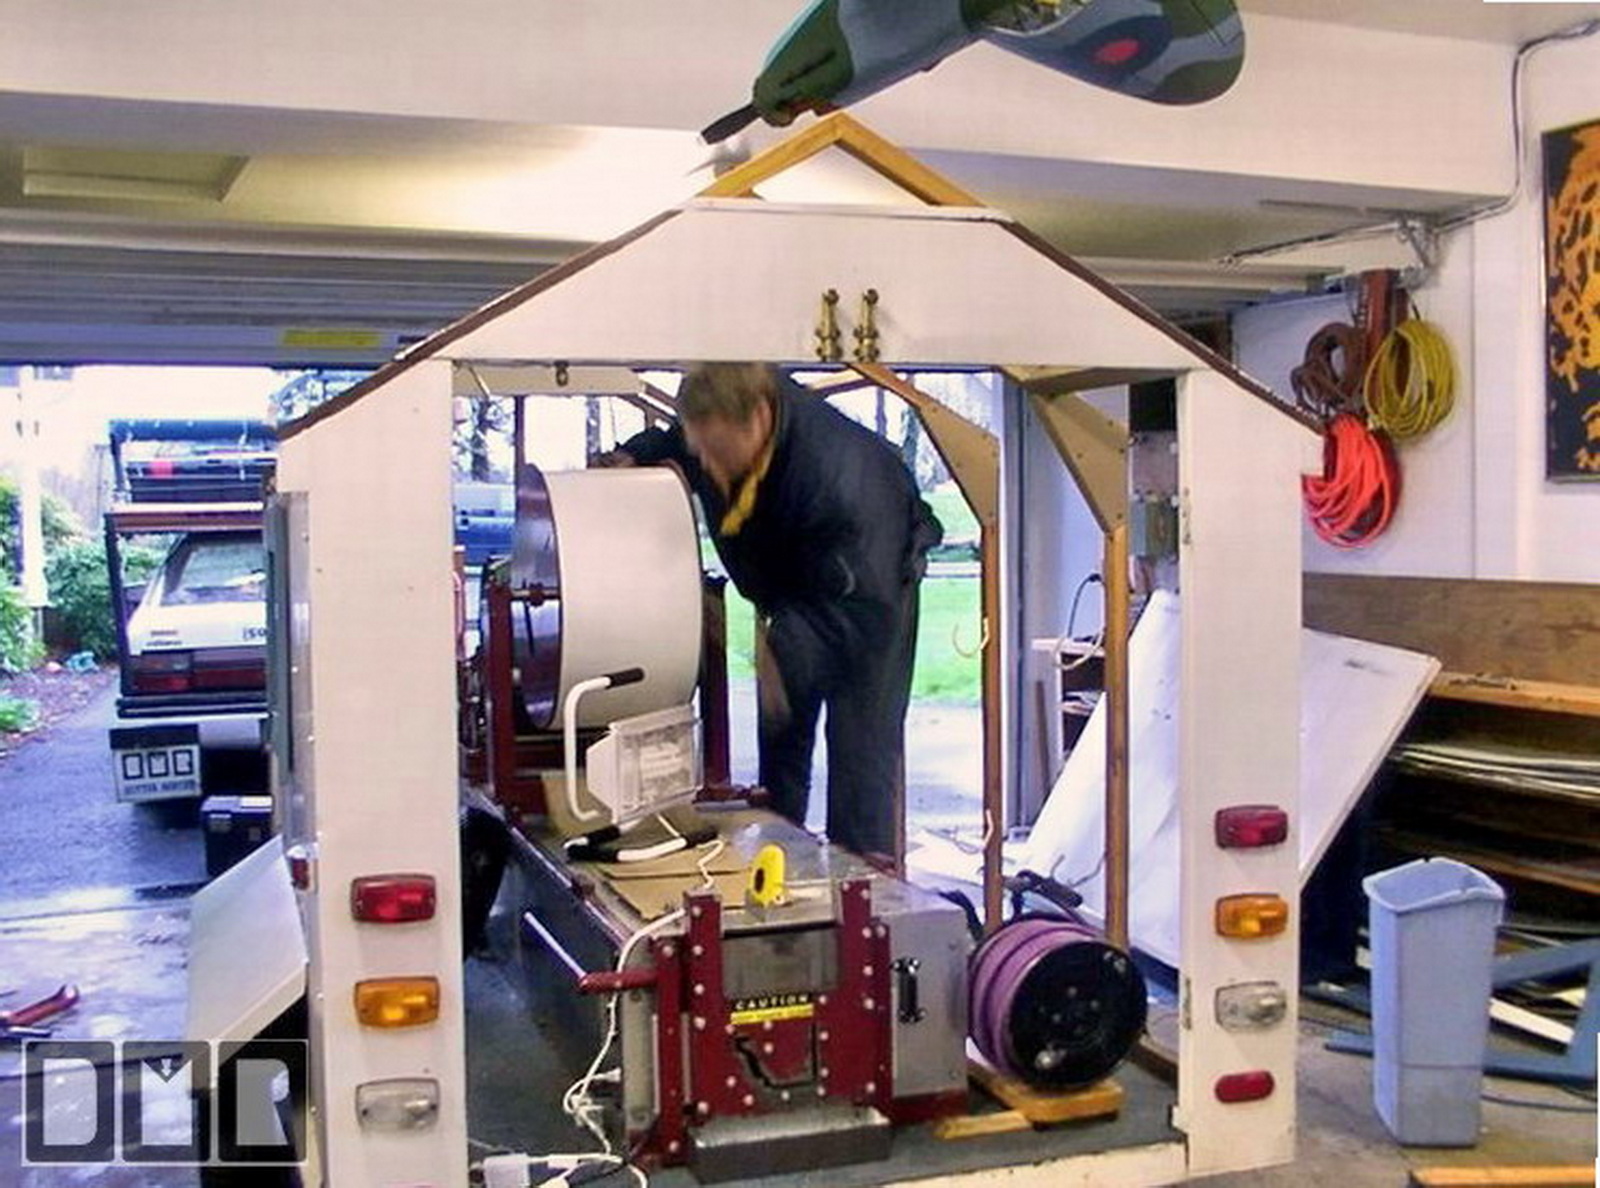
 You
can sort of see how tight a fit it was for me to move around the machine
in this picture. This shows the 2x2 wood ribs of the old trailer. I
had looked into
building this frame with extruded aluminum tubing and rivets, but they wanted a small
fortune for that tubing, so I decided to get some high grade CVG 2x2 fir
boards to build the
frame of the shell. I was glad I did. It was very workable, and was
plenty sturdy. I used some aluminum sheet metal to make some covers
over the cross bracing to help improve the sturdiness. You
can sort of see how tight a fit it was for me to move around the machine
in this picture. This shows the 2x2 wood ribs of the old trailer. I
had looked into
building this frame with extruded aluminum tubing and rivets, but they wanted a small
fortune for that tubing, so I decided to get some high grade CVG 2x2 fir
boards to build the
frame of the shell. I was glad I did. It was very workable, and was
plenty sturdy. I used some aluminum sheet metal to make some covers
over the cross bracing to help improve the sturdiness. |
| I do think the weight loss would have been
worth the cost of the aluminum tubing, but I learned from my smaller 4'x
8' trailer that mounting the aluminum sheet metal skin on those aluminum
'I' beams with 3/16" rivets, the vibration and bouncing of the road
works the rivets loose and it would leave gray streaks of ground up
aluminum running down the sides of the white painted aluminum
skin. Using the screws with the
steel and rubber washers to hold the skin onto the wood frame was much
more stable and did not seem to need adjustments over the 6 years I had
the first gutter machine trailer in service. It is advisable to
always pre-drill the wood before driving the screws in, or you risk
splitting and cracking the wood, which means having to start over and
replace that board.
I later rebuilt this small trailer as
well. I first used Liquid Nails adhesive on the 'I' beam surface and
then mounted the aluminum skin on them and used twice as many of the
3'16" rivets. So far so good, but this does not permit any
future changes if I want to reuse any of the frame or skin parts.
In hopes to make a trailer as light
as possible, I actually set up this small 4'x 8' trailer to be used for
the gutter machine. But once I found out that the gutter machine
weighs a ton, without a 400lb coil of gutter sheet metal, I realized that
this would not have worked. Beside the fact that there was no way to
get the 400lb coil onto the machine with the fork lift. So I just
use this trailer for light hauling |
 Here
I have begun to dismantle the old trailer in my work shop we had in
Clackamas (we are now in
Lake Oswego, Oregon, just South of Portland). Here
I have begun to dismantle the old trailer in my work shop we had in
Clackamas (we are now in
Lake Oswego, Oregon, just South of Portland).
I had the back doors off, along with the front, left
side, as well as the roof panels. Again, you can see here how
cramped it was inside.
|
 Here
it is with most all the aluminum skin removed. You can better see
the 2x2 wood frame. The aluminum skin does a lot to add structural support
to this shell, once it is screwed onto this frame. Here
it is with most all the aluminum skin removed. You can better see
the 2x2 wood frame. The aluminum skin does a lot to add structural support
to this shell, once it is screwed onto this frame.
I had mounted an outdoor carpet under
the wood frame base, over the birch plywood deck. But that did not
permit me to replace the carpet when it wore out and began to look
ragged. It was also more difficult to inspect if the deck had
any water damage. |
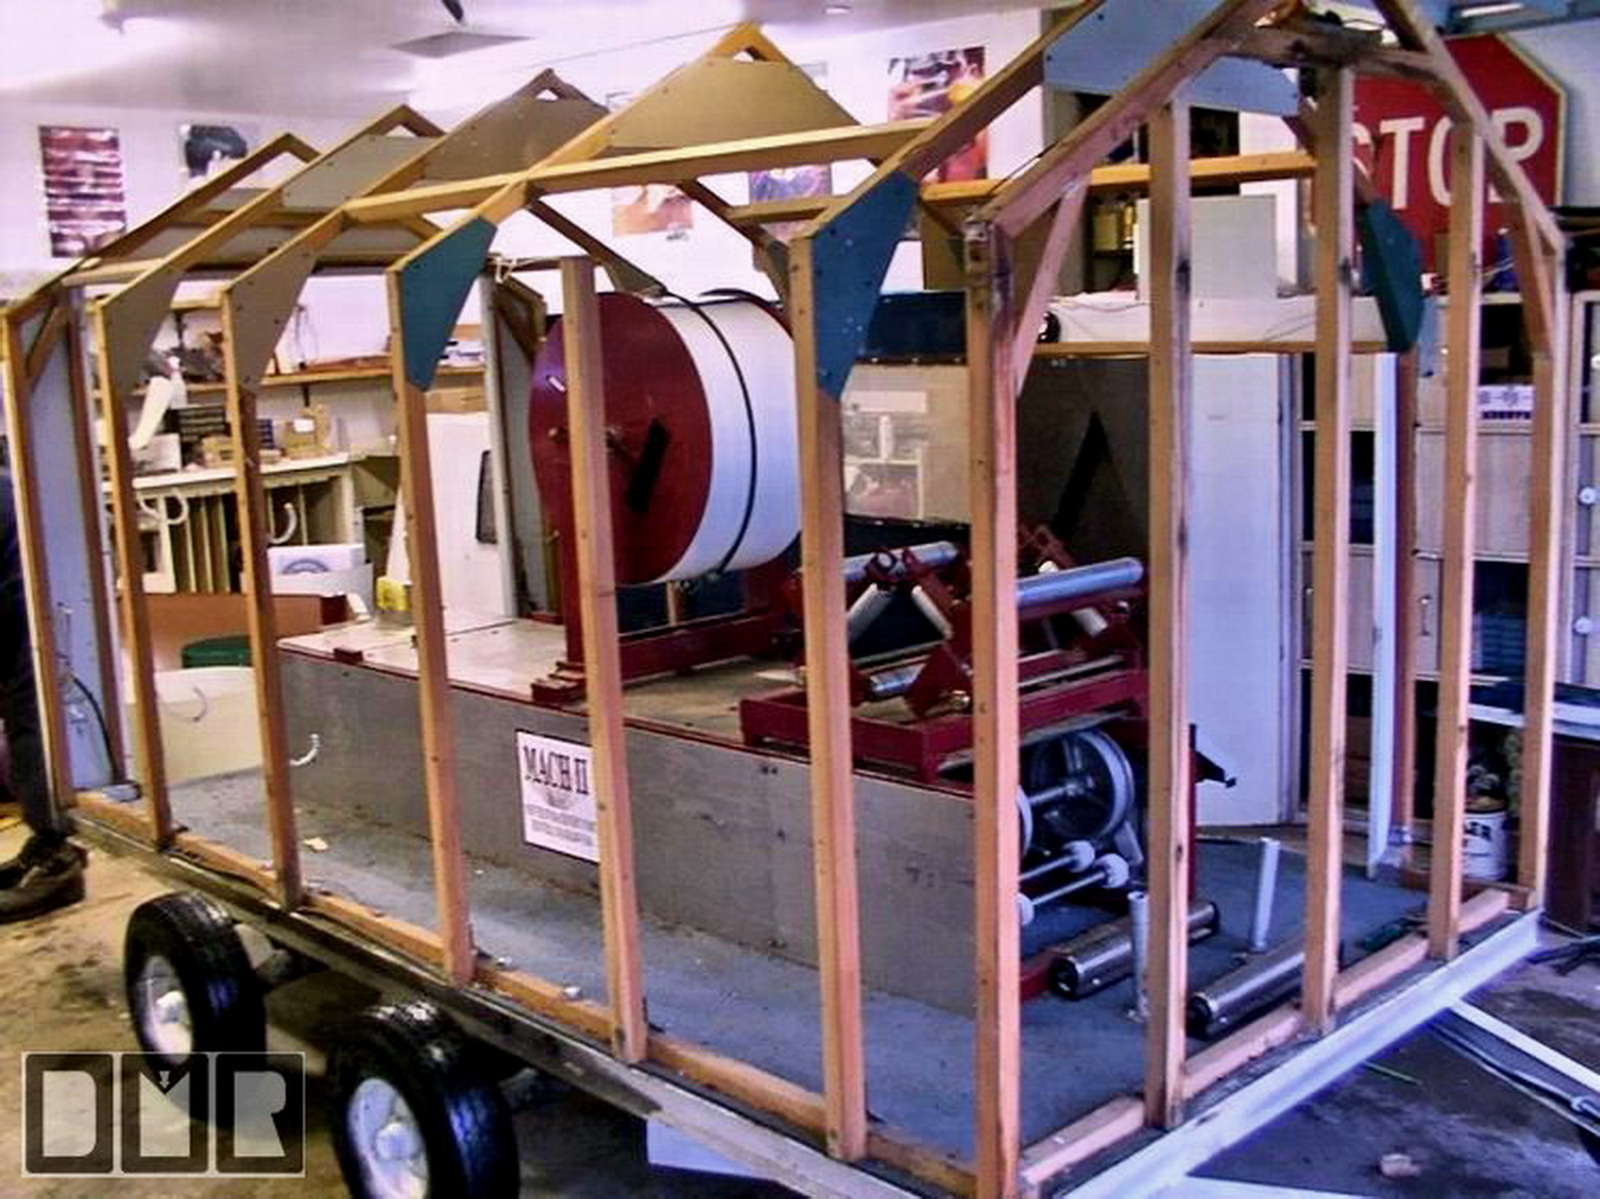
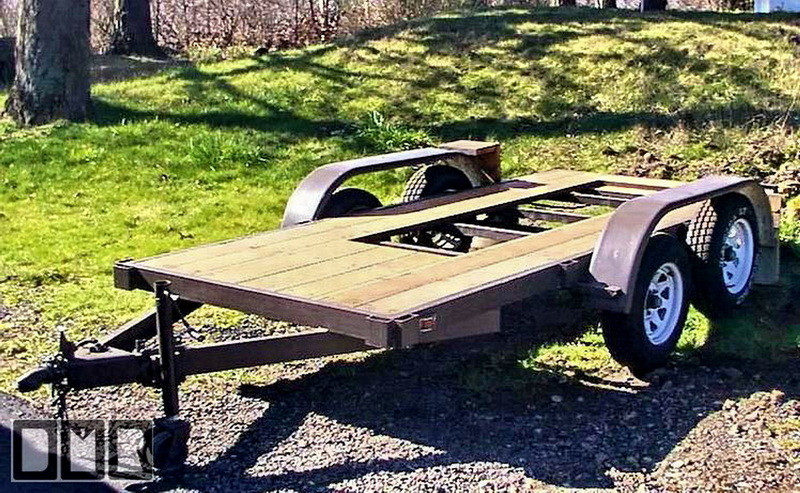
I had bought
this slightly larger 5'x 12' double axel trailer several years before
this, to haul roofing debris. I also bought some high quality CVG
fir to deck it with and made the removable side walls.
That wood cost me $1200, nearly the same cost as the trailer frame it's
self.
 I learned that I could have decked it for half the cost with
the same type of wood by using 2x4s instead of the 2x8s I got for the
floor. Live and learn? I learned that I could have decked it for half the cost with
the same type of wood by using 2x4s instead of the 2x8s I got for the
floor. Live and learn?
After
a few years I gave up roofing work all together, since it was a great deal
of dangerous work, and there was not enough money in it, due to the fierce
competition.
Before I got ready to do the transfer
of the gutter machine, I had to spend a good deal of
time flipping over, sanding, and resurfacing the floor boards. I
re-bolted them to the steel frame with Stainless steel carriage bolts this time.
To minimize the weight, I realized I did not need to deck it under the
gutter machine. This would also leave it a little lower to the
ground, lowering the center of gravity. I simply slipped a sheet of
aluminum to shield it from the road grime. This will also allow
access to do some work on the machine rollers from underneath.
|
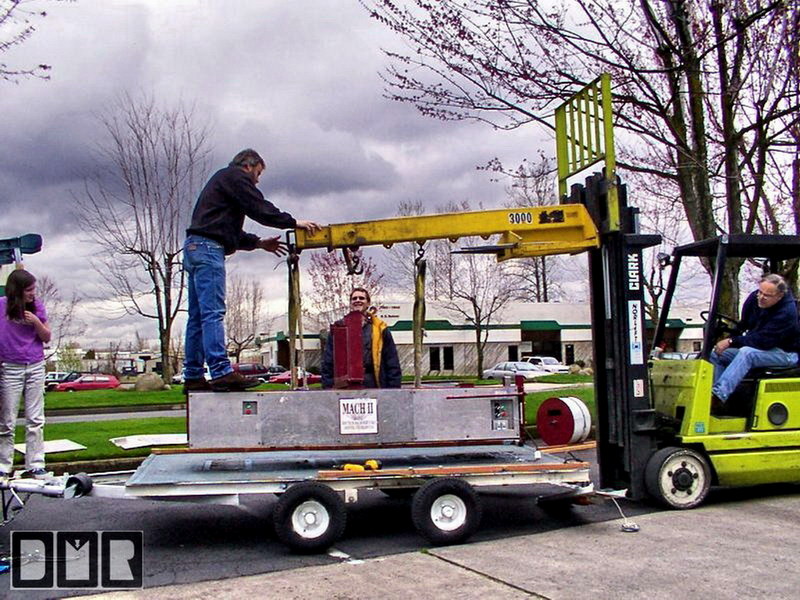
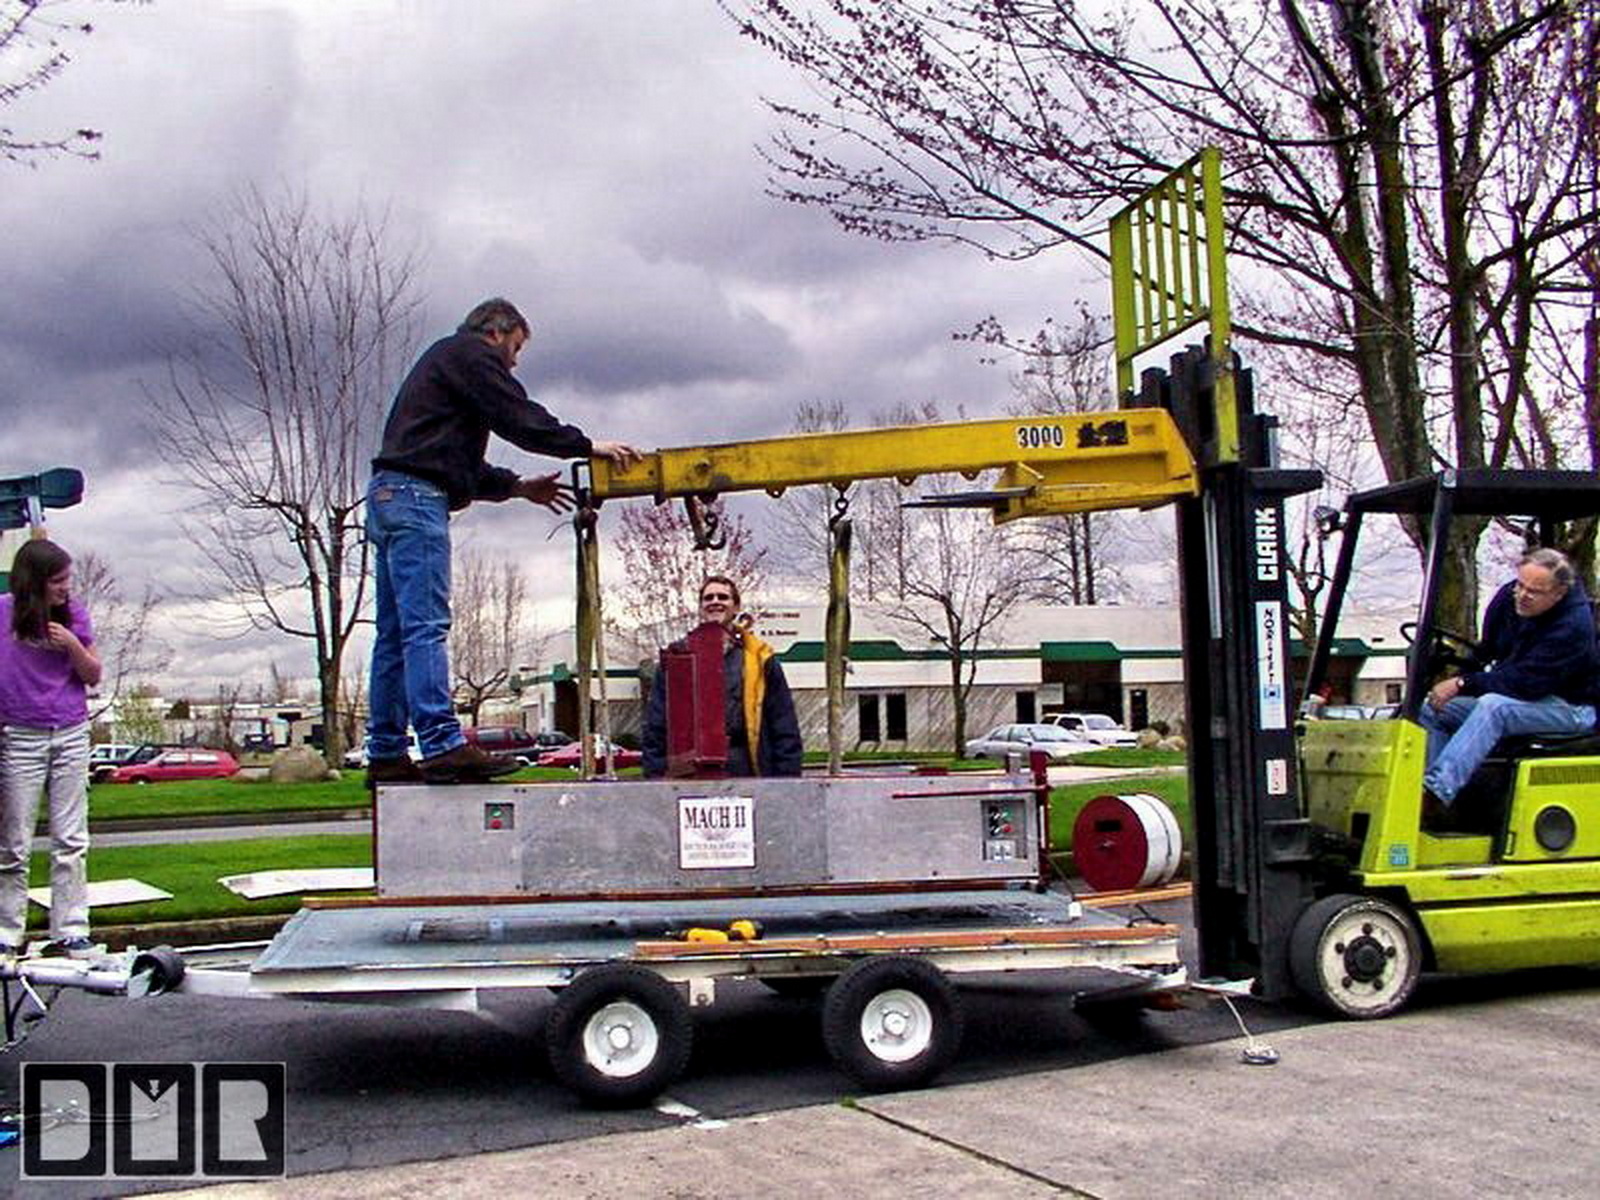
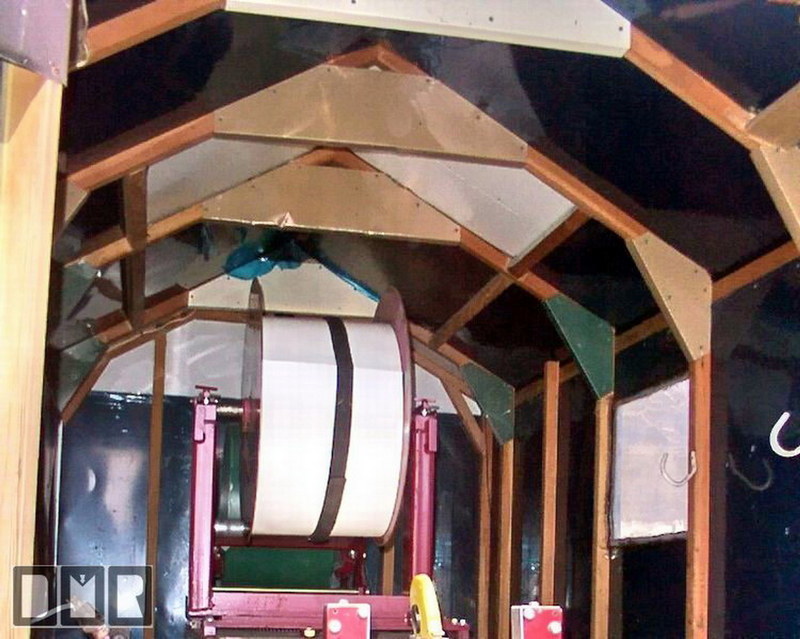
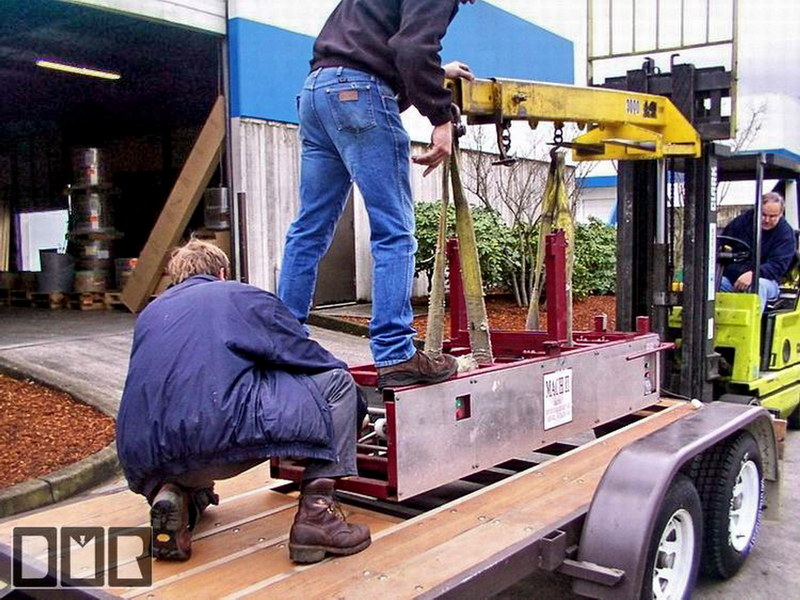
Here we are
lifting the gutter machine off the old stripped down trailer, after they
removed the gutter coil you see in the back ground.
I also had to remove the aluminum covers on top to place the nylon
straps they used to lift the gutter machine with.
|
|
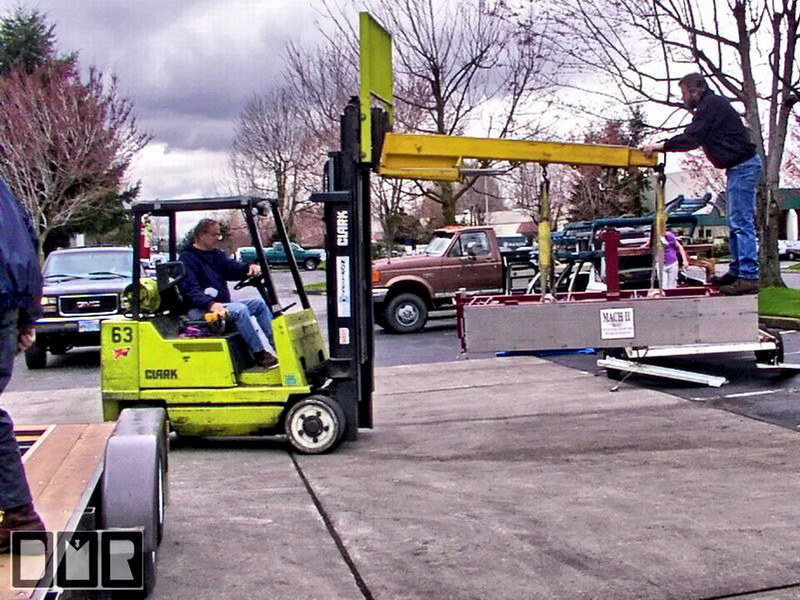
 So,
in the first part of
2001, I finally drummed
up the energy and time off my work schedule to do the conversion to house our gutter machine
on this larger trailer. So,
in the first part of
2001, I finally drummed
up the energy and time off my work schedule to do the conversion to house our gutter machine
on this larger trailer.
Here
it is getting the gutter machine loaded onto it with a fork lift at Custom-bilt
Metals, where I had bought the gutter machine. They
were very kind to do the transfer at no charge.
|
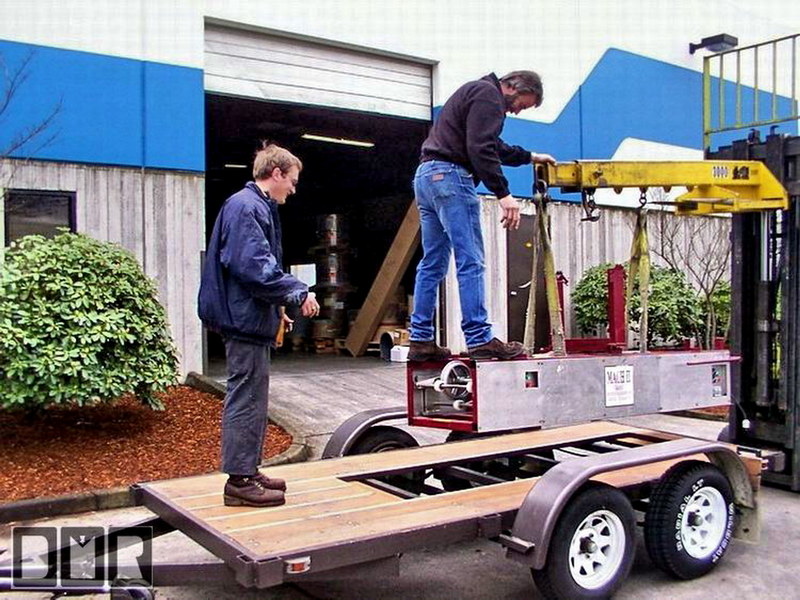
 Here
the gutter machine is just about in place. In this picture, you can
better see the 2x2s I used to close the gaps I had between the original
2x8s deck placement. No more need for rail drainage, once I have the
new shell for this trailer fabricated. Here
the gutter machine is just about in place. In this picture, you can
better see the 2x2s I used to close the gaps I had between the original
2x8s deck placement. No more need for rail drainage, once I have the
new shell for this trailer fabricated. |
 Luckily
my measurements were good, and it was a nice tight fit. It is now
ready to bolt it down to the steel frame. I brought some tools and
the bolts with me, so I could secure it before getting back on the road
with this trailer and gutter machine, so I can work on the rest at our
place. Luckily
my measurements were good, and it was a nice tight fit. It is now
ready to bolt it down to the steel frame. I brought some tools and
the bolts with me, so I could secure it before getting back on the road
with this trailer and gutter machine, so I can work on the rest at our
place. |
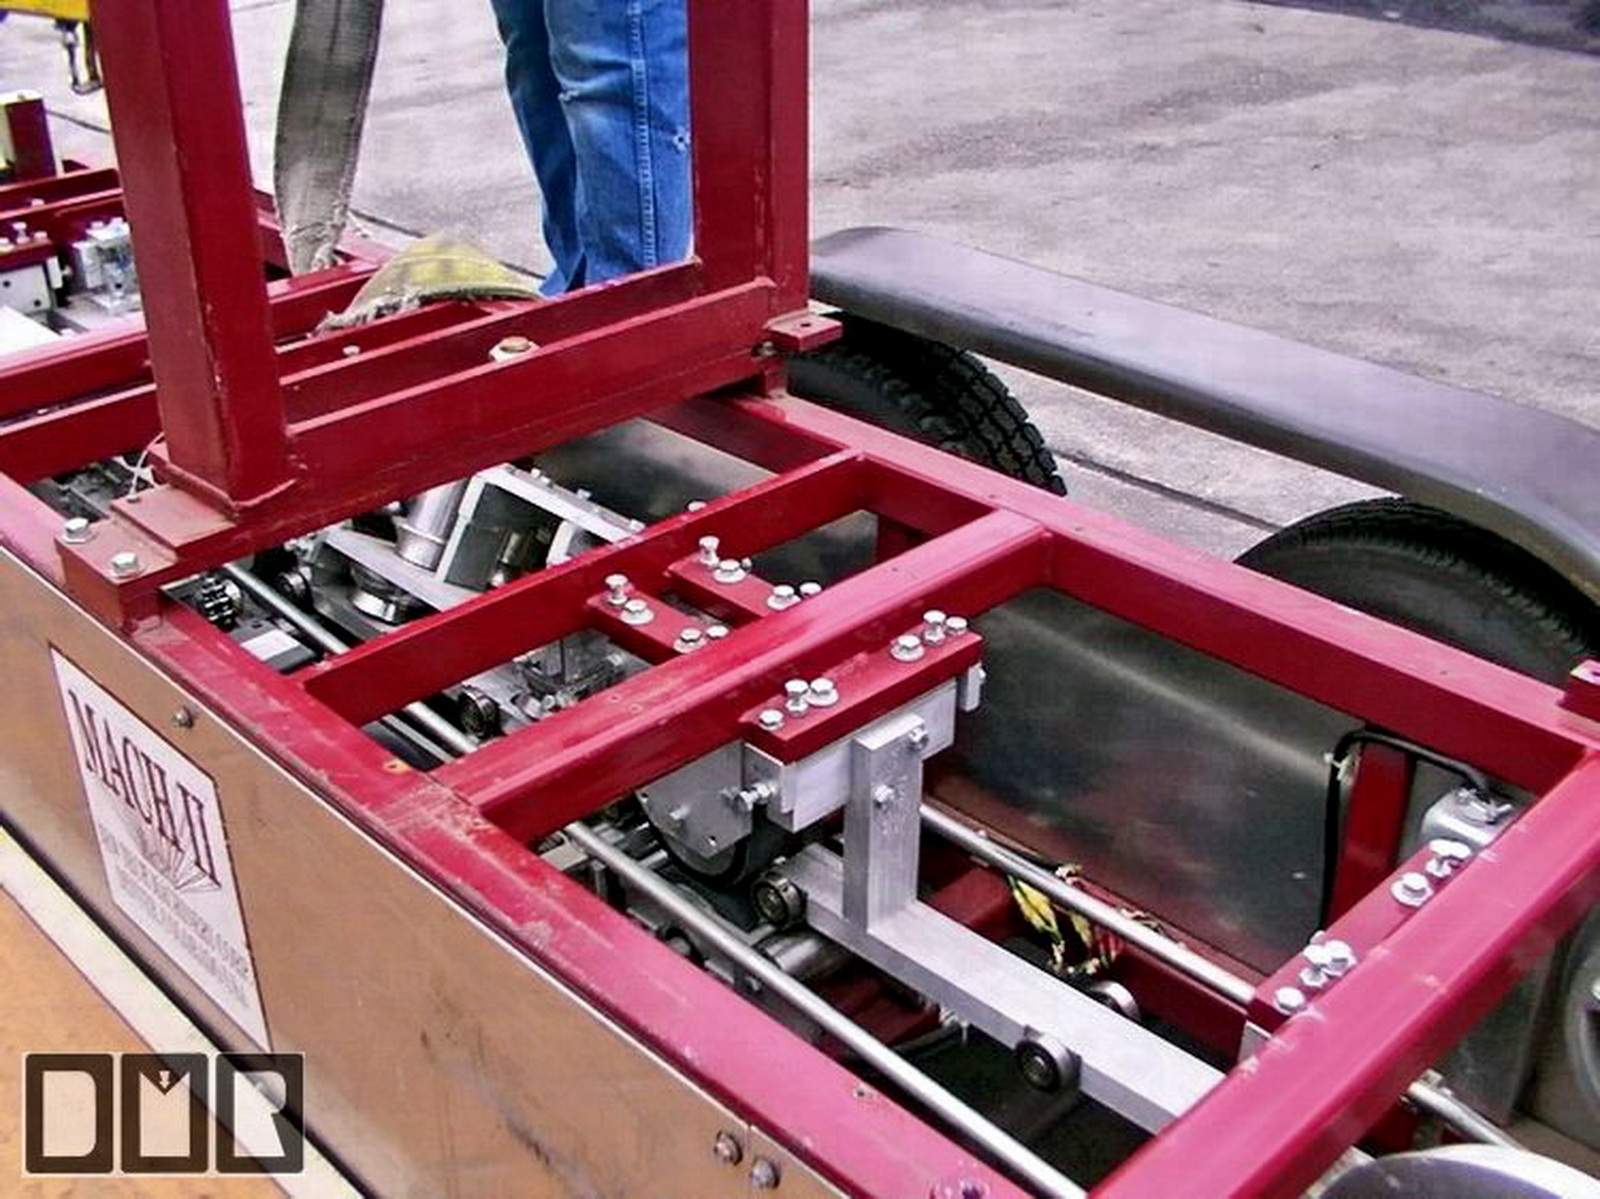
 This
is an over head shot, showing some of the inner workings, guides, and rollers.
It has hundreds of precisely aligned rollers on bearings to carefully form
the gutter shape from the 12" coil of sheet metal, as it passes
through this 8' long gutter roll-forming machine. It has to
carefully do this without scratching or cracking the paint. This
is an over head shot, showing some of the inner workings, guides, and rollers.
It has hundreds of precisely aligned rollers on bearings to carefully form
the gutter shape from the 12" coil of sheet metal, as it passes
through this 8' long gutter roll-forming machine. It has to
carefully do this without scratching or cracking the paint. |
.
.
.
.
|
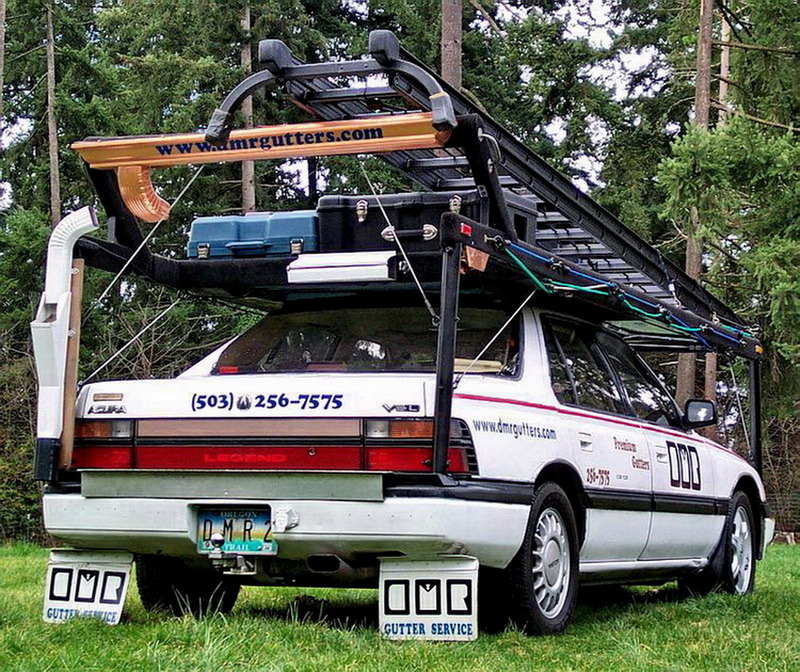
Drive this car to
see the history of our gutter truck and other trailers
|
.
Other
Helpful Roofing Information
For some valuable
advice with regards to roofing and rain management issues check out our:
(a)
Gutter Installation
(b)
Gutter Debris Protection
Options
(c)
Roofing
Quality Standards
(d)
Chimney Flashing
(e)
Moss Control & Treatment
web
pages for answers and solutions that could save you thousands of $ and a
great deal of anguish.
If you do find this information very
helpful, feel free to send us a $ tip for the assistance we so freely
have published on the web here for your benefit, like you might tip a
waitress. Heck, send us a gift certificate for a candle lit dinner
for two. <LOL> |
.
.
.
.
.
.
.
.
.
.
dmr-gutters.com